
vue
1. 创建Vue 3项目
1.1 使用 create-vue 初始化项目
1.1.1 全局安装命令 npm init vue@latest
安装Node.js
确保你已经安装了 Node.js,建议安装最新的LTS版本(长期支持版)。安装Node.js后,会自动包含npm(Node Package Manager),这是我们后续安装Vue的工具。安装Vue CLI
在Vue 3中,我们使用create-vue脚手架工具快速创建项目,不再使用旧版的vue-cli。在命令行(终端)中执行以下命令:npm init vue@latest解释:
npm init vue@latest是初始化Vue项目的命令,使用@latest保证安装最新版本的create-vue。这会启动Vue 3项目的创建向导。进入项目向导
执行命令后,终端会显示创建项目的几个选择项,我们可以根据项目需求进行配置。
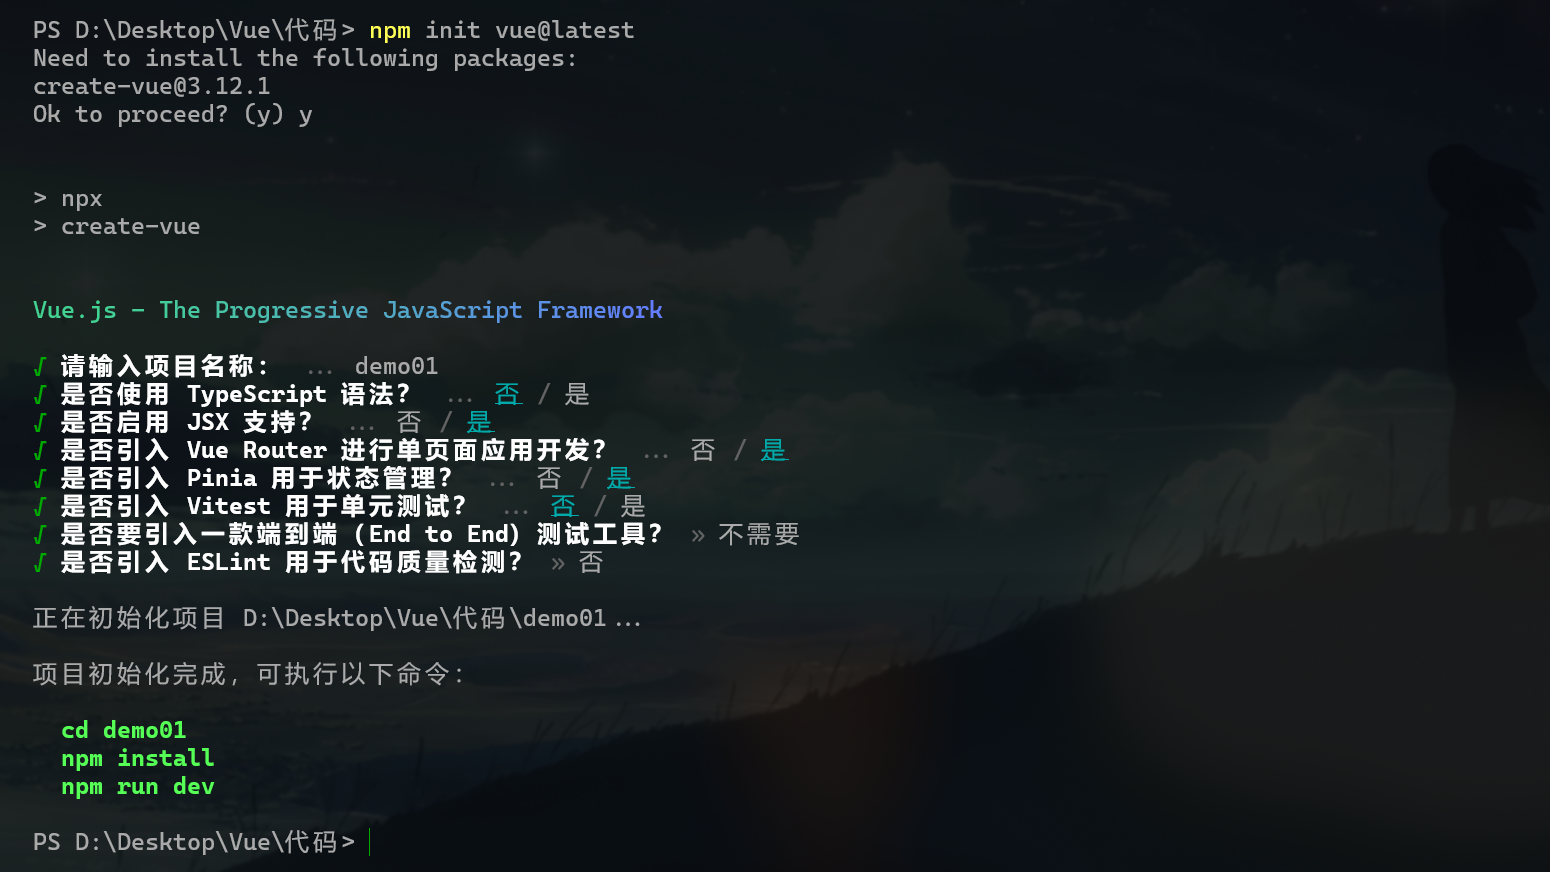
1.1.2 选择项目配置(TypeScript、Pinia、Router等)
在运行 npm init vue@latest 后,终端会依次弹出几个配置选项,解释如下:
Project name (项目名称)
你需要输入项目的名称(例如:my-vue-app)。Vue会自动为你创建一个文件夹用于保存项目代码。如果直接按Enter,默认名称是vue-project。Add TypeScript?
选择是否添加 TypeScript 支持。- Yes: 如果你计划使用 TypeScript 编写Vue项目代码,选择
Yes。 - No: 如果你希望使用纯JavaScript,选择
No。
- Yes: 如果你计划使用 TypeScript 编写Vue项目代码,选择
Add JSX Support?
选择是否支持 JSX 语法。JSX通常用于React框架中,但Vue 3也可以支持。- Yes: 如果你的项目需要使用JSX语法,选择
Yes。 - No: 如果不需要JSX支持,选择
No。
- Yes: 如果你的项目需要使用JSX语法,选择
Add Vue Router for Single Page Application development?
选择是否添加 Vue Router。Vue Router用于实现SPA(单页面应用)的路由管理。- Yes: 如果你计划在项目中使用路由(即需要多个页面),选择
Yes。 - No: 如果你的项目只需要一个页面,可以选择
No。
- Yes: 如果你计划在项目中使用路由(即需要多个页面),选择
Add Pinia for state management?
Pinia是Vue 3推荐的状态管理库,比Vuex更轻量,适合较大型项目。- Yes: 如果你的项目需要全局状态管理,选择
Yes。 - No: 如果不需要全局状态管理,选择
No。
- Yes: 如果你的项目需要全局状态管理,选择
Add Vitest for Unit Testing?
Vitest 是 Vue 3 中推荐的测试框架,用于进行单元测试。- Yes: 如果你的项目有单元测试需求,选择
Yes。 - No: 如果不需要单元测试,选择
No。
- Yes: 如果你的项目有单元测试需求,选择
Add Cypress for both Unit and End-to-End testing?
Cypress 是一种现代化的端到端测试工具,适合做自动化测试。- Yes: 如果需要自动化端到端测试,选择
Yes。 - No: 如果不需要,可以选择
No。
- Yes: 如果需要自动化端到端测试,选择
Add ESLint for code quality?
ESLint 用于代码质量检查,确保项目代码风格一致。- Yes: 如果希望在项目中启用代码检查工具,选择
Yes。 - No: 如果不需要代码检查工具,选择
No。
- Yes: 如果希望在项目中启用代码检查工具,选择
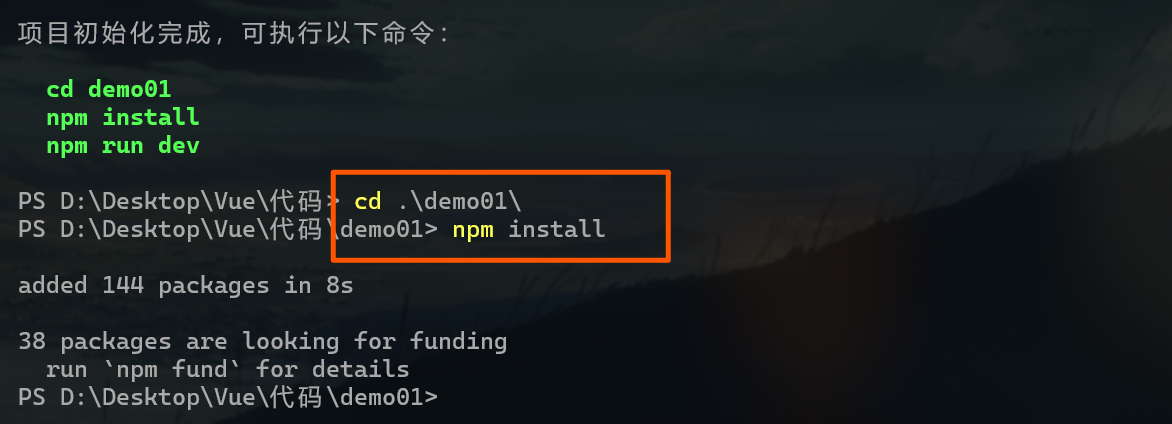
完成这些选择后,项目初始化工具会根据你的选择为你创建一个Vue 3项目模板,并安装对应的依赖包。
接下来我用vscode打开项目
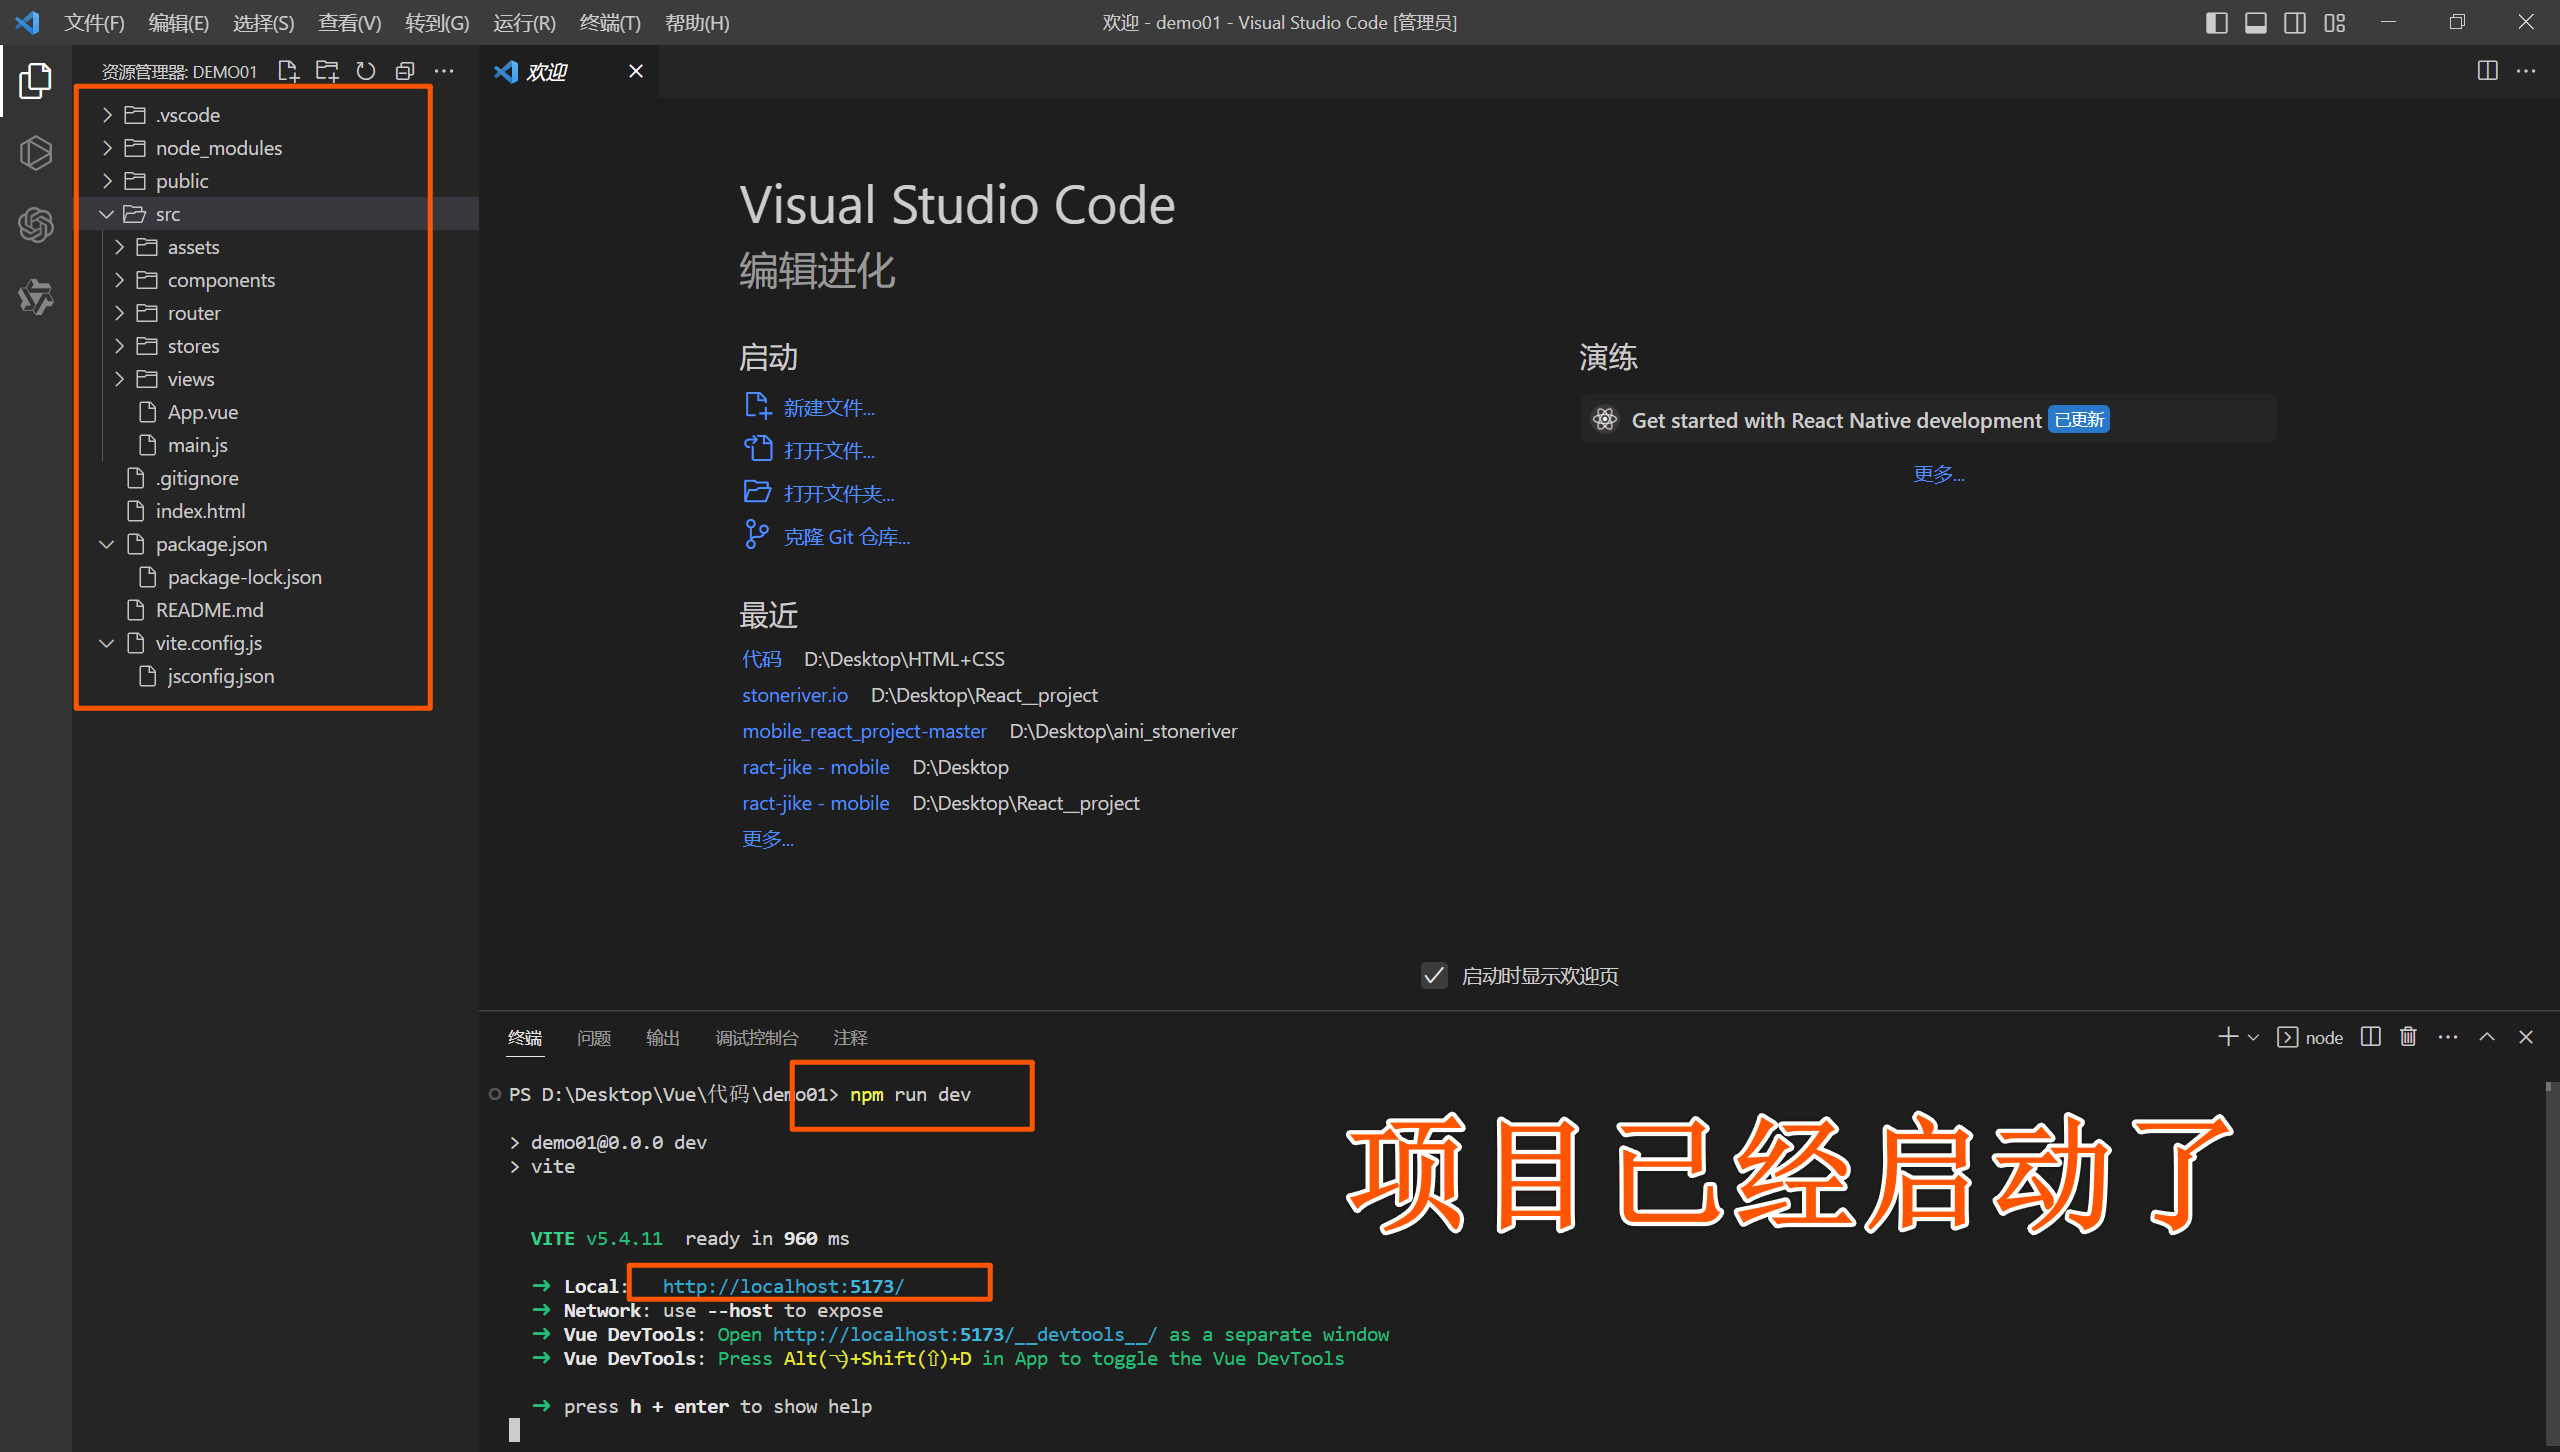
1.1.3 项目结构解读
项目创建完成后,可以使用以下命令进入项目文件夹,并启动开发服务器。
cd my-vue-app
npm install   # 安装依赖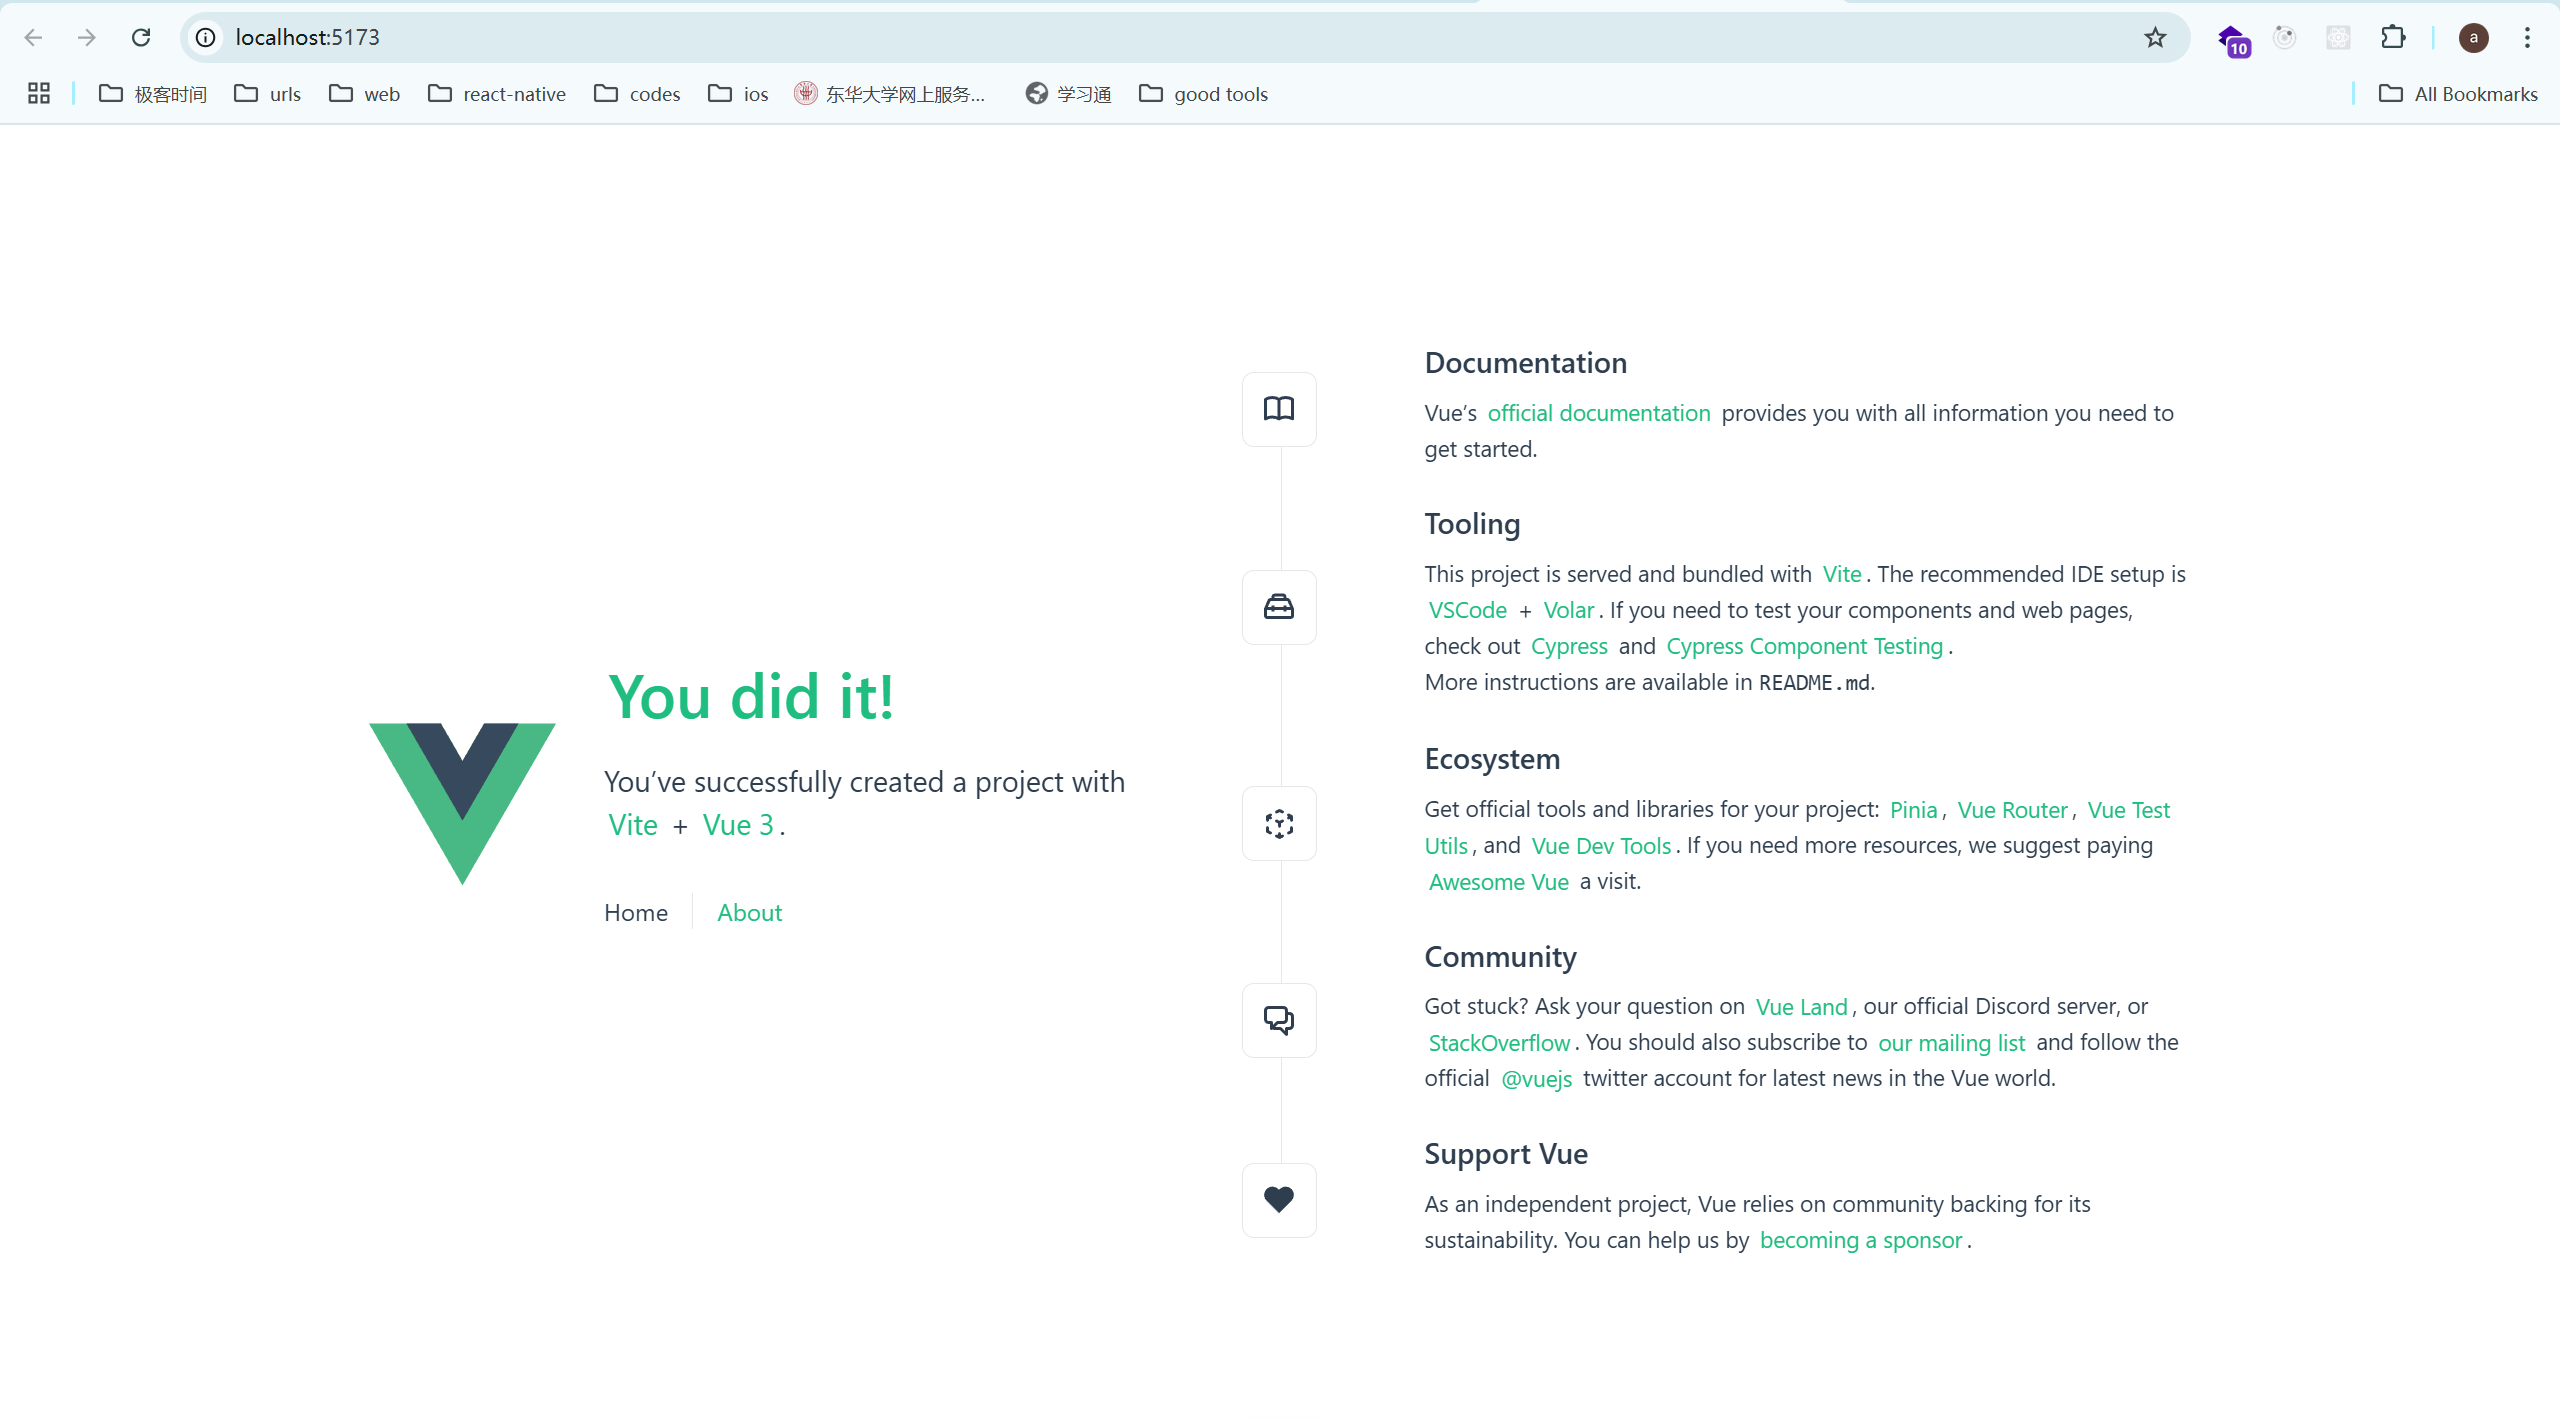
npm run dev # 启动开发服务器项目成功启动后,默认会在http://localhost:3000打开Vue项目。
接下来是项目的目录结构:
my-vue-app
├── public               # 公共资源文件夹
│   ├── favicon.ico      # 网站图标
│   └── index.html       # HTML 入口文件
├── src                  # 源代码文件夹
│   ├── assets           # 静态资源(图片、样式等)
│   ├── components       # Vue组件文件夹
│   ├── App.vue          # 根组件
│   ├── main.js          # 应用入口文件
│   ├── router           # 路由文件夹(若启用 Vue Router)
│   ├── store            # 状态管理文件夹(若启用 Pinia)
│   └── views            # 页面视图组件(若启用 Vue Router)
├── .gitignore           # Git忽略文件
├── package.json         # 项目配置信息及依赖列表
├── README.md            # 项目文档
└── vite.config.js       # Vite 配置文件
详细说明:
- public 文件夹:用于存放静态文件(如
favicon.ico)。index.html是项目的入口HTML文件,Vite会将项目挂载在这个文件中。 - src 文件夹:存放项目的源代码。包括各类组件、页面、路由配置等内容。
- assets:用于存放项目中的静态资源,如图片和样式文件。
- components:用于存放可复用的Vue组件。
- App.vue:根组件,所有组件都会挂载到此组件中。
- main.js:项目入口文件,在此初始化Vue实例、加载根组件、配置全局插件等。
- router:如果启用了Vue Router,路由文件会存放在此文件夹中。
- store:如果启用了Pinia或Vuex状态管理,状态管理代码会存放在此文件夹。
- views:如果启用了Vue Router,views文件夹用于存放路由对应的页面组件。
- package.json:包含项目的配置信息,如项目名称、版本、依赖项等。
- vite.config.js:Vite的配置文件,用于配置开发服务器、别名、插件等。
1.2 使用Vite创建Vue 3项目
Vite 是一个由 Vue 的作者尤雨溪开发的现代构建工具。相比于传统的Webpack等工具,Vite具有显著的性能优势,尤其是在开发时的热重载和构建速度方面。
1.2.1 Vite的优势与快速启动
Vite的主要优势
- 快速冷启动:Vite基于ES模块,避免了传统构建工具的预编译和打包步骤,在开发环境下启动速度极快。
- 即时热更新(HMR):Vite采用模块热更新(HMR),在修改代码后立即在浏览器中更新内容,极大提高开发效率。
- 优化的生产构建:在生产环境下,Vite使用Rollup进行打包,生成高度优化的代码包。
- 现代的浏览器支持:Vite默认支持现代浏览器,无需进行复杂的Polyfill设置。
- 内置支持Vue 3:Vite原生支持Vue 3,无需额外配置,即可使用Vue 3的所有特性。
快速启动Vite项目
使用以下命令初始化一个Vue 3项目(需要Vite版本在2.0及以上):
npm init vite@latest my-vue-app在命令执行过程中,Vite会询问项目的模板类型。选择
vue或vue-ts(如果希望使用TypeScript)。进入项目文件夹并安装依赖:
cd my-vue-app
npm install
启动开发服务器:
npm run dev启动后,Vite会默认在
http://localhost:3000上运行项目,浏览器会自动打开该地址。你可以编辑代码并实时在浏览器中看到修改的效果。
1.2.2 Vite配置文件 vite.config.js 分析
项目创建后,vite.config.js 是Vite的配置文件,存储在项目的根目录中。该文件用于配置开发和构建的相关选项。以下是vite.config.js中的主要配置项:
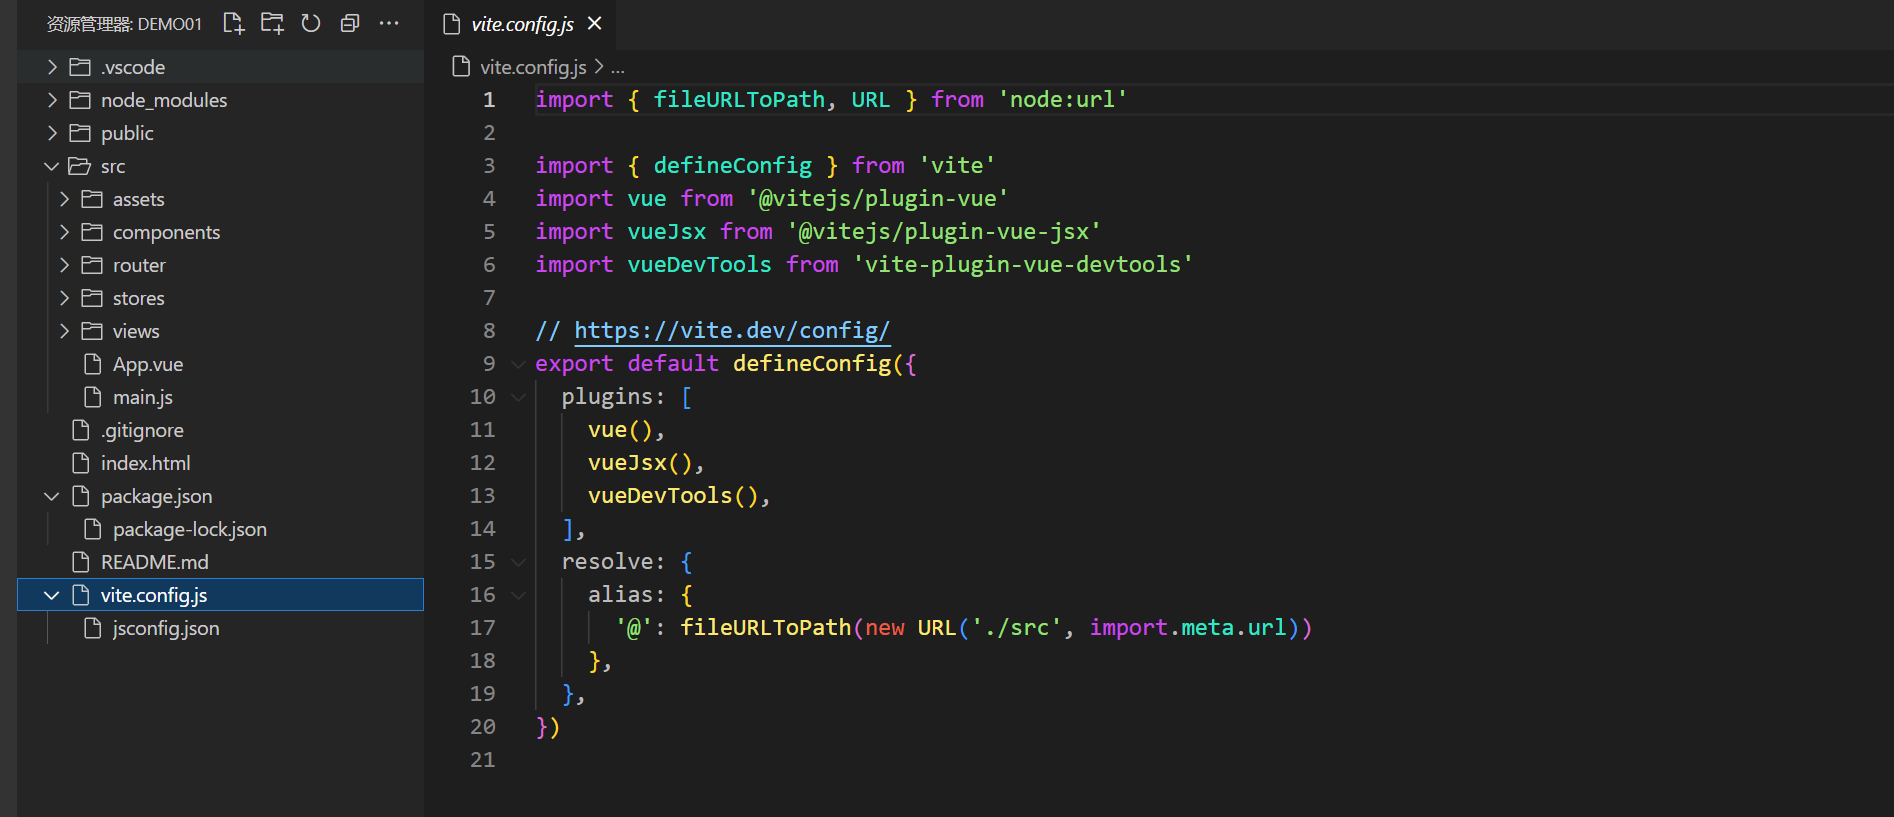
基本配置
import { defineConfig } from 'vite' import vue from '@vitejs/plugin-vue' export default defineConfig({ plugins: [vue()], })- defineConfig:
defineConfig是Vite提供的一个方法,用于帮助获得类型提示和语法支持。 - plugins:Vite的插件系统。在这里通过
@vitejs/plugin-vue插件添加对Vue文件的支持。
- defineConfig:
Server选项
export default defineConfig({ server: { port: 3000, open: true, // 启动时自动在浏览器中打开 proxy: { '/api': { target: 'http://localhost:4000', changeOrigin: true, rewrite: path => path.replace(/^\/api/, '') } } } })- port:设置开发服务器的端口(默认是3000)。
- open:设置为
true时,开发服务器启动后自动在默认浏览器中打开项目。 - proxy:用于配置代理。当后端API和前端服务器不在同一域名时,可以通过代理解决跨域问题。以上示例将所有以
/api开头的请求代理到http://localhost:4000,并去掉/api前缀。
Build选项
export default defineConfig({ build: { outDir: 'dist', // 输出目录 rollupOptions: { input: './index.html', output: { manualChunks: { vendor: ['vue'] } } } } })- outDir:指定生产环境构建的输出目录,默认是
dist。 - rollupOptions:Vite的生产环境构建基于Rollup,因此可以通过
rollupOptions进行自定义配置。以上示例将Vue库打包成vendor块,以优化加载性能。
- outDir:指定生产环境构建的输出目录,默认是
别名配置
import path from 'path' export default defineConfig({ resolve: { alias: { '@': path.resolve(__dirname, 'src') } } })- alias:用于配置路径别名。例如,将
@映射到src文件夹,便于在项目中简化引用路径,如@/components/MyComponent.vue。
- alias:用于配置路径别名。例如,将
1.2.3 热重载和模块化支持
热重载(Hot Module Replacement, HMR)
- Vite在开发环境下使用HMR,确保在文件发生变化时,可以局部更新页面而不刷新整个页面。
- HMR在以下场景非常有用:
- 修改样式文件(CSS、SCSS等):样式更新会立即生效。
- 修改Vue组件:组件状态和数据不会丢失。
- 模板、脚本的变化实时同步到浏览器。
- HMR的实现原理是基于ES模块,通过监听模块变化并仅更新受影响的模块,减少了全局页面的刷新,提高开发效率。
模块化支持
- Vite天然支持ES模块(ESM),与传统的CommonJS相比,ESM具有更好的性能和模块化支持。所有在Vite中的模块都是以ESM格式加载的。
- 动态导入:Vite支持ESM的动态导入,例如在Vue Router中按需加载组件:
import { createRouter, createWebHistory } from 'vue-router' const routes = [ { path: '/', component: () => import('@/views/Home.vue') // 动态导入Home组件 } ] const router = createRouter({ history: createWebHistory(), routes }) export default router - 代码分割:Vite结合Rollup支持代码分割和按需加载,通过动态导入的方式可以将不同页面的代码分割,提升应用的加载速度。
Vite与Vue的模块化开发
- 在Vite中,Vue组件可以天然支持模块化开发。可以将业务逻辑分散到不同的Vue组件中,然后通过ESM导入。Vite会自动处理这些模块,确保开发效率。
- 按需加载插件:在Vue 3项目中,可以通过插件按需加载UI库(如Element Plus),减少初始加载体积。例如:
import ElementPlus from 'element-plus'
import 'element-plus/theme-chalk/index.css'

export default defineConfig({
  plugins: [vue(), ElementPlus()]
})
2. Vue 3 基础语法
2.1 Composition API 基础
2.1.1 setup 函数
setup 函数是 Composition API 的核心入口,它在组件初始化时最早调用,允许在其中定义响应式变量、计算属性、监听器等。setup 函数返回的对象中的属性和方法可以直接在模板中使用。
完整代码示例:
<template>
  <div>
    <p>Count: {{ count }}</p>
    <button @click="increment">Increment</button>
  </div>
</template>

<script setup>
import { ref } from 'vue';

const count = ref(0);

function increment() {
  count.value++;
}
</script>
解释:
setup函数中定义的count和increment可以直接在模板中使用。ref创建一个响应式变量count。increment是一个方法,用于增加count的值。
注意事项:
setup中不能使用this,因为它在组件实例创建之前调用。
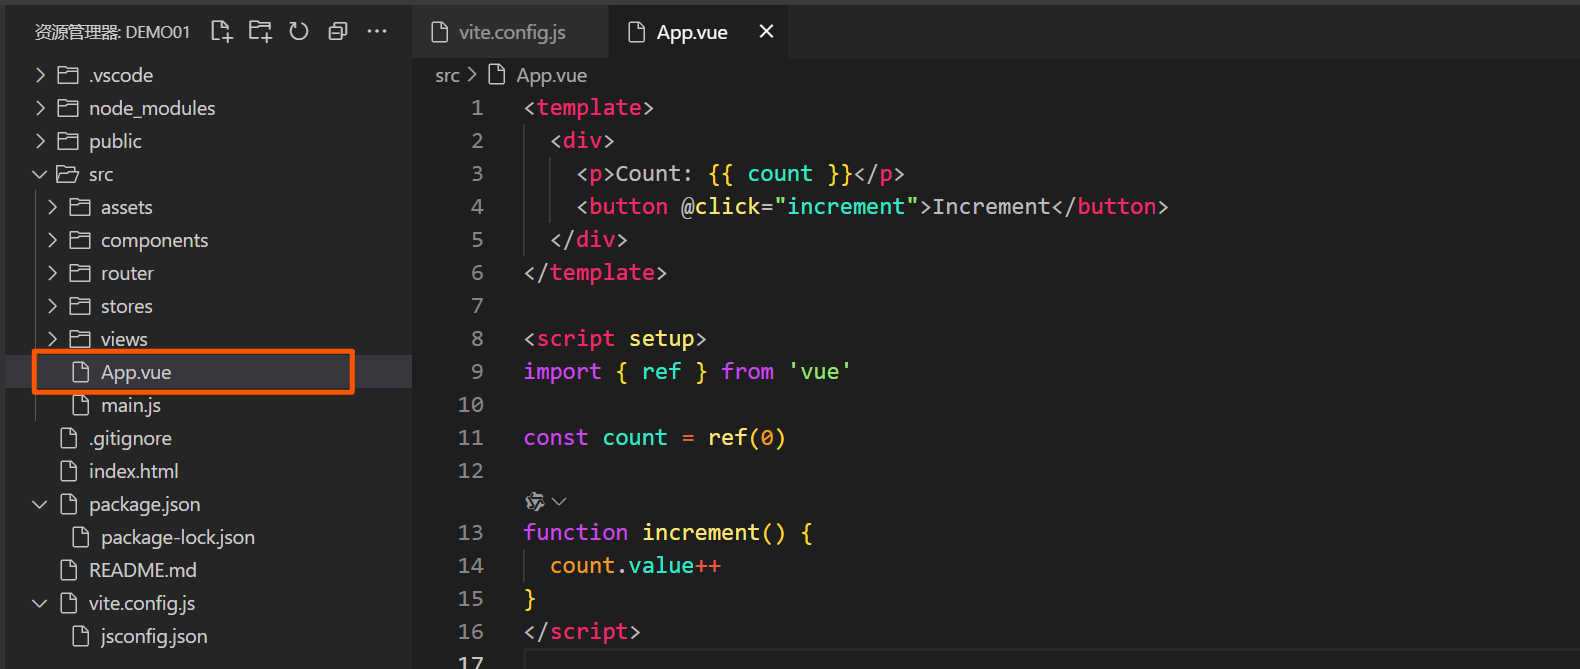
App.js是跟组件,大家可以把代码写在根组件里练习先

2.1.2 响应式变量:ref 和 reactive
在 Vue 3 中,ref 和 reactive 用于创建响应式数据,可以使数据变化自动更新到视图。
refref用于定义基础数据类型的响应式变量。它返回一个对象,需要通过.value属性来访问和修改值。完整代码示例:
<template>
  <div>
    <p>Count: {{ count }}</p>
    <button @click="increment">Increment</button>
  </div>
</template>

<script setup>
import { ref } from 'vue';

const count = ref(0);

function increment() {
  count.value++;
}
</script>
解释:
ref用于定义基本类型的响应式变量(如数字、字符串等)。- 在模板中使用时,Vue 会自动解包
.value,所以可以直接写{{ count }}。
reactivereactive用于将对象类型的数据(如对象或数组)转换为响应式数据。它可以递归地将对象中的所有属性变成响应式的。完整代码示例:
<template>
  <div>
    <p>Name: {{ person.name }}</p>
    <p>Age: {{ person.age }}</p>
    <button @click="incrementAge">Increase Age</button>
  </div>
</template>

<script setup>
import { reactive } from 'vue';

const person = reactive({
  name: 'John',
  age: 30
});

function incrementAge() {
  person.age++;
}
</script>
解释:
reactive用于创建复杂类型(如对象、数组)的响应式数据。- 通过
reactive创建的响应式数据,不需要使用.value来访问属性,可以直接修改。
选择使用 ref 或 reactive 的建议:
- 当处理简单的数据类型时(如数字、字符串、布尔值),推荐使用
ref。 - 当处理复杂的数据类型(如对象、数组)时,推荐使用
reactive。
2.1.3 计算属性:computed
computed 用于定义计算属性,它会基于其他响应式数据进行计算,并在依赖数据变化时自动更新。computed 具有缓存特性,只有当依赖的数据变化时才会重新计算。
完整代码示例:
<template>
  <div>
    <p>Count: {{ count }}</p>
    <p>Double Count: {{ doubleCount }}</p>
    <button @click="increment">Increment</button>
  </div>
</template>

<script setup>
import { ref, computed } from 'vue';

const count = ref(10);

const doubleCount = computed(() => count.value * 2);

function increment() {
  count.value++;
}
</script>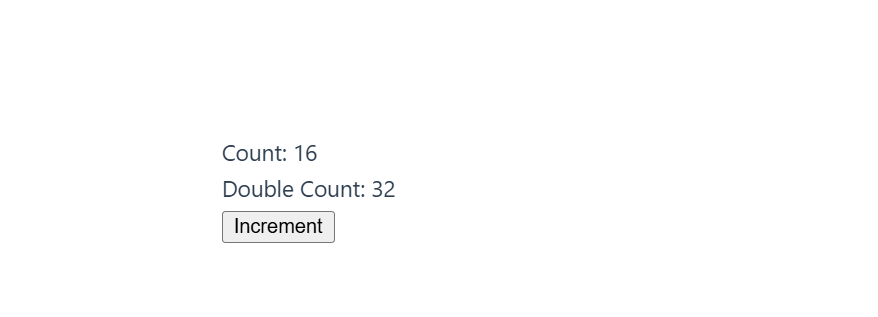
解释:
computed用于创建计算属性doubleCount,其值等于count的两倍。- 当
count的值变化时,doubleCount会自动更新。
注意事项:
computed的结果会被缓存,只有在依赖的数据发生变化时才会重新计算。
2.1.4 监听器:watch 和 watchEffect
watch 和 watchEffect 用于监听响应式数据的变化,并在变化时执行相应的操作。watch 适合监听特定的响应式变量,而 watchEffect 会自动追踪依赖的数据。
watchwatch用于监听特定的响应式变量,当变量变化时执行回调函数。完整代码示例:
<template>
  <div>
    <p>Count: {{ count }}</p>
    <button @click="increment">Increment</button>
  </div>
</template>

<script setup>
import { ref, watch } from 'vue';

const count = ref(0);

watch(count, (newValue, oldValue) => {
  console.log(`Count changed from ${oldValue} to ${newValue}`);
});

function increment() {
  count.value++;
}
</script>
解释:
watch监听count的变化,每当count的值发生变化时,回调函数会被触发。- 回调函数接收新值
newValue和旧值oldValue。
watchEffectwatchEffect是一个立即执行的监听器,它会自动追踪回调函数中使用的响应式数据,并在数据发生变化时重新执行回调。完整代码示例:
<template>
  <div>
    <p>Count: {{ count }}</p>
    <button @click="increment">Increment</button>
  </div>
</template>

<script setup>
import { ref, watchEffect } from 'vue';

const count = ref(0);

watchEffect(() => {
  console.log(`Count is: ${count.value}`);
});

function increment() {
  count.value++;
}
</script>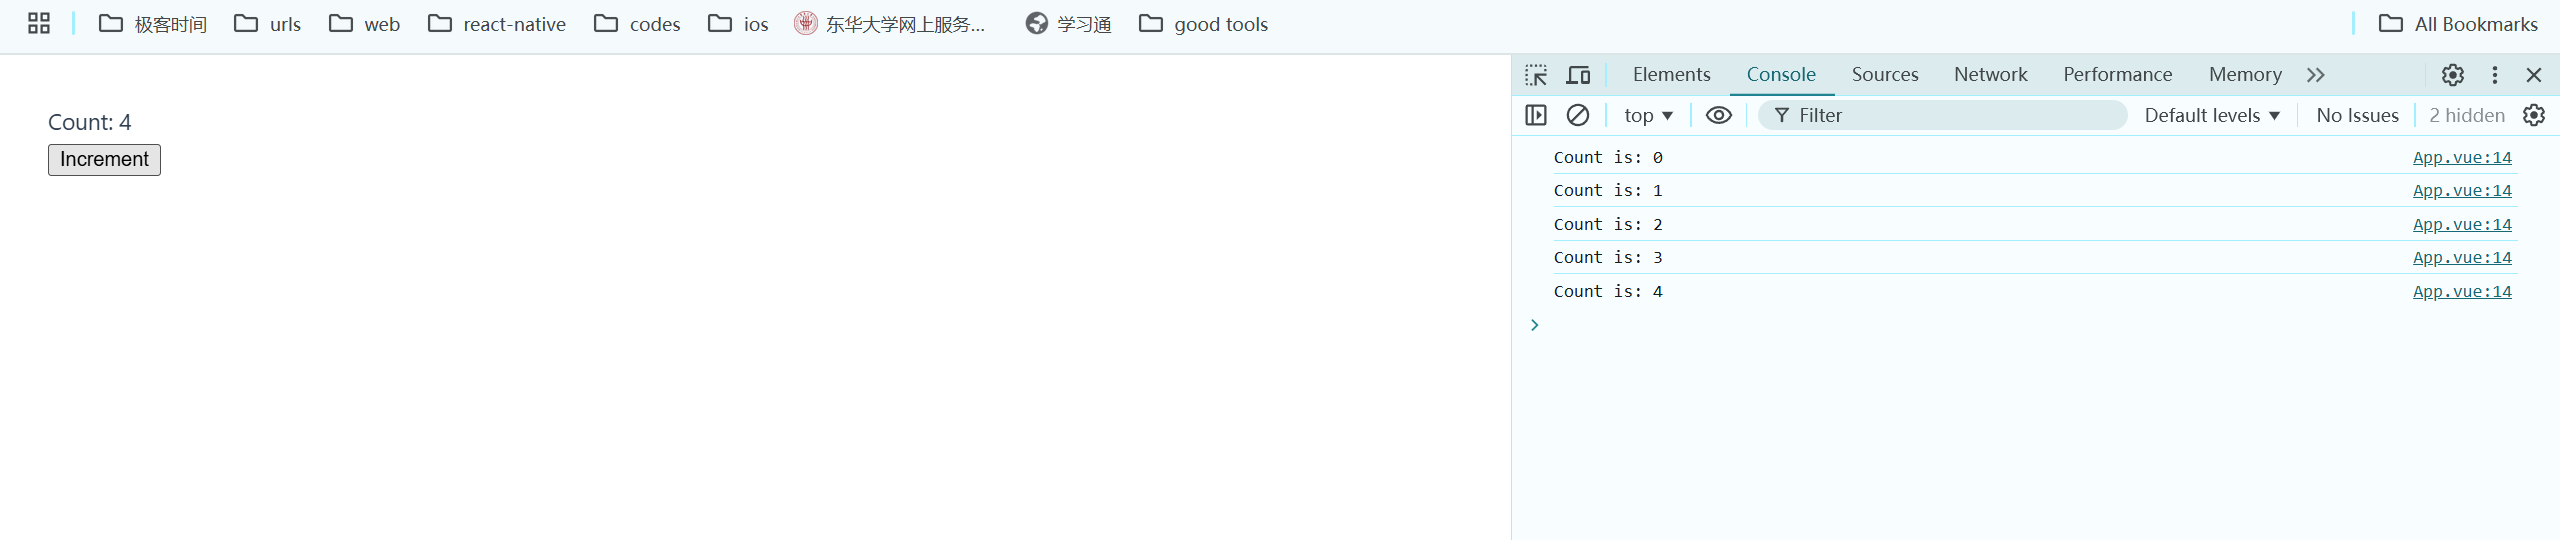
解释:
watchEffect会自动追踪回调函数中用到的响应式数据count。- 每当
count的值发生变化时,watchEffect会自动重新执行。
选择 watch 和 watchEffect 的建议:
- 使用
watch来监听特定数据的变化,适合需要旧值和新值对比的场景。 - 使用
watchEffect来自动追踪所有依赖的数据变化,适合立即执行并自动追踪依赖的场景。
2.1.5 总结
setup函数是 Composition API 的核心入口,用于定义响应式变量、计算属性和监听器。ref和reactive用于创建响应式数据,ref适用于基本类型,reactive适用于复杂类型。computed创建计算属性,具有缓存特性,适合依赖数据的计算逻辑。watch和watchEffect用于监听数据变化,watch适合指定依赖的变化,watchEffect自动追踪所有依赖的数据。
2.2 Options API(兼容 Vue 2 的写法)
Vue 3 支持 Vue 2 中的 Options API 写法,以便兼容现有代码。这种写法对于 Vue 2 用户更熟悉,可以帮助更顺利地过渡到 Vue 3。
2.2.1 data 选项
data 选项用于定义组件的响应式数据。Vue 3 中的 Options API 写法与 Vue 2 相同。
完整代码示例:
<template>
  <div>
    <p>Count: {{ count }}</p>
    <button @click="increment">Increment</button>
  </div>
</template>

<script>
export default {
  data() {
    return {
      count: 0  // 定义一个响应式数据 count
    };
  },
  methods: {
    increment() {
      this.count++;  // 更新 count 的值
    }
  }
};
</script>
解释:
data选项是一个返回对象的函数,这个对象中的属性会自动变成响应式。- 在模板中使用
{{ count }}来显示count的值。 methods选项定义在组件中可以调用的函数,例如increment。
2.2.2 methods 选项
methods 选项用于定义组件中的方法,方法通常是对数据进行操作或执行某些事件响应。Vue 3 中的 methods 选项与 Vue 2 相同。
完整代码示例:
<template>
  <div>
    <p>Message: {{ message }}</p>
    <button @click="changeMessage">Change Message</button>
  </div>
</template>

<script>
export default {
  data() {
    return {
      message: 'Hello, Vue!'  // 定义一个响应式数据 message
    };
  },
  methods: {
    changeMessage() {
      this.message = 'Hello, Vue 3!';  // 修改 message 的值
    }
  }
};
</script>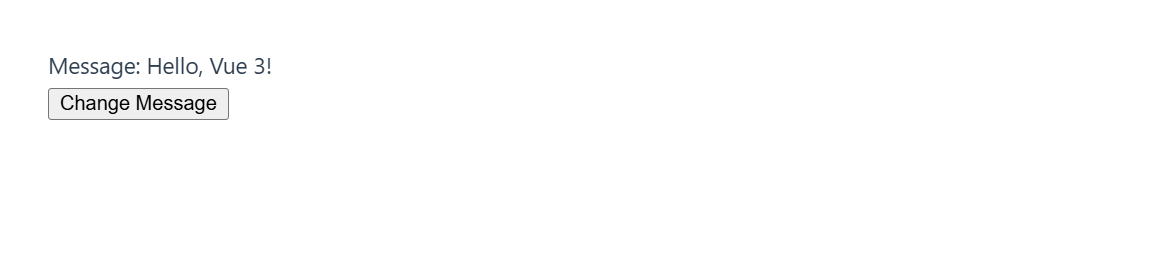
解释:
methods中定义的changeMessage方法可以通过模板事件调用。- 在
methods中可以使用this来访问data中定义的响应式数据。
2.2.3 computed 计算属性
computed 用于定义计算属性。计算属性会缓存计算结果,只有当依赖的响应式数据变化时才会重新计算。
完整代码示例:
<template>
  <div>
    <p>Count: {{ count }}</p>
    <p>Double Count: {{ doubleCount }}</p> <!-- 显示计算属性的值 -->
    <button @click="increment">Increment</button>
  </div>
</template>

<script>
export default {
  data() {
    return {
      count: 0  // 定义响应式数据 count
    };
  },
  computed: {
    doubleCount() {
      return this.count * 2;  // 定义一个计算属性 doubleCount
    }
  },
  methods: {
    increment() {
      this.count++;
    }
  }
};
</script>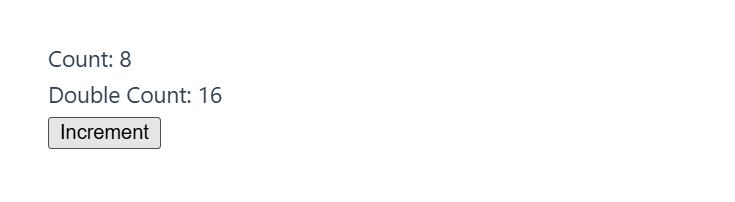
解释:
computed选项中的doubleCount是一个计算属性,会根据count的变化自动更新。- 当
count改变时,doubleCount会重新计算其值。
2.2.4 watch 选项
watch 用于监听指定响应式数据的变化,并在变化时执行回调函数。watch 选项适合处理一些副作用,例如数据变化后触发异步操作或复杂的业务逻辑。
完整代码示例:
<template>
  <div>
    <p>Count: {{ count }}</p>
    <button @click="increment">Increment</button>
  </div>
</template>

<script>
export default {
  data() {
    return {
      count: 0  // 定义响应式数据 count
    };
  },
  methods: {
    increment() {
      this.count++;  // 更新 count 的值
    }
  },
  watch: {
    count(newValue, oldValue) {
      console.log(`Count changed from ${oldValue} to ${newValue}`);
      // 当 count 发生变化时,输出旧值和新值
    }
  }
};
</script>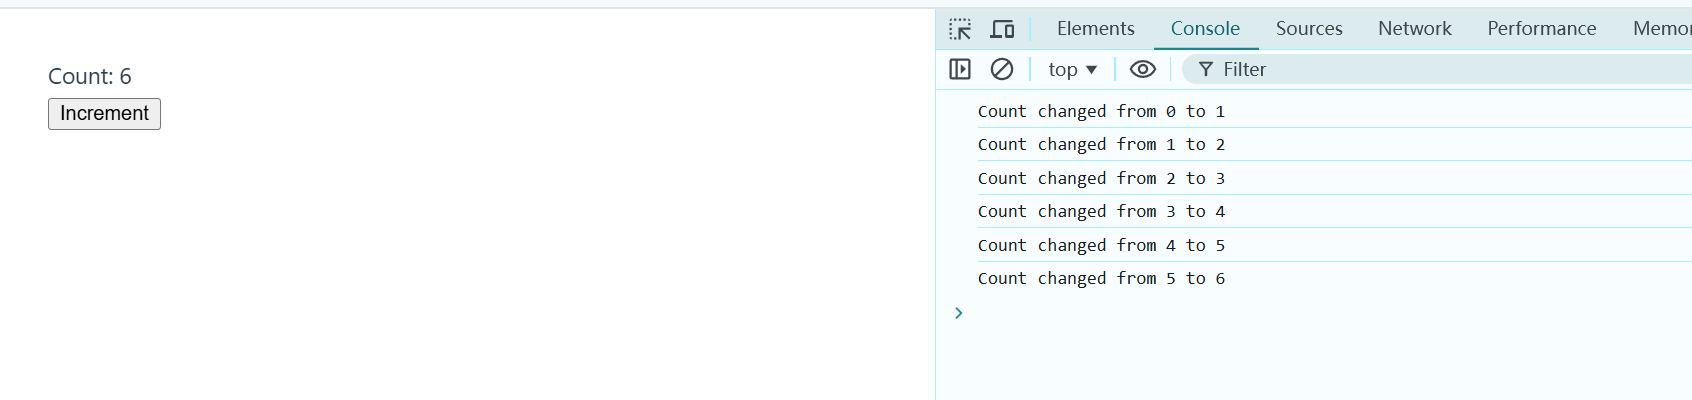
解释:
watch监听count的变化,每次count发生变化时,回调函数都会被触发。- 回调函数接收两个参数:
newValue是新的值,oldValue是旧的值。
2.2.5 生命周期钩子(mounted、updated、beforeUnmount 等)
Vue 提供了一系列生命周期钩子函数,用于在组件的不同阶段执行特定逻辑。常用的生命周期钩子包括 mounted(组件挂载完成)、updated(数据更新完成)和 beforeUnmount(组件卸载前)。
完整代码示例:
<template>
  <div>
    <p>Message: {{ message }}</p>
    <button @click="updateMessage">Update Message</button>
  </div>
</template>

<script>
export default {
  data() {
    return {
      message: 'Hello, Vue!'  // 定义响应式数据 message
    };
  },
  methods: {
    updateMessage() {
      this.message = 'Hello, Vue 3!';  // 修改 message 的值
    }
  },
  mounted() {
    console.log('Component mounted!');  // 组件挂载后执行
  },
  updated() {
    console.log('Component updated!');  // 数据更新后执行
  },
  beforeUnmount() {
    console.log('Component is about to be unmounted!');  // 组件卸载前执行
  }
};
</script>
解释:
mounted:组件挂载到页面后执行,通常用于初始数据请求或 DOM 操作。updated:组件数据更新并重新渲染后执行,适合在数据更新后进行一些逻辑处理。beforeUnmount:组件销毁之前执行,用于清理定时器、事件监听等。

3. Vue 指令
Vue 指令用于在模板中绑定数据和 DOM 操作。Vue 提供了一些内置指令,常用的有条件渲染、列表渲染、事件绑定、属性绑定等。Vue 3 还新增了一些优化性能的指令。
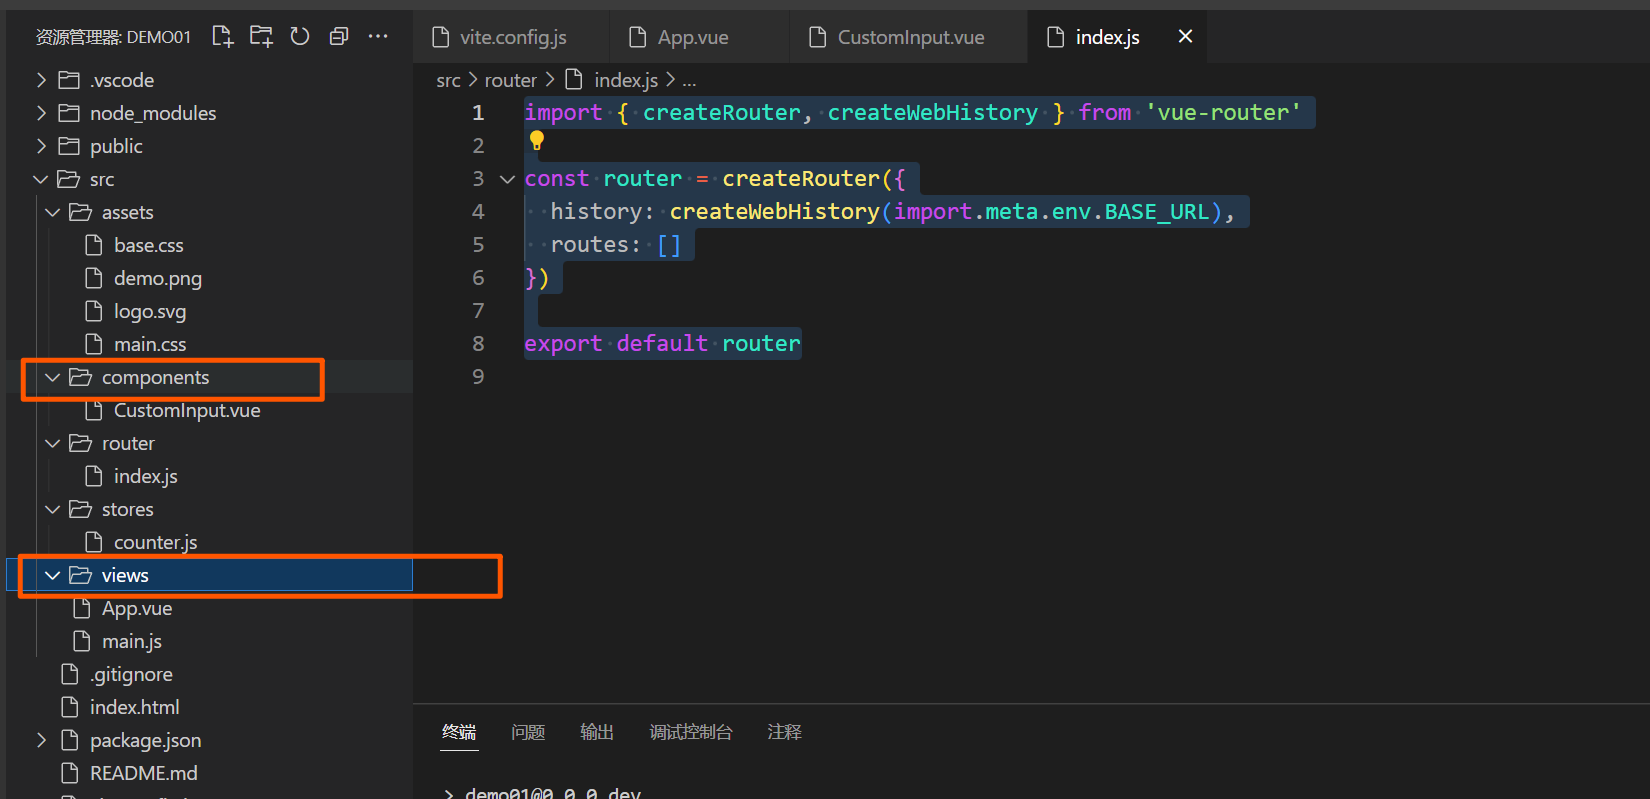
首先对项目做一个清理把,把View文件夹和Componets文件夹里的内容可以删除干净,这样以后项目报错,因为router里面找不到页面路
import { createRouter, createWebHistory } from 'vue-router'

const router = createRouter({
  history: createWebHistory(import.meta.env.BASE_URL),
  routes: []
})

export default router
到router文件夹里的index.js里面删除导入的页面和路由,只保留上面的代码
最后View文件夹和Componets文件夹里应该是空的(我的有一个组件,后来创建的,你们的应该是空的)
3.1 常用指令
3.1.1 条件渲染:v-if、v-else-if、v-else
v-if、v-else-if 和 v-else 用于条件渲染元素,只有当条件为 true 时,元素才会渲染到 DOM 中。
完整代码示例 1:显示不同的内容
<template>
  <div>
    <p v-if="userRole === 'admin'">Welcome, Admin!</p>
    <p v-else-if="userRole === 'editor'">Welcome, Editor!</p>
    <p v-else>Welcome, Guest!</p>
  </div>
</template>

<script>
export default {
  data() {
    return {
      userRole: 'guest'  // 可以是 'admin', 'editor' 或 'guest'
    };
  }
};
</script>
完整代码示例 2:切换登录状态

<template>
  <div>
    <p v-if="isLoggedIn">You are logged in</p>
    <p v-else>You are not logged in</p>
    <button @click="toggleLogin">Toggle Login Status</button>
  </div>
</template>

<script>
export default {
  data() {
    return {
      isLoggedIn: false
    };
  },
  methods: {
    toggleLogin() {
      this.isLoggedIn = !this.isLoggedIn;
    }
  }
};
</script>
3.1.2 列表渲染:v-for
v-for 用于遍历数组或对象,渲染相应数量的元素。
完整代码示例 1:渲染一个简单的数组
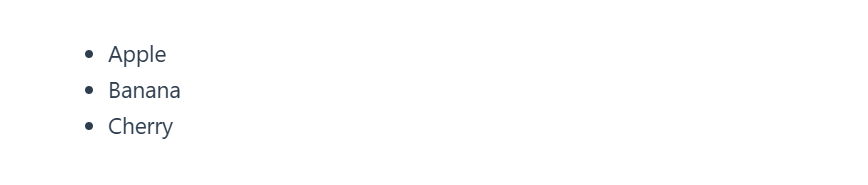
<template>
  <ul>
    <li v-for="(item, index) in items" :key="index">{{ item }}</li>
  </ul>
</template>

<script>
export default {
  data() {
    return {
      items: ['Apple', 'Banana', 'Cherry']
    };
  }
};
</script>
完整代码示例 2:渲染对象数组

<template>
  <div v-for="(user, index) in users" :key="user.id">
    <p>{{ index + 1 }}. {{ user.name }} - {{ user.age }} years old</p>
  </div>
</template>

<script>
export default {
  data() {
    return {
      users: [
        { id: 1, name: 'Alice', age: 25 },
        { id: 2, name: 'Bob', age: 30 },
        { id: 3, name: 'Charlie', age: 35 }
      ]
    };
  }
};
</script>
3.1.3 事件绑定:v-on / @
v-on 用于绑定事件,可以使用简写 @。
完整代码示例 1:按钮点击事件

<template>
  <button @click="showAlert">Click Me</button>
</template>

<script>
export default {
  methods: {
    showAlert() {
      alert('Button clicked!');
    }
  }
};
</script>
完整代码示例 2:鼠标悬停事件

<template>
  <p @mouseover="changeText" @mouseleave="resetText">{{ message }}</p>
</template>

<script>
export default {
  data() {
    return {
      message: 'Hover over me!'
    };
  },
  methods: {
    changeText() {
      this.message = 'You are hovering!';
    },
    resetText() {
      this.message = 'Hover over me!';
    }
  }
};
</script>
3.1.4 属性绑定:v-bind / :
v-bind 用于绑定属性,简写为 :。
完整代码示例 1:绑定图片的 src 属性

<template>
  <img :src="imageUrl" alt="Dynamic Image" />
</template>

<script>
import demoImage from '@/assets/demo.png'

export default {
  data() {
    return {
      imageUrl: demoImage // 使用 import 导入图片路径
    }
  }
}
</script>
完整代码示例 2:动态绑定样式
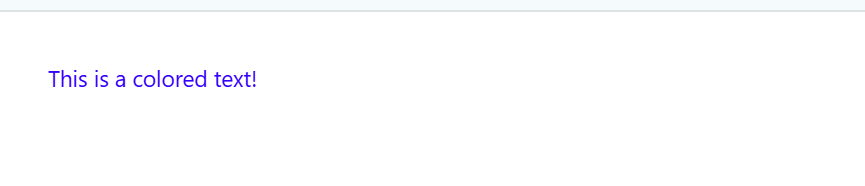
<template>
  <p :style="{ color: textColor }">This is a colored text!</p>
</template>

<script>
export default {
  data() {
    return {
      textColor: 'blue'
    };
  }
};
</script>
3.1.5 双向绑定:v-model 及在自定义组件上的使用
v-model 用于双向绑定输入框、复选框等元素的值,在 Vue 3 中也可以应用于自定义组件。
完整代码示例 1:双向绑定输入框的值
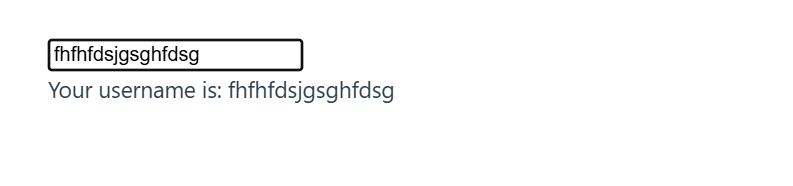
<template>
  <input v-model="username" placeholder="Enter your username">
  <p>Your username is: {{ username }}</p>
</template>

<script>
export default {
  data() {
    return {
      username: ''
    };
  }
};
</script>
完整代码示例 2:在自定义组件上使用 v-model
首先在App.js里面写父组件
ParentComponent.vue
确保只有一个 <template> 标签:
<template>
  <div>
    <CustomInput v-model="text"></CustomInput>
    <p>Input Value: {{ text }}</p>
  </div>
</template>

<script>
import CustomInput from '@/components/CustomInput.vue'

export default {
  components: { CustomInput },
  data() {
    return {
      text: ''
    };
  }
};
</script>
components文件家里创建子组件CustomInput.vue
CustomInput.vue
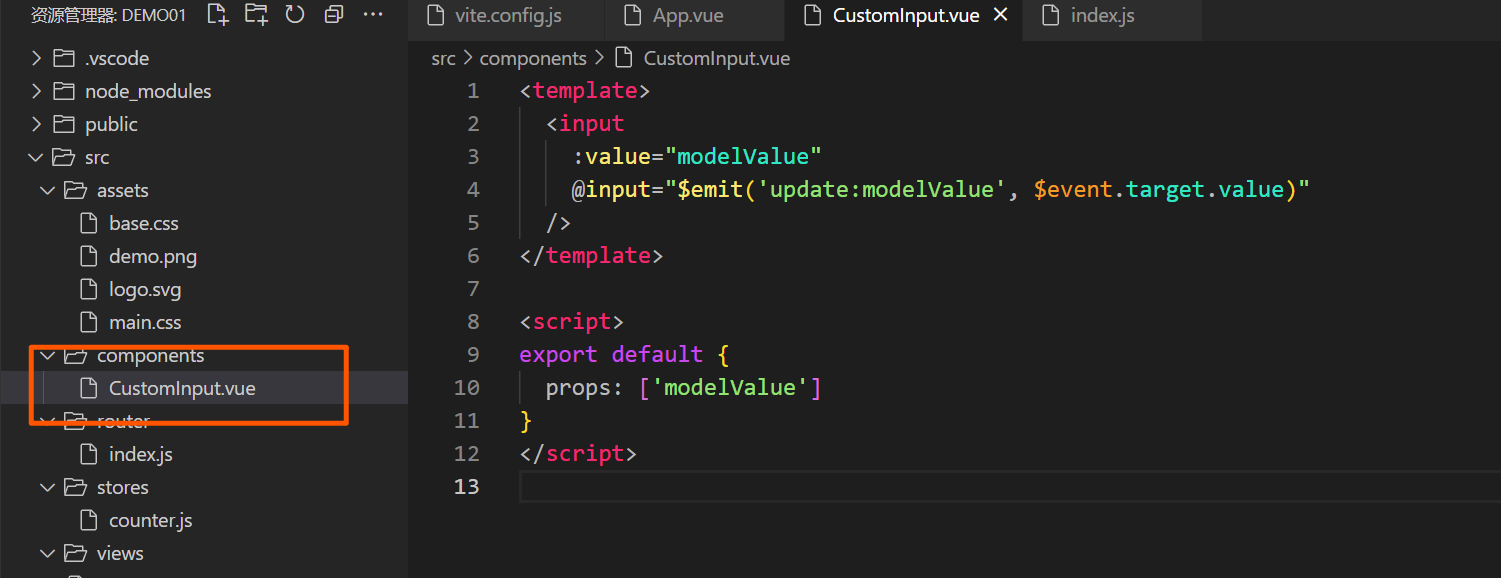
<template>
  <input
    :value="modelValue"
    @input="$emit('update:modelValue', $event.target.value)"
  />
</template>

<script>
export default {
  props: ['modelValue']
};
</script>
3.1.6 显示隐藏:v-show
v-show 根据条件控制元素的显示或隐藏。与 v-if 不同,v-show 只是切换元素的 display 样式,不会移除 DOM 元素。

完整代码示例:
<template>
  <button @click="toggleVisibility">Toggle Visibility</button>
  <p v-show="isVisible">This text is visible based on v-show!</p>
</template>

<script>
export default {
  data() {
    return {
      isVisible: true
    };
  },
  methods: {
    toggleVisibility() {
      this.isVisible = !this.isVisible;
    }
  }
};
</script>
3.2 新增指令
3.2.1 性能优化:v-memo(Vue 3 新增)
v-memo 用于缓存部分模板的渲染结果,只有当依赖的响应式数据变化时才会重新渲染。这可以提高性能。

完整代码示例:
<template>
  <div v-memo="[count % 2 === 0]">
    <p>Count: {{ count }}</p>
    <button @click="increment">Increment</button>
  </div>
</template>

<script>
export default {
  data() {
    return {
      count: 0
    };
  },
  methods: {
    increment() {
      this.count++;
    }
  }
};
</script>
解释:
- 当
count为偶数时,模板内容会被缓存,不会重新渲染。 - 当
count为奇数时,重新渲染模板内容。
3.2.2 插槽绑定:v-slot / #
注意,如果有子组件和父组件的时候,不能写在一个文件里,比如子组件放在component文件夹下,父组件可以放在APP.js;当然了现在是为了学习方便,真是项目中可不是这么随便乱来的;
v-slot 用于在父组件中向子组件传递插槽内容,可以使用简写 #。

完整代码示例:
<!-- ParentComponent.vue -->
<template>
  <ChildComponent>
    <template v-slot:header>
      <h1>Header Content</h1>
    </template>
    <template v-slot:default>
      <p>Main Content</p>
    </template>
  </ChildComponent>
</template>

<script>
import ChildComponent from './ChildComponent.vue';

export default {
  components: { ChildComponent }
};
</script>

<!-- ChildComponent.vue -->
<template>
  <header>
    <slot name="header"></slot>
  </header>
  <main>
    <slot></slot>
  </main>
</template>

<script>
export default {};
</script>
3.2.3 自定义指令的创建与使用(Vue 2 和 Vue 3 中都适用)
自定义指令允许开发者为特定元素添加自定义行为。可以在 Vue 2 和 Vue 3 中使用相似的写法,不过 Vue 3 中的指令生命周期钩子有所调整。
示例:自动聚焦指令
下面我们创建一个 v-focus 指令,自动让输入框在页面加载时获取焦点。
完整代码示例:
<template>
  <input v-focus placeholder="Auto-focused input">
</template>

<script>
export default {
  directives: {
    focus: {
      mounted(el) {
        el.focus();  // 在元素挂载时自动获取焦点
      }
    }
  }
};
</script>
解释:
focus是一个自定义指令,它在mounted钩子中调用el.focus(),让元素在挂载时自动聚焦。- 自定义指令的
mounted钩子在 Vue 3 中相当于 Vue 2 的bind和inserted合并。
示例:文本高亮指令
再创建一个 v-highlight 指令,用于高亮显示文本。
完整代码示例:
<template>
  <p v-highlight="'yellow'">This text will be highlighted!</p>
</template>

<script>
export default {
  directives: {
    highlight: {
      mounted(el, binding) {
        el.style.backgroundColor = binding.value;  // 设置背景颜色
      }
    }
  }
};
</script>
解释:
highlight自定义指令接受一个参数binding.value,用于设置背景颜色。- 在使用时,可以直接传递颜色值,例如
v-highlight="'yellow'"。
总结
在 Vue 3 中,指令的使用更加灵活,新增了 v-memo 提升性能,同时保留了 Vue 2 中常用的指令,使得项目升级更顺利。以下是本节的总结:
- 条件渲染:使用
v-if、v-else-if和v-else,控制元素的渲染条件。 - 列表渲染:使用
v-for迭代数组或对象,动态生成列表项。 - 事件绑定:使用
v-on或简写@绑定事件,如点击、鼠标悬停等。 - 属性绑定:使用
v-bind或简写:动态绑定元素属性。 - 双向绑定:使用
v-model实现表单控件的双向绑定,并可用于自定义组件。 - 显示隐藏:使用
v-show控制元素的显示状态而不移除元素。 - 性能优化:使用
v-memo缓存模板渲染,减少不必要的 DOM 更新。 - 插槽绑定:使用
v-slot或简写#向子组件传递插槽内容。 - 自定义指令:自定义指令让我们可以在元素上实现特殊行为,适合场景化的需求。
4. Vue 组件基础
4.1 组件的基本使用
4.1.1 定义组件(Options API 与 Composition API)
Vue 组件可以使用两种 API 来定义:Options API 和 Composition API。下面分别展示这两种方法的示例。
示例 1:使用 Options API 定义组件

<!-- ChildComponent.vue -->
<template>
  <p>{{ message }}</p>
</template>

<script>
export default {
  data() {
    return {
      message: 'Hello from Child Component (Options API)'
    };
  }
};
</script>
示例 2:使用 Composition API 定义组件
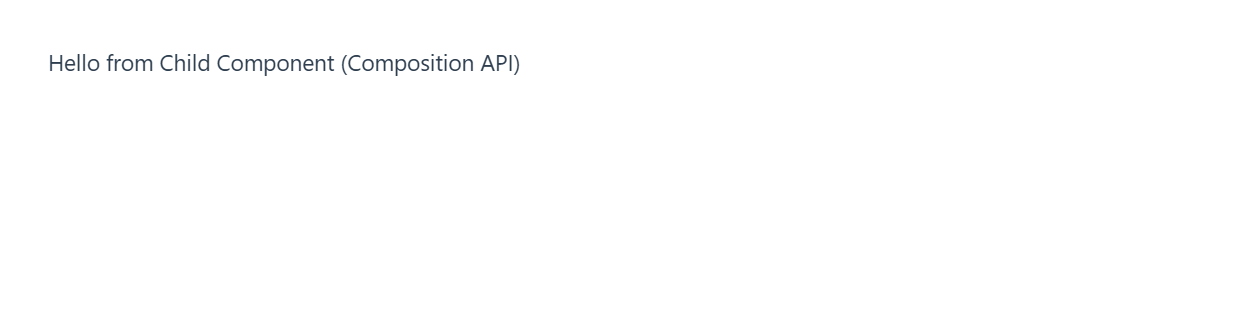
<!-- ChildComponent.vue -->
<template>
  <p>{{ message }}</p>
</template>

<script setup>
import { ref } from 'vue';

const message = ref('Hello from Child Component (Composition API)');
</script>
解释:
- 在 Options API 中,组件的状态和方法定义在
data、methods等选项中。 - 在 Composition API 中,
ref用于定义响应式变量,可以直接在<script setup>中定义。
4.1.2 组件注册(全局注册与局部注册)
在 Vue 中,组件可以全局注册或局部注册。
局部注册:仅在特定父组件中注册子组件,通常更常用。
<!-- ParentComponent.vue -->
<template>
  <ChildComponent />
</template>

<script>
import ChildComponent from '@/components/ChildComponent.vue';

export default {
  components: {
    ChildComponent  // 只在当前组件中可用
  }
};
</script>全局注册:在 main.js 中注册组件,使其在全局范围内可用。
// main.js
import { createApp } from 'vue';
import App from './App.vue';
import ChildComponent from './components/ChildComponent.vue';

const app = createApp(App);

// 全局注册 ChildComponent
app.component('ChildComponent', ChildComponent);

app.mount('#app');
解释:
- 全局注册适合频繁使用的基础组件。
- 局部注册更适合特定父组件使用的子组件,避免全局污染。
4.1.3 props 与父子组件通信
props 用于在父组件与子组件之间传递数据。父组件通过 props 传递数据给子组件。
父组件代码:
<!-- ParentComponent.vue -->
<template>
  <ChildComponent message="Hello from Parent Component" />
</template>

<script>
import ChildComponent from './ChildComponent.vue';

export default {
  components: {
    ChildComponent
  }
};
</script>
子组件代码:
<!-- ChildComponent.vue -->
<template>
  <p>{{ message }}</p>
</template>

<script>
export default {
  props: {
    message: String  // 定义接收的 prop 类型
  }
};
</script>
解释:
- 父组件通过
message属性向子组件传递字符串"Hello from Parent Component"。 - 子组件定义了一个
props属性message,用于接收从父组件传递的数据。
4.1.4 事件触发与监听:emit
在 Vue 中,子组件可以使用 $emit 向父组件发送事件,父组件监听这些事件,以实现子组件向父组件的通信。
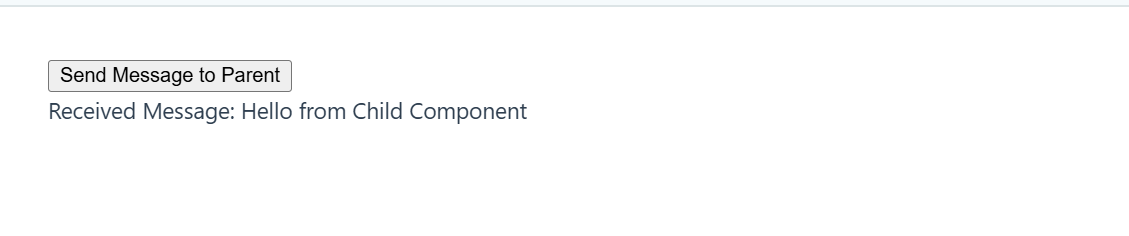
父组件代码:
<!-- ParentComponent.vue -->
<template>
  <ChildComponent @customEvent="handleCustomEvent" />
  <p>Received Message: {{ receivedMessage }}</p>
</template>

<script>
import ChildComponent from '@/components/ChildComponent.vue';

export default {
  components: {
    ChildComponent
  },
  data() {
    return {
      receivedMessage: ''
    };
  },
  methods: {
    handleCustomEvent(payload) {
      this.receivedMessage = payload;
    }
  }
};
</script>
子组件代码:
<!-- ChildComponent.vue -->
<template>
  <button @click="sendMessage">Send Message to Parent</button>
</template>

<script>
export default {
  methods: {
    sendMessage() {
      this.$emit('customEvent', 'Hello from Child Component'); // 触发自定义事件并传递数据
    }
  }
};
</script>
解释:
- 在子组件中,
this.$emit('customEvent', 'Hello from Child Component')触发一个自定义事件customEvent,并传递数据。 - 父组件监听
customEvent,并在回调方法handleCustomEvent中接收子组件传递的数据并更新receivedMessage。
4.2 插槽(Slots)
插槽用于在父组件中向子组件传递内容。Vue 提供了三种插槽类型:默认插槽、具名插槽和作用域插槽,分别适用于不同的内容插入场景。
4.2.1 默认插槽
默认插槽用于向子组件传递默认内容,适合内容固定的情况。
子组件代码(放在 @/components/DefaultSlotComponent.vue):
<!-- DefaultSlotComponent.vue -->
<template>
  <div class="default-slot">
    <h3>Default Slot Content:</h3>
    <slot>Default content if none is provided</slot>
  </div>
</template>

<script>
export default {};
</script>

<style scoped>
.default-slot {
  padding: 10px;
  border: 1px solid #ccc;
}
</style>
父组件代码:
<!-- ParentComponent.vue -->
<template>
  <div>
    <DefaultSlotComponent>
      <p>This is content passed from the Parent Component.</p>
    </DefaultSlotComponent>
  </div>
</template>

<script>
import DefaultSlotComponent from '@/components/DefaultSlotComponent.vue';

export default {
  components: {
    DefaultSlotComponent
  }
};
</script>
解释:
- 子组件
<slot>标签表示默认插槽的位置。如果父组件未提供内容,将显示默认内容 “Default content if none is provided”。 - 父组件向默认插槽传递了一段
<p>元素的内容。
4.2.2 具名插槽
具名插槽允许我们在子组件中定义多个插槽,并在父组件中为不同的插槽提供内容。
子组件代码(放在 @/components/NamedSlotComponent.vue):
<!-- NamedSlotComponent.vue -->
<template>
  <div class="named-slot">
    <header>
      <slot name="header">Default Header Content</slot>
    </header>
    <main>
      <slot>Default Main Content</slot>
    </main>
    <footer>
      <slot name="footer">Default Footer Content</slot>
    </footer>
  </div>
</template>

<script>
export default {};
</script>

<style scoped>
.named-slot {
  padding: 10px;
  border: 1px solid #ccc;
}
header, main, footer {
  margin: 5px 0;
}
</style>
父组件代码:

<!-- ParentComponent.vue -->
<template>
  <div>
    <NamedSlotComponent>
      <template #header>
        <h1>Custom Header Content from Parent</h1>
      </template>
      <template #footer>
        <p>Custom Footer Content from Parent</p>
      </template>
      <p>This is the main content from the Parent Component.</p>
    </NamedSlotComponent>
  </div>
</template>

<script>
import NamedSlotComponent from '@/components/NamedSlotComponent.vue';

export default {
  components: {
    NamedSlotComponent
  }
};
</script>
解释:
- 子组件定义了三个具名插槽:
header、默认插槽(未命名)、和footer。 - 父组件通过
<template #slotName>语法向具名插槽提供不同内容。 - 如果父组件未提供某个插槽内容(如
main插槽),则使用子组件的默认内容。
4.2.3 作用域插槽
作用域插槽允许子组件将数据传递给父组件,父组件可以根据这些数据自定义插槽内容。它适用于需要灵活展示数据的场景。
子组件代码(放在 @/components/ScopedSlotComponent.vue):
<!-- ScopedSlotComponent.vue -->
<template>
  <div class="scoped-slot">
    <h3>Scoped Slot Content:</h3>
    <slot :user="user"></slot>
  </div>
</template>

<script>
export default {
  data() {
    return {
      user: {
        name: 'Alice',
        age: 28
      }
    };
  }
};
</script>

<style scoped>
.scoped-slot {
  padding: 10px;
  border: 1px solid #ccc;
}
</style>
父组件代码:
<!-- ParentComponent.vue -->
<template>
  <div>
    <ScopedSlotComponent v-slot:default="slotProps">
      <p>User Name: {{ slotProps.user.name }}</p>
      <p>User Age: {{ slotProps.user.age }}</p>
    </ScopedSlotComponent>
  </div>
</template>

<script>
import ScopedSlotComponent from '@/components/ScopedSlotComponent.vue';

export default {
  components: {
    ScopedSlotComponent
  }
};
</script>
解释:
- 子组件
ScopedSlotComponent使用<slot :user="user">向插槽传递user数据。 - 父组件通过
v-slot:default="slotProps"语法接收user数据,并根据数据内容自定义渲染。 slotProps.user.name和slotProps.user.age提供了user对象的属性,父组件可以灵活展示。

4.3 动态组件与异步组件
动态组件和异步组件在 Vue 中提供了更灵活的组件渲染和加载方式。动态组件允许在运行时切换组件,而异步组件可以按需加载,适合提升应用性能。
4.3.1 动态组件:<component :is="...">
动态组件使用 <component :is="..."> 语法,可以根据变量的值在不同的组件间切换渲染。
子组件代码 1(放在 @/components/InfoComponent.vue):
<!-- InfoComponent.vue -->
<template>
  <div>
    <h3>个人信息</h3>
    <p>姓名:{{ name }}</p>
    <p>年龄:{{ age }}</p>
    <p>居住地:{{ location }}</p>
  </div>
</template>

<script>
export default {
  data() {
    return {
      name: 'aini',
      age: 23,
      location: '上海'
    };
  }
};
</script>

<style scoped>
h3 {
  color: #333;
}
</style>
子组件代码 2(放在 @/components/JobComponent.vue):
<!-- JobComponent.vue -->
<template>
  <div>
    <h3>职业信息</h3>
    <p>职业:{{ job }}</p>
    <p>擅长领域:{{ skills }}</p>
  </div>
</template>

<script>
export default {
  data() {
    return {
      job: '前端开发工程师和 iOS 开发工程师',
      skills: 'Vue、React、Swift'
    };
  }
};
</script>

<style scoped>
h3 {
  color: #333;
}
</style>
父组件代码:
<!-- ParentComponent.vue -->
<template>
  <div>
    <button @click="currentComponent = 'InfoComponent'">显示个人信息</button>
    <button @click="currentComponent = 'JobComponent'">显示职业信息</button>

    <!-- 动态组件,根据 currentComponent 值切换渲染的子组件 -->
    <component :is="currentComponent"></component>
  </div>
</template>

<script>
import InfoComponent from '@/components/InfoComponent.vue';
import JobComponent from '@/components/JobComponent.vue';

export default {
  components: {
    InfoComponent,
    JobComponent
  },
  data() {
    return {
      currentComponent: 'InfoComponent'  // 默认显示个人信息组件
    };
  }
};
</script>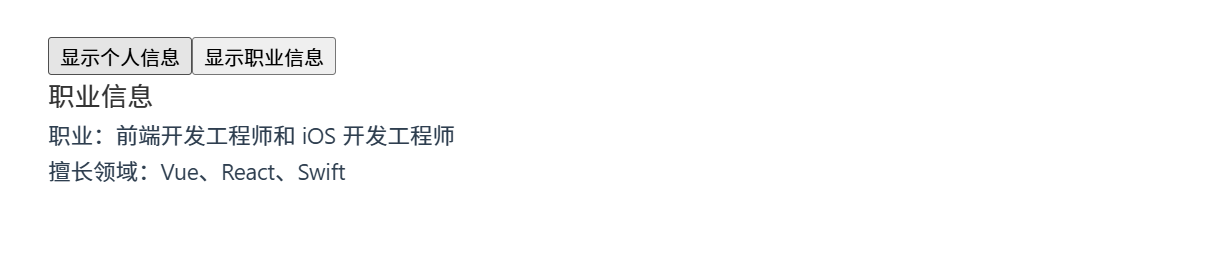
解释:
- 父组件通过
<component :is="currentComponent">根据currentComponent的值动态切换渲染不同的子组件。 - 点击按钮可以在
InfoComponent和JobComponent之间切换。
4.3.2 异步组件:defineAsyncComponent
异步组件适用于按需加载组件。使用 defineAsyncComponent 可以延迟加载组件,提高应用性能。
父组件代码:
<!-- ParentComponent.vue -->
<template>
  <div>
    <button @click="showInfo = !showInfo">
      {{ showInfo ? '隐藏个人信息' : '显示个人信息' }}
    </button>

    <!-- 使用异步组件加载个人信息 -->
    <component v-if="showInfo" :is="AsyncInfoComponent" />
  </div>
</template>

<script>
import { defineAsyncComponent } from 'vue';

const AsyncInfoComponent = defineAsyncComponent(() =>
  import('@/components/InfoComponent.vue')
);

export default {
  components: {
    AsyncInfoComponent
  },
  data() {
    return {
      showInfo: false  // 控制是否显示异步加载的组件
    };
  }
};
</script>
解释:
- 通过
defineAsyncComponent按需加载InfoComponent,仅在showInfo为true时加载并渲染该组件。 - 异步组件会在需要时才加载,减轻了初始加载压力,提高性能。
4.3.3 suspense 组件的使用(异步加载时的占位符)
在 Vue 3 中,<suspense> 组件用于处理异步组件加载时的占位符。可以在组件加载完成之前显示占位内容,以改善用户体验。
子组件代码(放在 @/components/InfoComponent.vue):
<!-- InfoComponent.vue -->
<template>
  <div>
    <h3>个人信息</h3>
    <p>姓名:{{ name }}</p>
    <p>年龄:{{ age }}</p>
    <p>居住地:{{ location }}</p>
  </div>
</template>

<script>
export default {
  data() {
    return {
      name: 'aini',
      age: 23,
      location: '上海'
    };
  }
};
</script>

<style scoped>
h3 {
  color: #333;
}
</style>
父组件代码:
<!-- ParentComponent.vue -->
<template>
  <div>
    <button @click="loadComponent = !loadComponent">
      {{ loadComponent ? '卸载个人信息组件' : '加载个人信息组件' }}
    </button>

    <Suspense v-if="loadComponent">
      <!-- 异步加载的 InfoComponent 组件 -->
      <template #default>
        <AsyncInfoComponent />
      </template>

      <!-- 加载时的占位符内容 -->
      <template #fallback>
        <p>加载中,请稍候...</p>
      </template>
    </Suspense>
  </div>
</template>

<script>
import { defineAsyncComponent } from 'vue';

const AsyncInfoComponent = defineAsyncComponent(() =>
  import('@/components/InfoComponent.vue')
);

export default {
  components: {
    AsyncInfoComponent
  },
  data() {
    return {
      loadComponent: false  // 控制是否加载 InfoComponent
    };
  }
};
</script>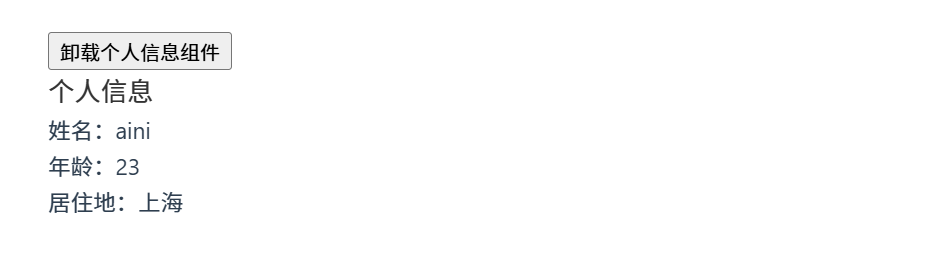
解释:
- 父组件使用
<Suspense>组件管理AsyncInfoComponent异步加载时的状态。 #fallback插槽提供了加载期间的占位内容 “加载中,请稍候...”。- 当异步组件加载完成后,
#default插槽中的AsyncInfoComponent被渲染。
在 Vue 3 中,引入了 app 实例,用于注册全局组件、全局指令以及全局混入。这些全局 API 提供了更加模块化和清晰的全局配置方式。
4.4 全局 API 与组件注册(Vue 3 新增)
在 Vue 3 中,通过 createApp 创建应用实例,并使用 app.component、app.directive 和 app.mixin 注册全局组件、指令和混入。
4.4.1 app.component 注册全局组件
app.component 方法用于注册全局组件,使其在整个应用中任何地方都可以使用。
示例代码:
子组件代码(放在 @/components/GlobalComponent.vue):
<!-- GlobalComponent.vue -->
<template>
  <div>
    <p>这是一个全局组件。</p>
  </div>
</template>

<script>
export default {
  name: 'GlobalComponent'
};
</script>

<style scoped>
p {
  color: #42b983;
  font-size: 16px;
}
</style>
main.js 中的全局注册:
// main.js
import { createApp } from 'vue';
import App from './App.vue';
import GlobalComponent from '@/components/GlobalComponent.vue';

const app = createApp(App);

// 使用 app.component 注册全局组件
app.component('GlobalComponent', GlobalComponent);

app.mount('#app');
使用全局组件:
在任何其他组件中都可以直接使用 GlobalComponent:
<!-- ParentComponent.vue -->
<template>
  <div>
    <GlobalComponent />
  </div>
</template>

<script>
export default {};
</script>
解释:
- 通过
app.component方法注册GlobalComponent,可以在应用的任何地方使用它,无需在局部注册。
4.4.2 app.directive 注册全局指令
app.directive 用于定义全局自定义指令,可以在任何组件中使用。指令通常用于操作 DOM,例如自动聚焦、元素高亮等。
示例代码:
在 main.js 中注册全局指令:
// main.js
import { createApp } from 'vue';
import App from './App.vue';

const app = createApp(App);

// 定义一个全局指令 v-focus,用于让元素自动获得焦点
app.directive('focus', {
  mounted(el) {
    el.focus();
  }
});

app.mount('#app');
在组件中使用全局指令:
<!-- ParentComponent.vue -->
<template>
  <div>
    <input v-focus placeholder="自动获得焦点的输入框" />
  </div>
</template>

<script>
export default {};
</script>
解释:
v-focus是一个全局指令,用于自动聚焦输入框。在任何组件中添加v-focus,该输入框都会在挂载时自动获得焦点。
4.4.3 app.mixin 全局混入
app.mixin 可以将公共的逻辑混入到所有组件中,适合重复使用的生命周期钩子、方法或数据。需要谨慎使用,因为混入会影响所有组件的行为。
示例代码:
在 main.js 中注册全局混入:
// main.js
import { createApp } from 'vue';
import App from './App.vue';

const app = createApp(App);

// 全局混入,向所有组件添加 `created` 钩子和一个 `globalMethod` 方法
app.mixin({
  created() {
    console.log('全局混入的 created 钩子');
  },
  methods: {
    globalMethod() {
      console.log('这是一个全局方法');
    }
  }
});

app.mount('#app');
在组件中使用全局混入:
<!-- ParentComponent.vue -->
<template>
  <div>
    <button @click="globalMethod">调用全局方法</button>
  </div>
</template>

<script>
export default {
  created() {
    console.log('ParentComponent 的 created 钩子');
  }
};
</script>
解释:
- 全局混入在应用内的所有组件中生效,
created钩子会在每个组件实例化时触发,并执行全局混入的逻辑。 - 组件可以直接调用全局混入的
globalMethod方法,因为它会自动添加到组件的实例中。
5. 组件间通信
Vue 提供了多种方式在组件之间传递数据和事件,包括 props、emit、provide 和 inject 等。不同的通信方式适用于不同的组件关系和需求。
5.1 props 和 emit 实现父子通信
在 Vue 中,父子组件之间的数据通信通常通过 props 和 emit 来实现。props 用于父组件向子组件传递数据,而 emit 用于子组件向父组件发送事件通知。
父组件通过 props 向子组件传递数据
父组件通过 props 将数据传递给子组件,子组件需要在 props 选项中声明接收的数据。
父组件代码:
<!-- ParentComponent.vue -->
<template>
  <div>
    <ChildComponent message="你好,我是父组件传递的数据" />
  </div>
</template>

<script>
import ChildComponent from '@/components/ChildComponent.vue';

export default {
  components: {
    ChildComponent
  }
};
</script>
子组件代码(放在 @/components/ChildComponent.vue):
<!-- ChildComponent.vue -->
<template>
  <div>
    <p>子组件接收到的消息:{{ message }}</p>
  </div>
</template>

<script>
export default {
  props: {
    message: {
      type: String,
      required: true
    }
  }
};
</script>
解释:
- 父组件
ParentComponent使用message属性将字符串"你好,我是父组件传递的数据"传递给子组件ChildComponent。 - 子组件
ChildComponent通过props接收message,并在模板中显示出来。
子组件通过 emit 向父组件发送事件
子组件可以使用 $emit 方法触发事件,并将数据传递给父组件。父组件可以通过监听该事件来处理子组件的反馈。
父组件代码:
<!-- ParentComponent.vue -->
<template>
  <div>
    <ChildComponent @custom-event="handleCustomEvent" />
    <p>来自子组件的消息:{{ receivedMessage }}</p>
  </div>
</template>

<script>
import ChildComponent from '@/components/ChildComponent.vue';

export default {
  components: {
    ChildComponent
  },
  data() {
    return {
      receivedMessage: ''
    };
  },
  methods: {
    handleCustomEvent(message) {
      this.receivedMessage = message;
    }
  }
};
</script>
子组件代码(放在 @/components/ChildComponent.vue):
<!-- ChildComponent.vue -->
<template>
  <div>
    <button @click="sendMessage">发送消息给父组件</button>
  </div>
</template>

<script>
export default {
  methods: {
    sendMessage() {
      this.$emit('custom-event', '子组件的消息');
    }
  }
};
</script>
解释:
- 子组件
ChildComponent通过this.$emit('custom-event', '子组件的消息')触发自定义事件custom-event,并传递消息内容。 - 父组件
ParentComponent监听custom-event,并在handleCustomEvent方法中接收并处理子组件传递的消息。
5.2 provide 和 inject 实现祖孙通信
在 Vue 中,provide 和 inject 用于跨级组件通信,尤其适合需要在祖先和后代组件之间传递数据的情况。祖先组件使用 provide 提供数据,后代组件使用 inject 接收数据。
祖先组件使用 provide 提供数据
祖先组件通过 provide 选项提供数据,后代组件可以通过 inject 选项接收数据。这种方式适用于复杂的组件层级结构中避免层层传递 props 的情况。
祖先组件代码:
<!-- AncestorComponent.vue -->
<template>
  <div>
    <p>我是祖先组件,提供了全局数据。</p>
    <ParentComponent />
  </div>
</template>

<script>
import ParentComponent from '@/components/ParentComponent.vue';

export default {
  components: {
    ParentComponent
  },
  provide() {
    return {
      sharedInfo: '来自祖先组件的共享数据'
    };
  }
};
</script>
父组件代码(不使用 provide 或 inject,只作为中间组件):
<!-- ParentComponent.vue -->
<template>
  <div>
    <p>我是父组件。</p>
    <ChildComponent />
  </div>
</template>

<script>
import ChildComponent from '@/components/ChildComponent.vue';

export default {
  components: {
    ChildComponent
  }
};
</script>
子组件代码(放在 @/components/ChildComponent.vue):
别忘了最后在App.js里引入组件组件
<template>
  <div>
    <p>我是APP</p>
    <ChildComponent />
  </div>
</template>

<script>
import AncestorComponent from '@/components/AncestorComponent.vue'

export default {
  components: {
    AncestorComponent
  }
}
</script>
<!-- ChildComponent.vue -->
<template>
  <div>
    <p>我是子组件,接收到祖先组件的消息:{{ sharedInfo }}</p>
  </div>
</template>

<script>
export default {
  inject: ['sharedInfo']
};
</script>
解释:
- 祖先组件
AncestorComponent使用provide提供sharedInfo数据,值为"来自祖先组件的共享数据"。 - 子组件
ChildComponent使用inject接收sharedInfo,并在模板中展示。 - 这种方式实现了跨级传递数据,避免了中间
ParentComponent的props传递,提升了代码简洁性。
使用 Composition API 的 provide 和 inject
在 Vue 3 中,provide 和 inject 可以在 Composition API 中使用,灵活性更高。
祖先组件代码:
<!-- AncestorComponent.vue -->
<template>
  <div>
    <p>我是祖先组件,使用 Composition API 提供数据。</p>
    <ParentComponent />
  </div>
</template>

<script setup>
import { provide } from 'vue';
import ParentComponent from '@/components/ParentComponent.vue';

const sharedInfo = '来自祖先组件的共享数据 (Composition API)';
provide('sharedInfo', sharedInfo);
</script>
子组件代码:
<!-- ChildComponent.vue -->
<template>
  <div>
    <p>我是子组件,接收到祖先组件的消息:{{ sharedInfo }}</p>
  </div>
</template>

<script setup>
import { inject } from 'vue';

const sharedInfo = inject('sharedInfo');
</script>
解释:
- 在 Composition API 中,
provide和inject更加简洁:祖先组件使用provide函数提供数据,后代组件使用inject函数接收数据。 - 这种方式在大型项目中更加灵活,适合复杂的祖孙组件通信需求。
总结
- 父子通信 (
props和emit):父组件通过props向子组件传递数据,子组件通过emit向父组件发送事件,适用于直接的父子通信。 - 祖孙通信 (
provide和inject):祖先组件使用provide提供数据,后代组件通过inject接收数据,适合跨层级的组件通信,避免了层层props传递。
好的,下面是关于 Vue 中事件总线(使用 mitt)和状态管理工具(Vuex 和 Pinia)的详细讲解。事件总线可以在没有父子关系的组件之间传递事件,而 Vuex 和 Pinia 则用于全局状态管理,适合管理复杂的应用状态。
5.3 事件总线与 mitt 的使用
在 Vue 3 中,mitt 是一个轻量级的事件总线库,可以在没有直接关系的组件之间传递事件。例如在兄弟组件或隔层组件之间,可以使用事件总线实现通信。
使用 mitt 创建事件总线
安装
mitt:在项目根目录中运行以下命令:

npm install mitt创建事件总线实例:
在项目中创建一个事件总线实例,可以在项目根目录下新建一个文件,例如
eventBus.js:
// src/eventBus.js import mitt from 'mitt'; const eventBus = mitt(); export default eventBus;在组件中使用事件总线:
发送事件:在一个组件中使用
eventBus.emit发送事件。父组件代码(发送事件的组件):
<!-- SenderComponent.vue --> <template> <button @click="sendMessage">发送消息</button> <ReceiverComponent /> </template> <script> import eventBus from '@/eventBus' import ReceiverComponent from '@/components/ReceiverComponent.vue' export default { components: { ReceiverComponent // 需要在顶层定义 components }, methods: { sendMessage() { eventBus.emit('custom-event', '你好,这是从 SenderComponent 发送的消息') } } } </script>接收事件:在另一个组件中使用
eventBus.on监听事件。子组件代码(接收事件的组件):
<!-- ReceiverComponent.vue -->
<template>
  <div>
    <p>接收到的消息:{{ message }}</p>
  </div>
</template>

<script>
import { onMounted, onUnmounted, ref } from 'vue'
import eventBus from '@/eventBus'

export default {
  setup() {
    const message = ref('')

    const handleEvent = (msg) => {
      message.value = msg
    }

    onMounted(() => {
      eventBus.on('custom-event', handleEvent)
    })

    onUnmounted(() => {
      eventBus.off('custom-event', handleEvent)
    })

    return { message }
  }
}
</script>
解释:
SenderComponent使用eventBus.emit发送custom-event事件,并传递消息。ReceiverComponent使用eventBus.on监听custom-event事件,并在接收到消息后更新message。onUnmounted钩子中移除事件监听,避免内存泄漏。
5.4 状态管理工具(Vuex 与 Pinia)
Vuex 和 Pinia 是 Vue 中的状态管理工具,适用于管理应用中的全局状态。Vuex 是 Vue 2 和 Vue 3 通用的状态管理库,而 Pinia 是 Vue 3 推荐的状态管理库,具有更灵活的 API。
使用 Vuex 进行状态管理
安装 Vuex:
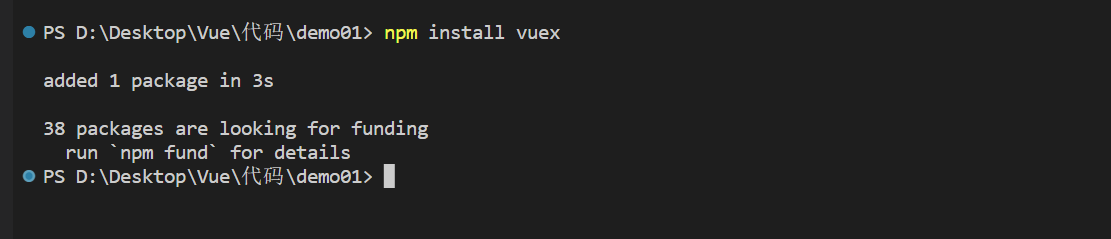
npm install vuex配置 Vuex:
在项目中创建
store文件夹,并创建index.js文件以初始化 Vuex。// src/store/index.js import { createStore } from 'vuex'; export default createStore({ state: { userName: 'aini' }, mutations: { setUserName(state, name) { state.userName = name; } }, actions: { updateUserName({ commit }, name) { commit('setUserName', name); } }, getters: { userName: (state) => state.userName } });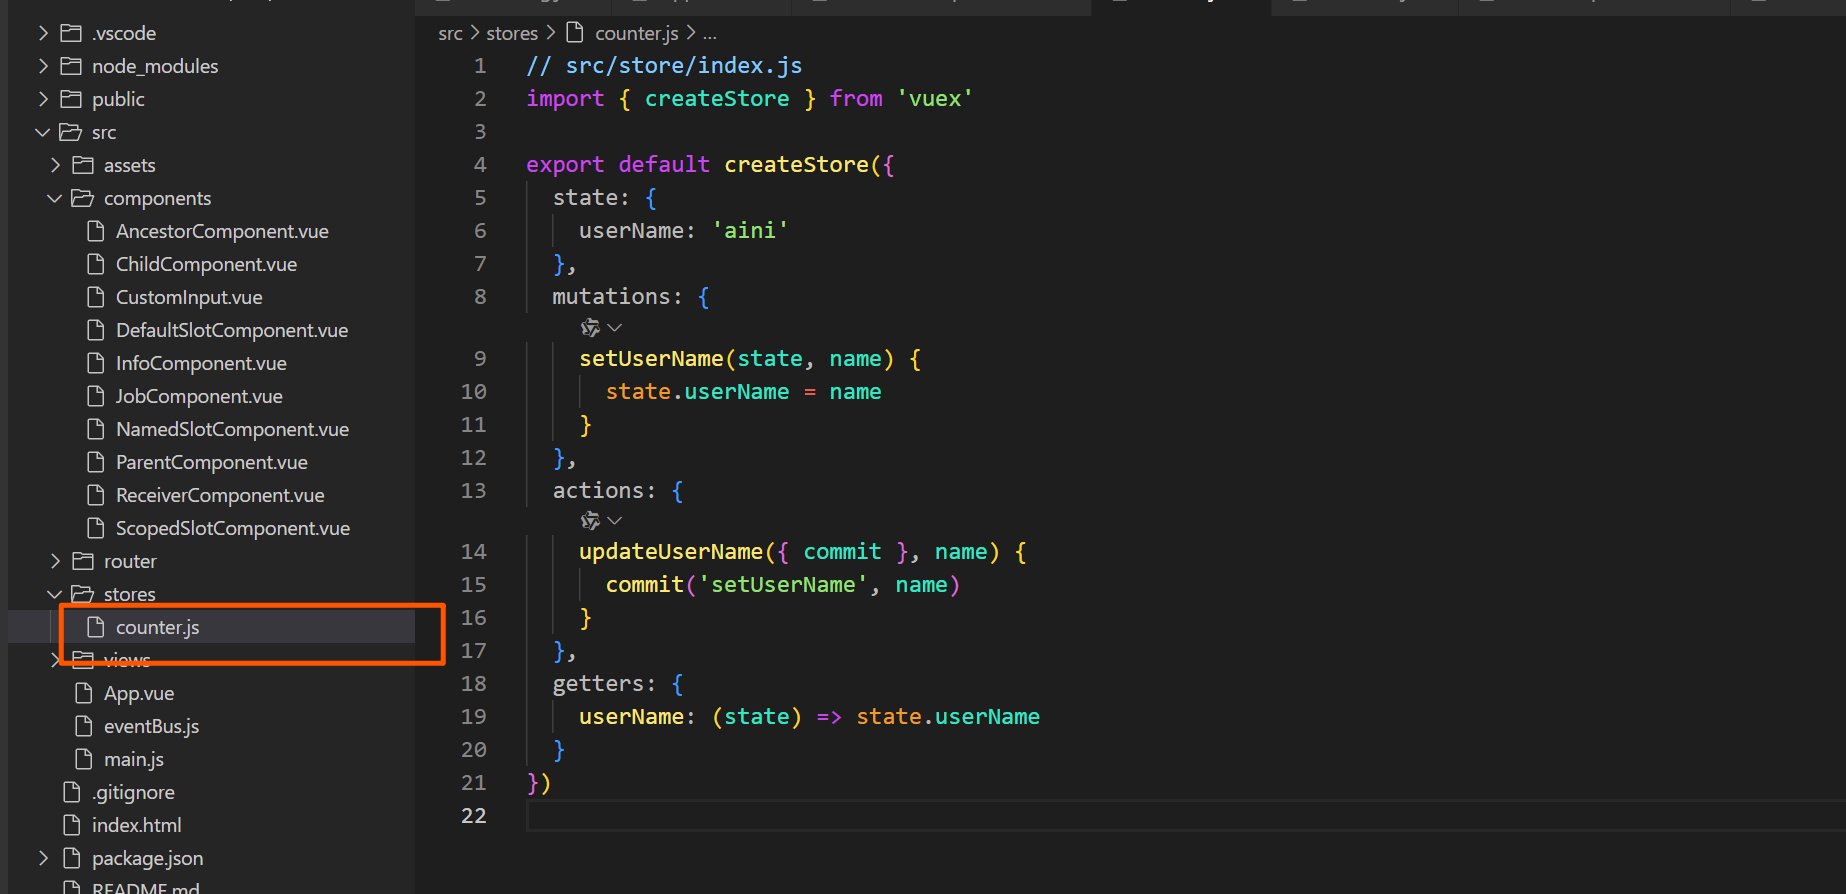
在
main.js中注册 Vuex: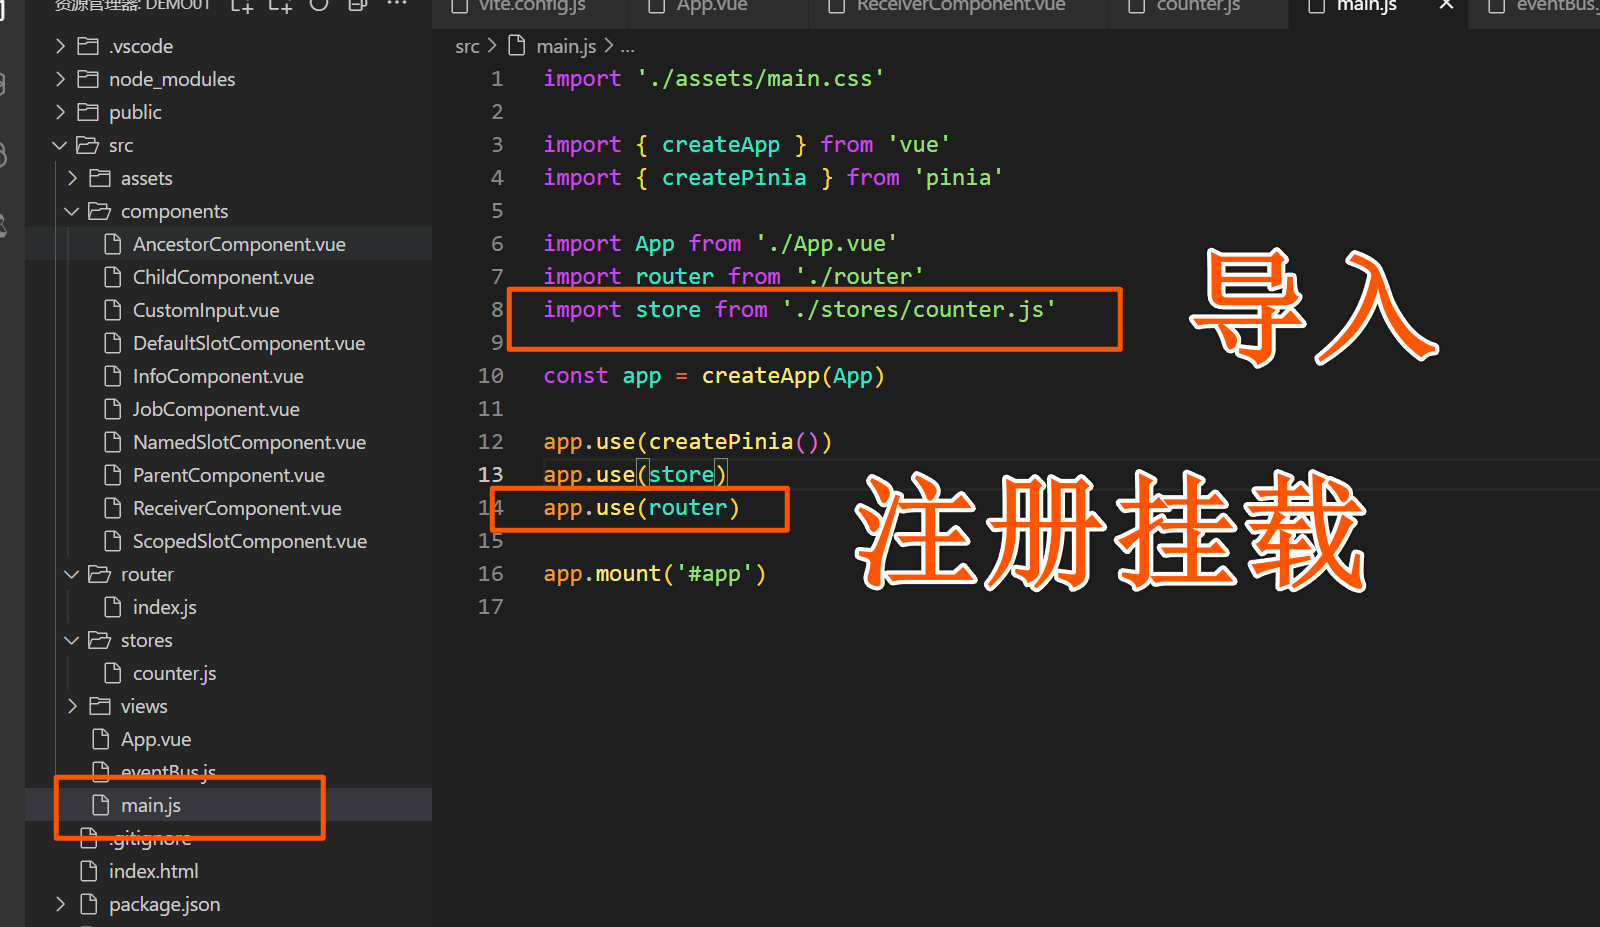
// main.js
import { createApp } from 'vue';
import App from './App.vue';
import store from './stores';

const app = createApp(App);
app.use(store);
app.mount('#app');
在组件中使用 Vuex:
可以在App.js根组价中使用
<!-- UserComponent.vue -->
<template>
  <div>
    <p>用户名:{{ userName }}</p>
    <input v-model="newName" placeholder="输入新用户名" />
    <button @click="changeUserName">修改用户名</button>
  </div>
</template>

<script>
import { computed, ref } from 'vue';
import { useStore } from 'vuex';

export default {
  setup() {
    const store = useStore();
    const newName = ref('');

    const userName = computed(() => store.getters.userName);

    const changeUserName = () => {
      store.dispatch('updateUserName', newName.value);
      newName.value = '';
    };

    return { userName, newName, changeUserName };
  }
};
</script>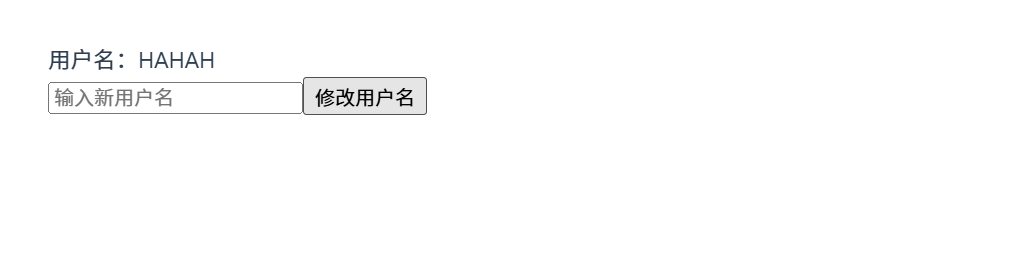
解释:
- 使用
store.getters.userName获取 Vuex 的userName状态。 - 使用
store.dispatch('updateUserName', newName.value)触发 action 修改用户名。
- 使用
5.5 使用 Pinia 进行状态管理
Pinia 是 Vue 3 推荐的状态管理库,API 更简洁易用。
安装 Pinia:
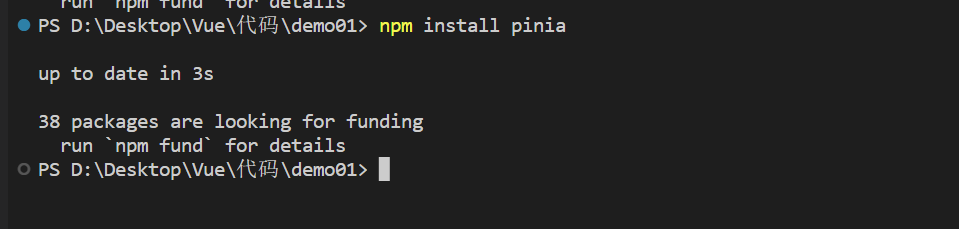
npm install pinia配置 Pinia:
创建
stores文件夹,并新建userStore.js文件定义状态管理。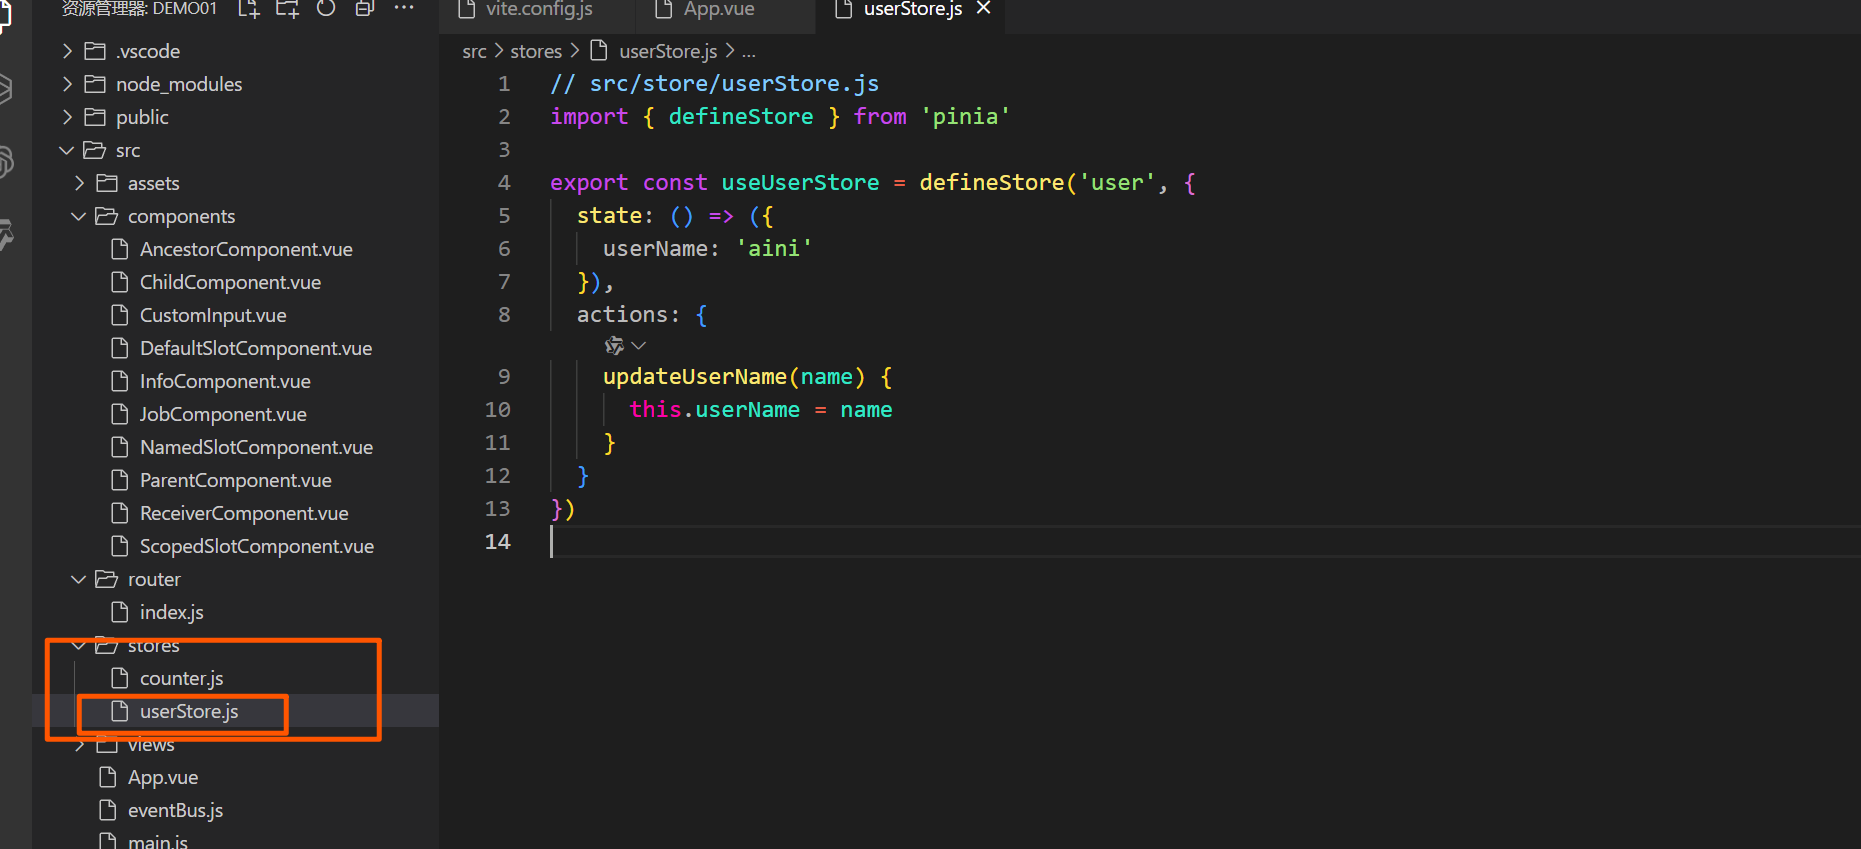
// src/store/userStore.js
import { defineStore } from 'pinia';

export const useUserStore = defineStore('user', {
  state: () => ({
    userName: 'aini'
  }),
  actions: {
    updateUserName(name) {
      this.userName = name;
    }
  }
});
在
main.js中注册 Pinia: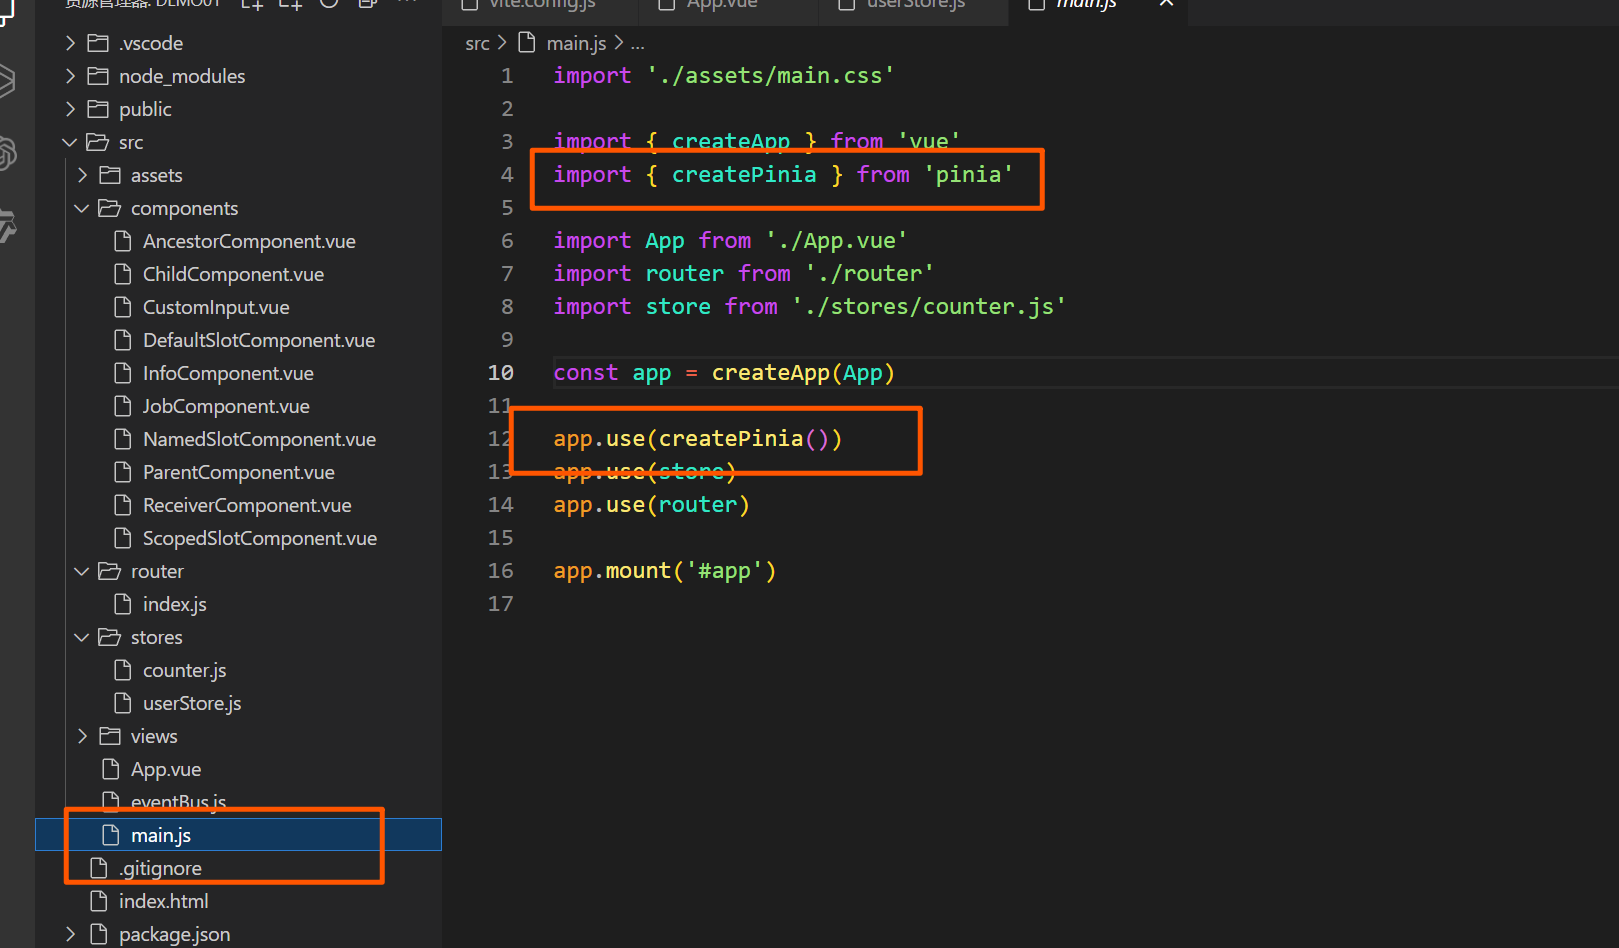
// main.js
import { createApp } from 'vue';
import App from './App.vue';
import { createPinia } from 'pinia';

const app = createApp(App);
app.use(createPinia());
app.mount('#app');
在组件中使用 Pinia:
<!-- UserComponent.vue -->
<template>
  <div>
    <p>用户名:{{ userName }}</p>
    <input v-model="newName" placeholder="输入新用户名" />
    <button @click="changeUserName">修改用户名</button>
  </div>
</template>

<script>
import { computed, ref } from 'vue'
import { useUserStore } from '@/stores/userStore.js'

export default {
  setup() {
    const userStore = useUserStore()
    const newName = ref('')

    const userName = computed(() => userStore.userName)

    const changeUserName = () => {
      userStore.updateUserName(newName.value)
      newName.value = ''
    }

    return { userName, newName, changeUserName }
  }
}
</script>
解释:
- 使用
useUserStore获取 Pinia 的userName状态。 - 调用
userStore.updateUserName修改userName状态。
- 使用
6. Vue Router 路由
Vue Router 是 Vue 官方的路由管理库,用于在 Vue 单页应用 (SPA) 中实现页面导航和 URL 管理。它支持嵌套路由、动态路由、路由守卫等强大功能。
6.1 Vue Router 基础
6.1.1 安装 Vue Router
在使用 Vue 3 创建的项目中,可以通过以下命令安装 Vue Router:

npm install vue-router6.1.2 创建路由实例与路由配置
创建路由配置文件
在项目根目录的
src文件夹下,创建router/index.js文件,用于定义和配置路由。设置路由路径与页面组件
在
@/views/文件夹下创建两个页面组件Home.vue和About.vue,并在@/assets/文件夹中放入一张图片demo.png。
@/views/Home.vue 页面组件代码:
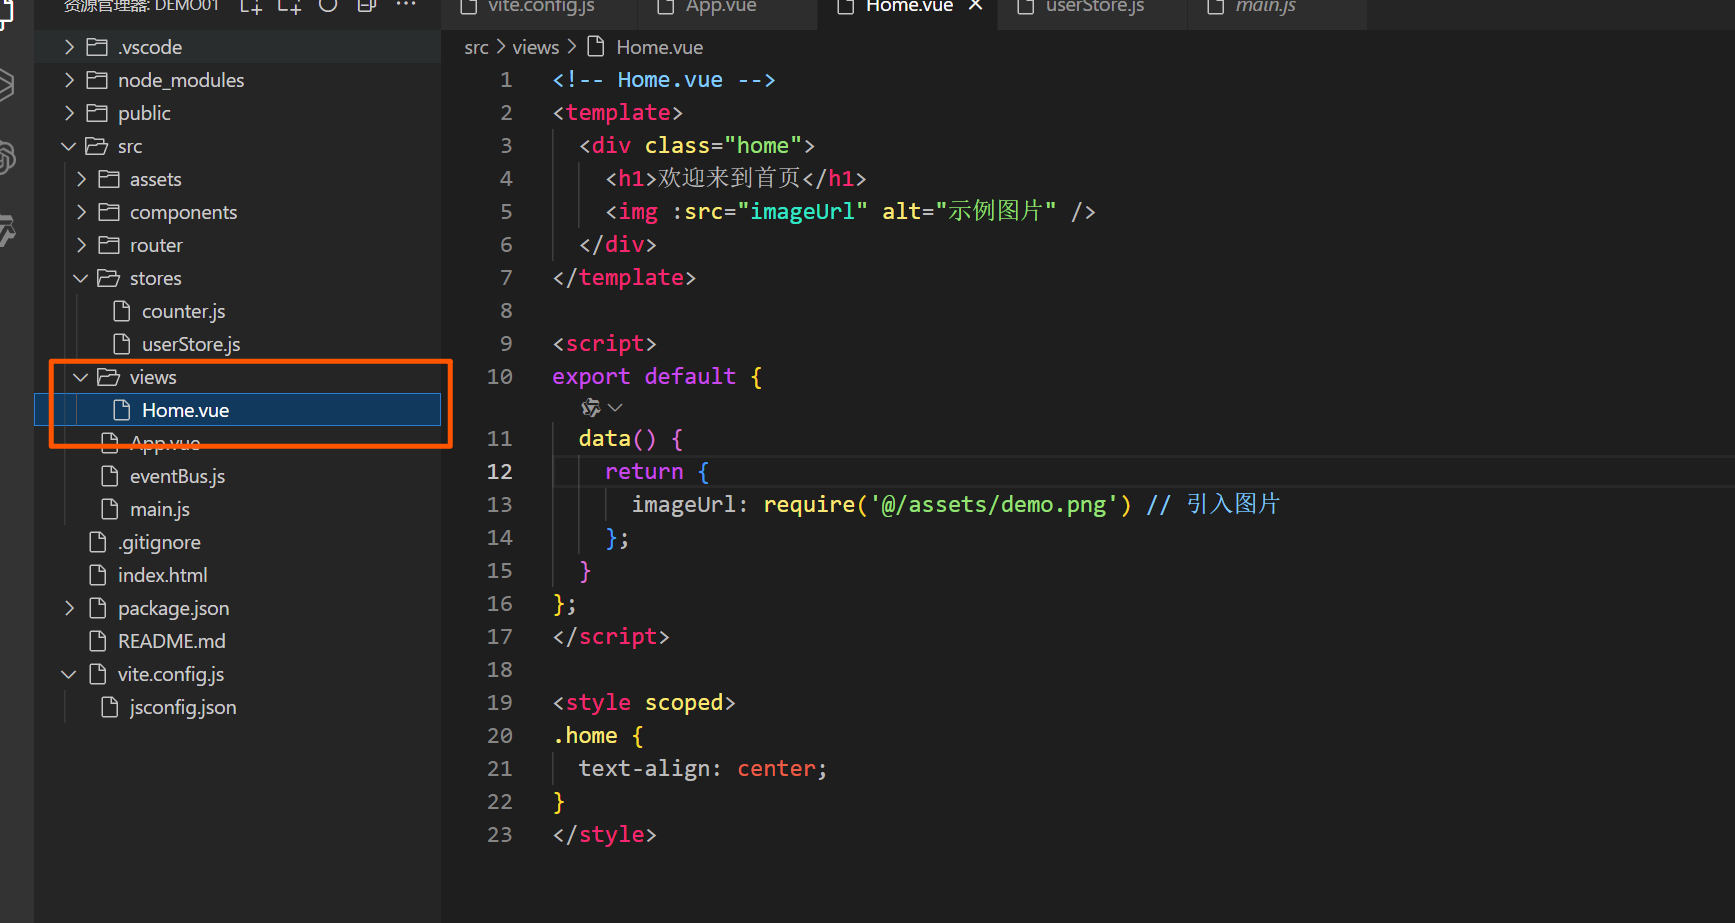
<!-- Home.vue -->
<template>
  <div class="home">
    <h1>欢迎来到首页</h1>
    <img :src="imageUrl" alt="示例图片" />
  </div>
</template>

<script>
export default {
  data() {
    return {
      imageUrl: new URL('@/assets/demo.png', import.meta.url).href // 使用 import.meta.url 加载图片
    }
  }
}
</script>

<style scoped>
.home {
  text-align: center;
}
</style>
@/views/About.vue 页面组件代码:

<!-- About.vue -->
<template>
  <div class="about">
    <h1>关于我们</h1>
    <p>我们是一家专注于前端开发的公司,致力于提供优质的开发服务。</p>
  </div>
</template>

<script>
export default {};
</script>

<style scoped>
.about {
  text-align: center;
}
</style>
配置路由
在
router/index.js文件中,配置路由路径及对应的组件。
@/router/index.js 文件代码:
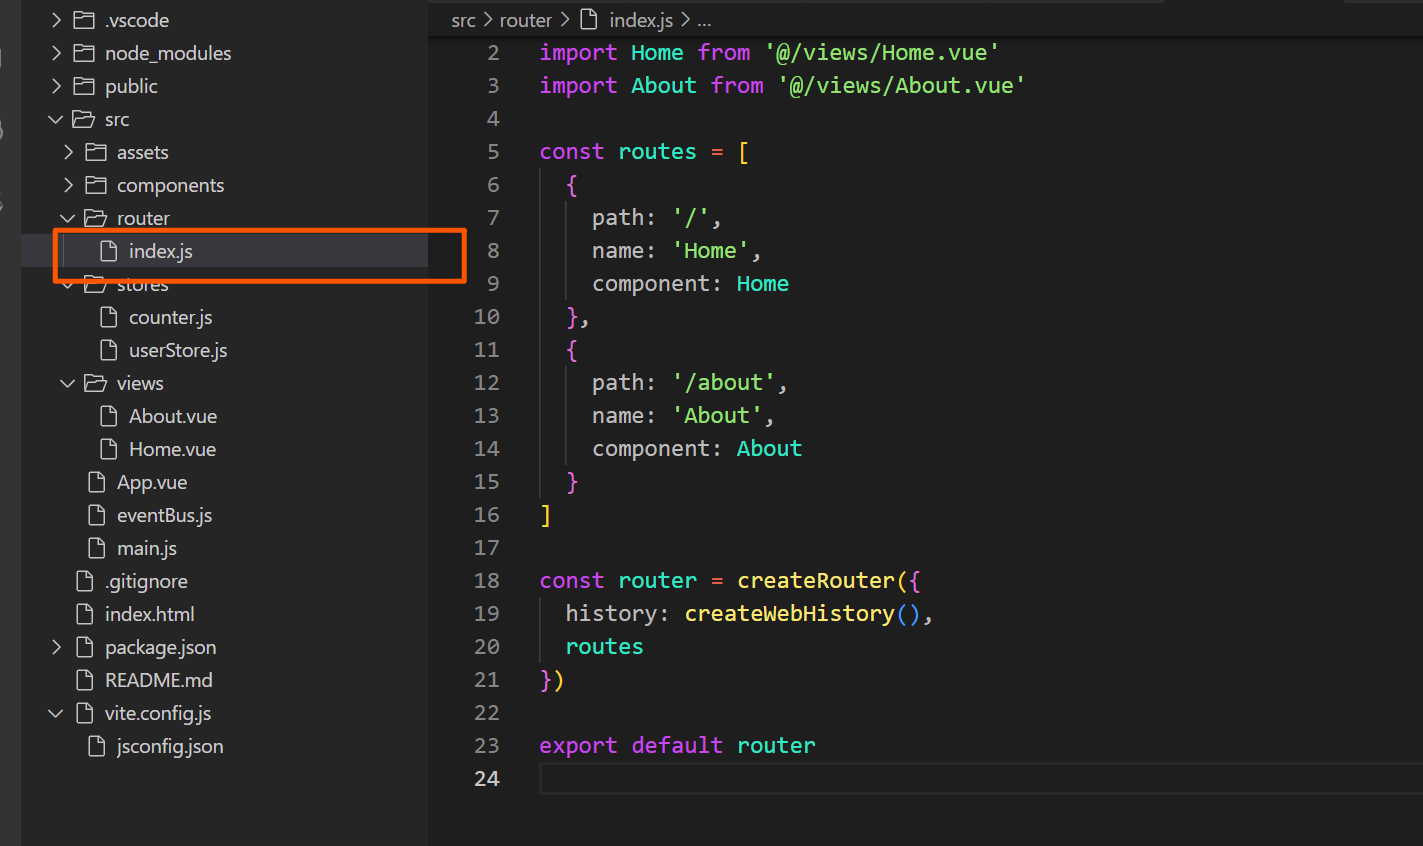
import { createRouter, createWebHistory } from 'vue-router';
import Home from '@/views/Home.vue';
import About from '@/views/About.vue';

const routes = [
  {
    path: '/',
    name: 'Home',
    component: Home
  },
  {
    path: '/about',
    name: 'About',
    component: About
  }
];

const router = createRouter({
  history: createWebHistory(),
  routes
});

export default router;
解释:
createRouter创建路由实例。routes数组定义了路由规则,每个对象表示一个路由。path是路由的访问路径,component是该路径对应的组件。createWebHistory()设置路由模式为history模式。
在
main.js中使用路由在
main.js中导入并使用router,使其生效。
main.js 文件代码:
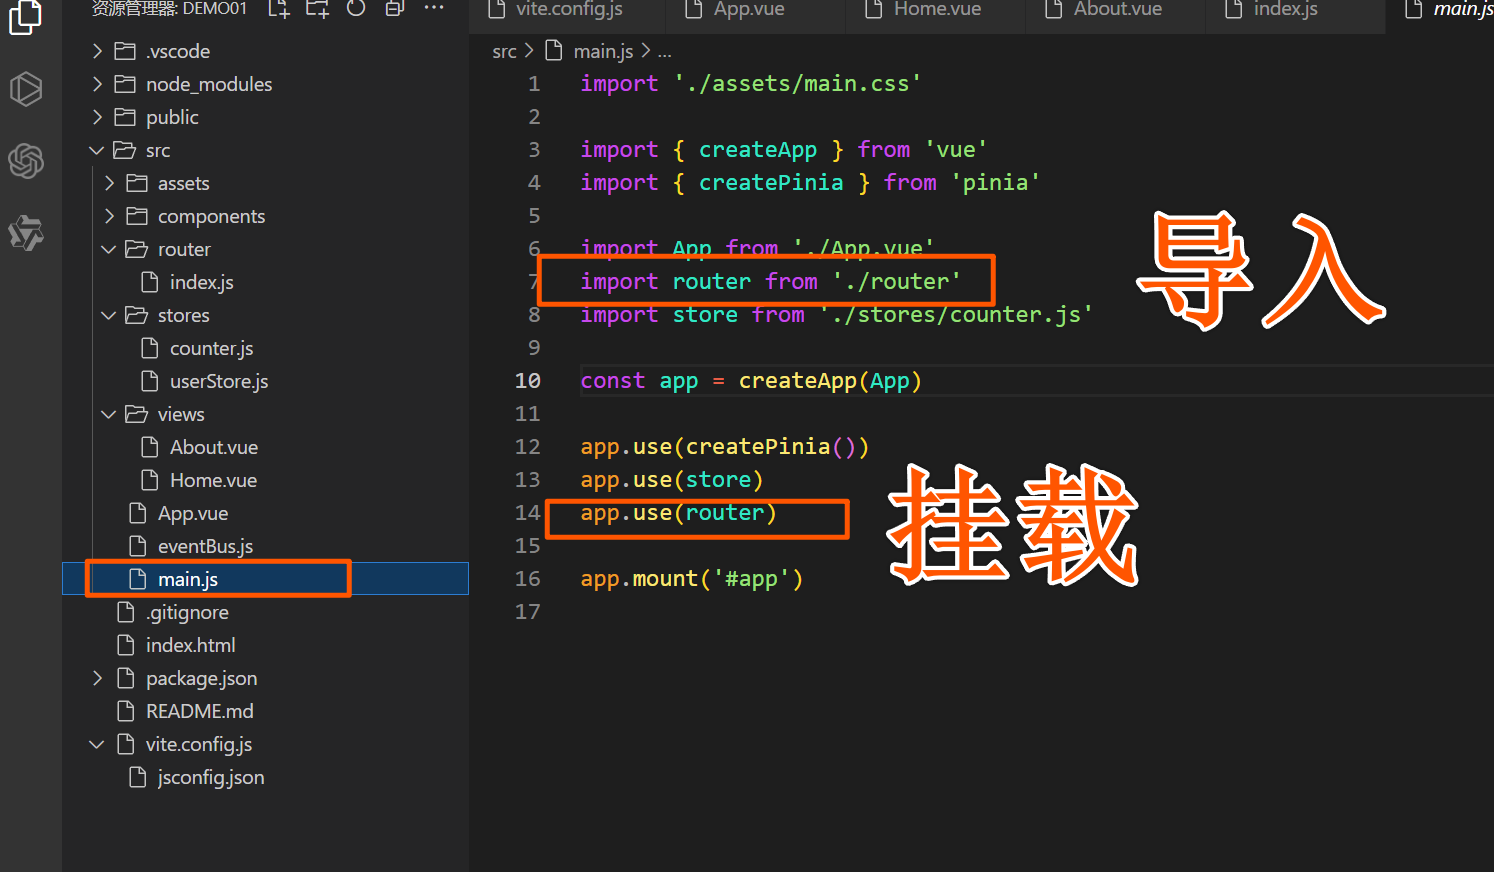
import { createApp } from 'vue';
import App from './App.vue';
import router from './router';

const app = createApp(App);
app.use(router);
app.mount('#app');
App.vue 文件代码
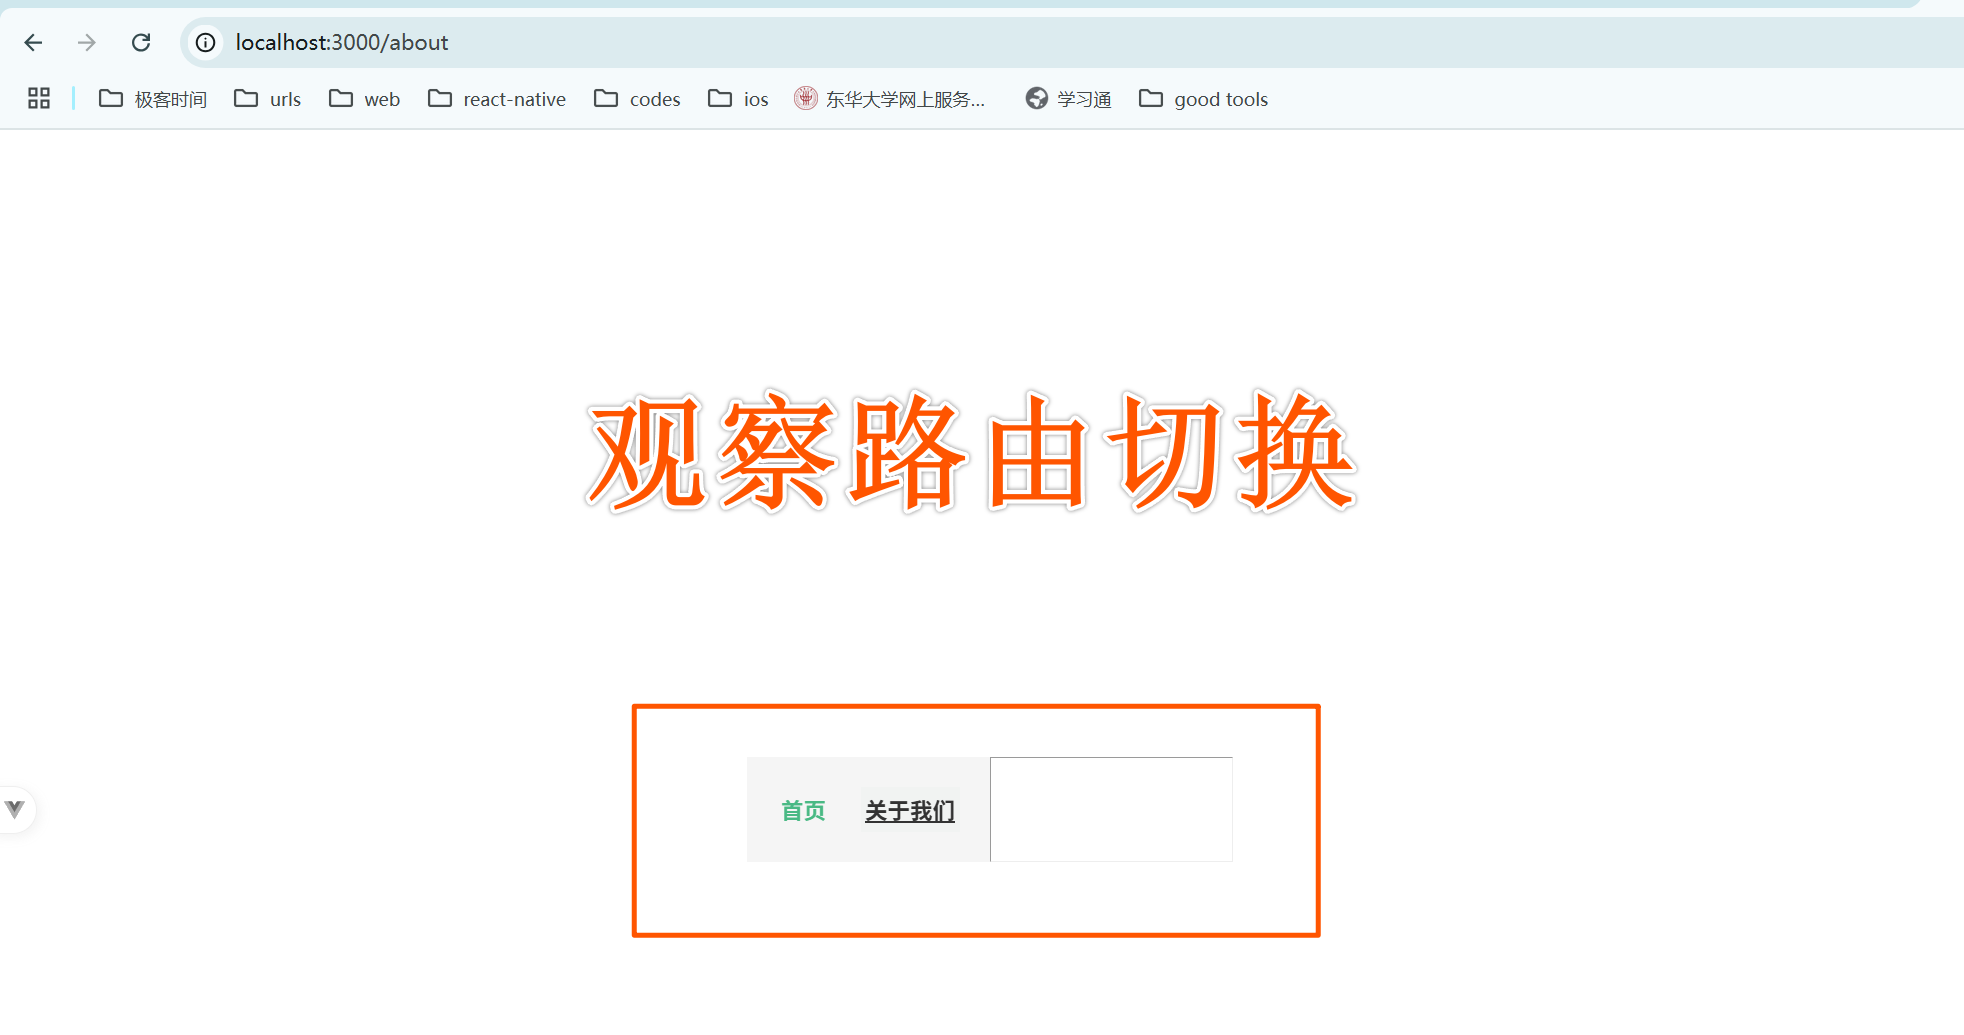
<!-- App.vue -->
<template>
  <div id="app">
    <nav>
      <!-- 路由链接 -->
      <router-link to="/">首页</router-link>
      <router-link to="/about">关于我们</router-link>
    </nav>
    <hr />
    <!-- 路由视图 -->
    <router-view />
  </div>
</template>

<script>
export default {
  name: 'App'
}
</script>

<style scoped>
/* 简单的导航样式 */
nav {
  display: flex;
  gap: 20px;
  justify-content: center;
  padding: 20px;
  background-color: #f5f5f5;
}

nav a {
  text-decoration: none;
  color: #42b983;
  font-weight: bold;
}

nav a.router-link-active {
  color: #333;
  text-decoration: underline;
}
</style>
6.1.3 路由模式(history 与 hash)
Vue Router 提供了两种路由模式:history 模式和 hash 模式。
history模式:使用
createWebHistory(),这种模式会移除 URL 中的#,且 URL 看起来更简洁。例如/about。// router/index.js import { createRouter, createWebHistory } from 'vue-router'; const router = createRouter({ history: createWebHistory(), routes });注意:
history模式需要服务器的支持,在实际部署时需设置服务器重定向到index.html。hash模式:使用
createWebHashHistory(),这种模式在 URL 中带有#,例如/#/about,兼容性更好,但 URL 看起来不如history模式简洁。// router/index.js import { createRouter, createWebHashHistory } from 'vue-router'; const router = createRouter({ history: createWebHashHistory(), routes });选择:在开发阶段一般使用
hash模式,生产环境可以选择history模式并配置服务器。
6.1.4 动态路由与嵌套路由
动态路由:动态路由适用于带参数的页面,例如用户详情页面 /user/123。
嵌套路由:嵌套路由用于在一个页面中显示多个层级的内容,例如 /user/123/profile。
动态路由
在
router/index.js中配置动态路由,path中使用:id表示动态参数。@/views/User.vue页面组件代码:<!-- User.vue --> <template> <div> <h2>用户 ID:{{ userId }}</h2> </div> </template> <script> import { useRoute } from 'vue-router'; export default { setup() { const route = useRoute(); // 获取路由对象 const userId = route.params.id; // 获取路由参数中的用户 ID return { userId }; } }; </script> <style scoped> h2 { color: #42b983; text-align: center; } </style>router/index.js配置动态路由:// router/index.js import { createRouter, createWebHistory } from 'vue-router'; import Home from '@/views/Home.vue'; import About from '@/views/About.vue'; import User from '@/views/User.vue'; const routes = [ { path: '/', name: 'Home', component: Home }, { path: '/about', name: 'About', component: About }, { path: '/user/:id', // 动态路由,:id 表示用户 ID 参数 name: 'User', component: User } ]; const router = createRouter({ history: createWebHistory(), routes }); export default router;解释:
/user/:id中的:id是动态参数,可以通过route.params.id获取。
App.vue文件代码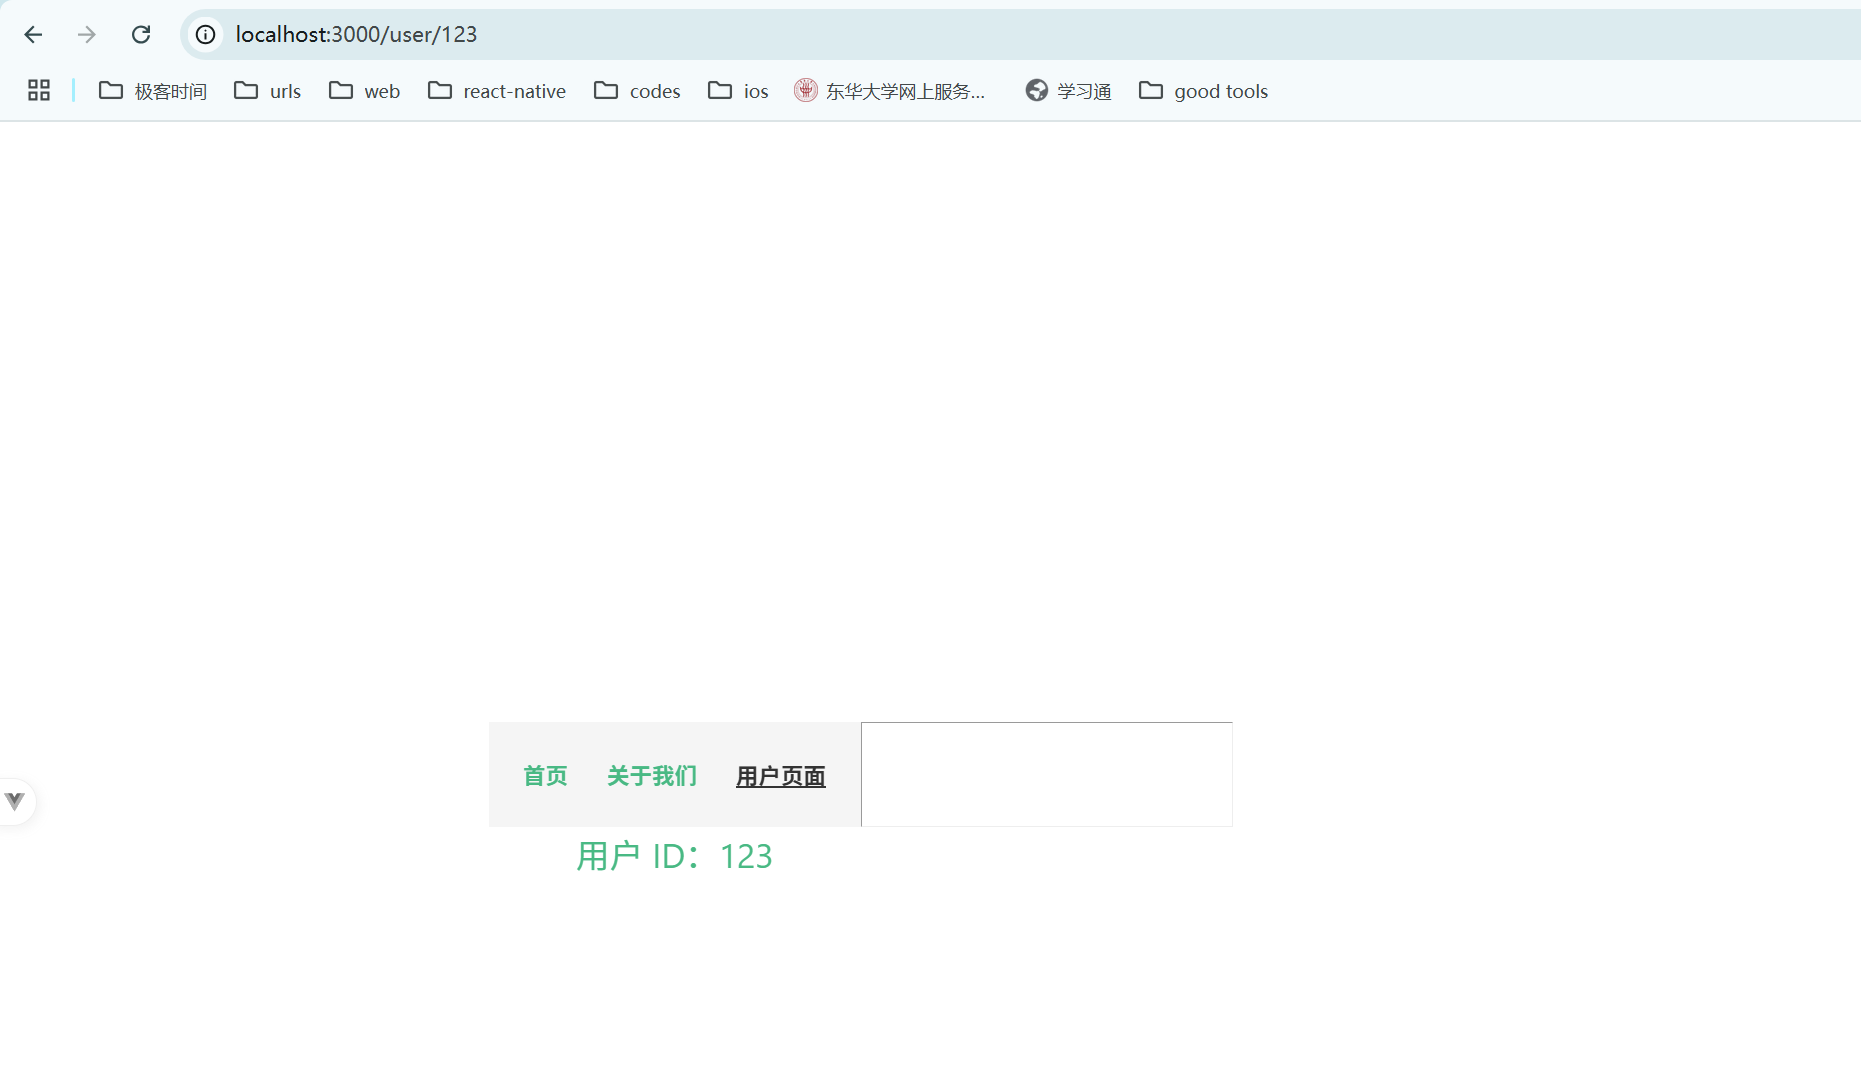
<!-- App.vue -->
<template>
  <div id="app">
    <!-- 导航链接 -->
    <nav>
      <router-link to="/">首页</router-link>
      <router-link to="/about">关于我们</router-link>
      <router-link :to="{ name: 'User', params: { id: 123 } }"
        >用户页面</router-link
      >
    </nav>
    <hr />
    <!-- 路由占位符 -->
    <router-view />
  </div>
</template>

<script>
export default {
  name: 'App'
}
</script>

<style scoped>
/* 简单的导航样式 */
nav {
  display: flex;
  gap: 20px;
  justify-content: center;
  padding: 20px;
  background-color: #f5f5f5;
}

nav a {
  text-decoration: none;
  color: #42b983;
  font-weight: bold;
}

nav a.router-link-active {
  color: #333;
  text-decoration: underline;
}
</style>
嵌套路由
为了展示嵌套路由的效果,创建两个子组件
UserProfile.vue和UserPosts.vue。@/views/UserProfile.vue代码:<!-- UserProfile.vue --> <template> <div> <h3>用户个人资料</h3> <p>这是用户的个人资料页面。</p> </div> </template> <script> export default {}; </script>@/views/UserPosts.vue代码:<!-- UserPosts.vue --> <template> <div> <h3>用户发布内容</h3> <p>这是用户发布的所有内容。</p> </div> </template> <script> export default {}; </script>在
router/index.js配置嵌套路由:import { createRouter, createWebHistory } from 'vue-router' import User from '@/views/User.vue' import UserProfile from '@/views/UserProfile.vue' import UserPosts from '@/views/UserPosts.vue' import Home from '@/views/Home.vue' import About from '@/views/About.vue' const routes = [ { path: '/', name: 'Home', component: Home }, { path: '/about', name: 'About', component: About }, { path: '/user/:id', name: 'User', component: User, children: [ { path: 'profile', name: 'UserProfile', component: UserProfile }, { path: 'posts', name: 'UserPosts', component: UserPosts } ] } ] const router = createRouter({ history: createWebHistory(), routes }) export default router在
User.vue中使用<router-view>渲染嵌套子路由:<!-- User.vue --> <template> <div> <h2>用户 ID:{{ userId }}</h2> <nav> <router-link :to="`/user/${userId}/profile`">个人资料</router-link> <router-link :to="`/user/${userId}/posts`">发布内容</router-link> </nav> <router-view /> <!-- 渲染子路由内容 --> </div> </template> <script> import { useRoute } from 'vue-router'; export default { setup() { const route = useRoute(); const userId = route.params.id; return { userId }; } }; </script>解释:
children数组定义嵌套路由,将子路由/user/:id/profile和/user/:id/posts添加到User路由下。User.vue中的<router-view>用于渲染嵌套路由的内容。
App.vue文件里的代码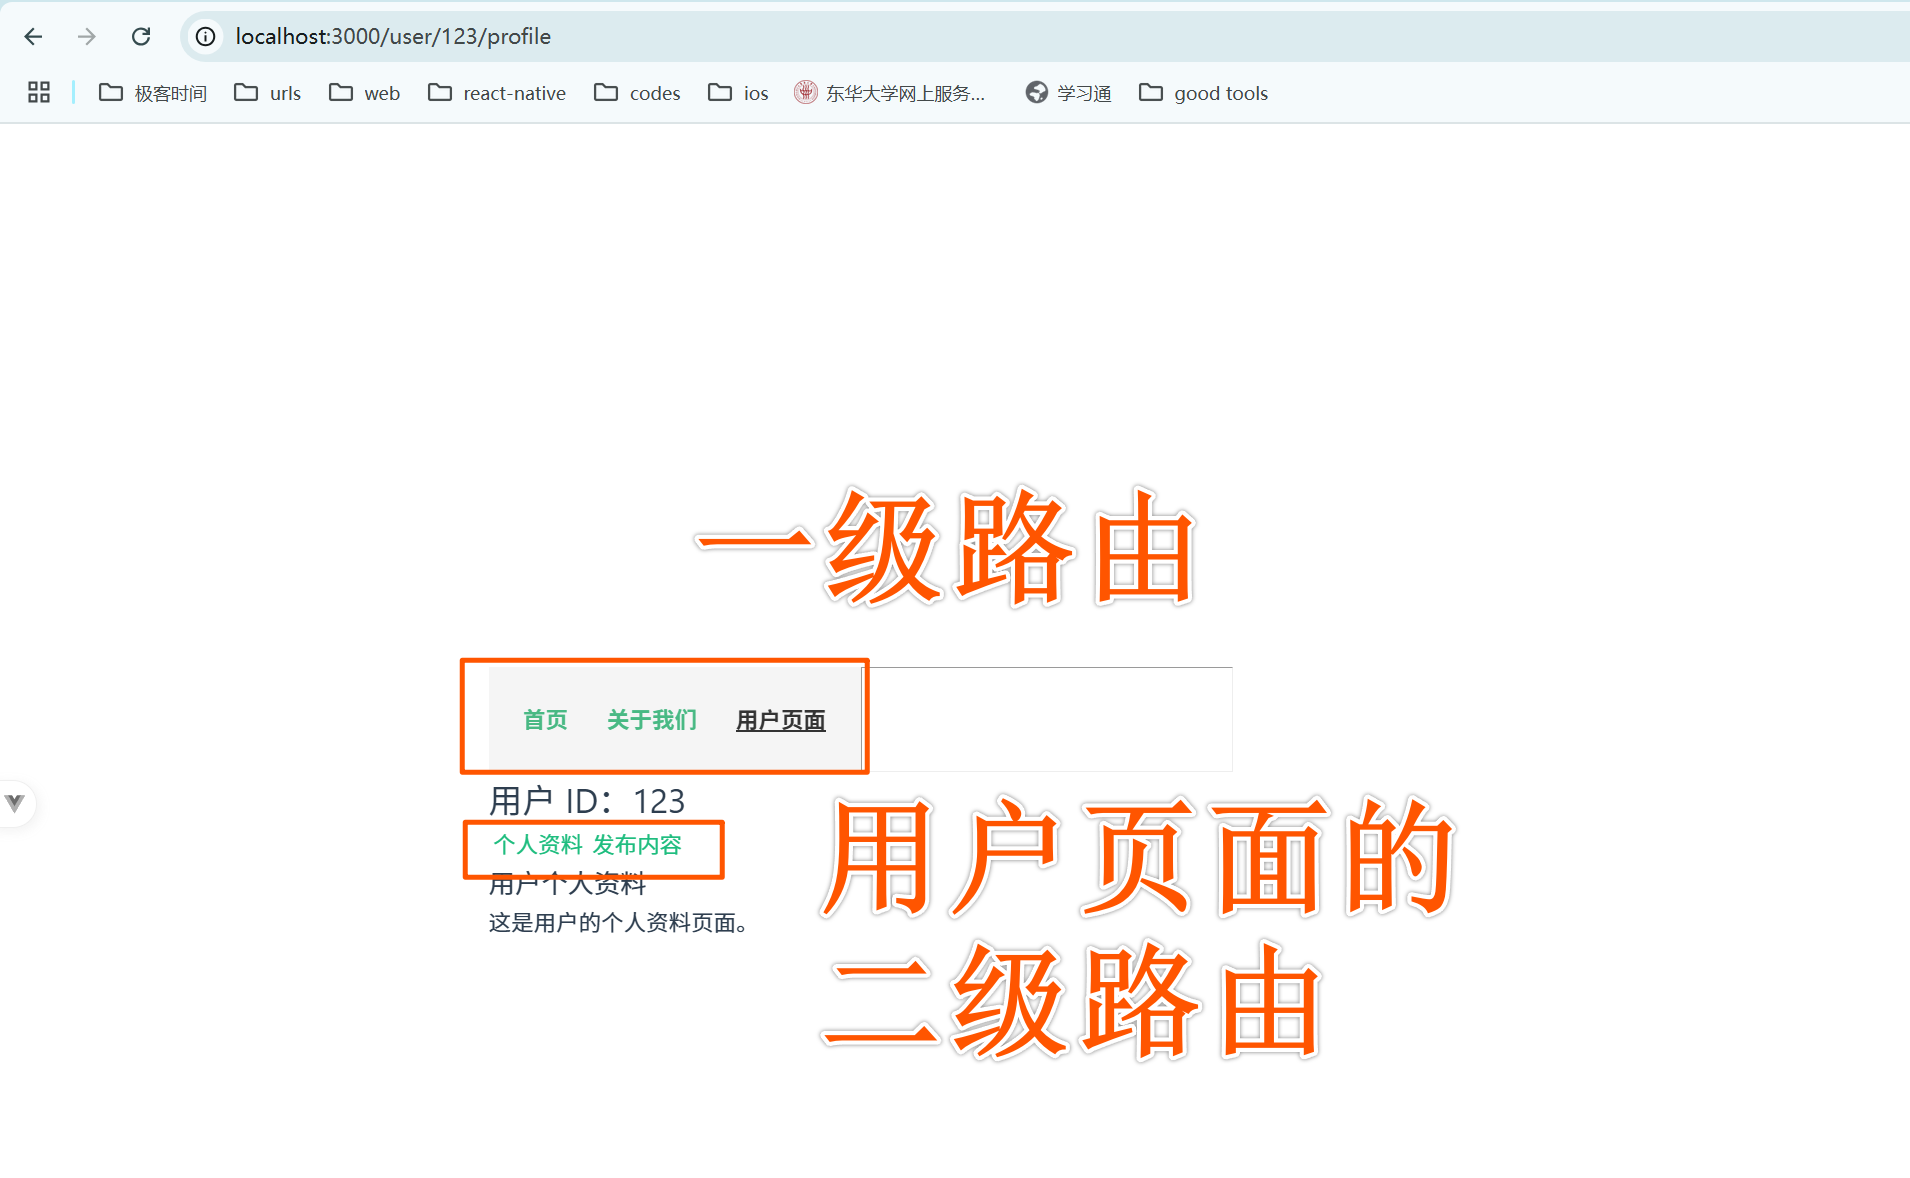
<!-- App.vue --> <template> <div id="app"> <!-- 主导航链接 --> <nav> <router-link to="/">首页</router-link> <router-link to="/about">关于我们</router-link> <!-- 指向用户页面的动态路由,传递用户 ID 为 123 --> <router-link :to="{ name: 'User', params: { id: 123 } }" >用户页面</router-link > </nav> <hr /> <!-- 路由占位符 --> <router-view /> </div> </template> <script> export default { name: 'App' } </script> <style scoped> /* 导航样式 */ nav { display: flex; gap: 20px; justify-content: center; padding: 20px; background-color: #f5f5f5; } nav a { text-decoration: none; color: #42b983; font-weight: bold; } nav a.router-link-active { color: #333; text-decoration: underline; } </style>
总结
- 安装和配置 Vue Router:安装 Vue Router,并在项目中配置基本路由。
- 路由模式:Vue
Router 提供 history 和 hash 模式,适用于不同的场景。
- 动态路由:使用
:param定义动态路由,用于显示带参数的页面。 - 嵌套路由:通过
children配置嵌套路由,使一个页面中可以显示多个层级的内容。
下面是关于 Vue Router 中的路由守卫的详细讲解,包括全局守卫、路由独享守卫和组件内的路由守卫。路由守卫用于在导航过程中执行一些逻辑,例如权限检查、数据加载或重定向。
6.2 路由守卫
Vue Router 提供了多种类型的路由守卫,以在不同阶段控制路由导航。常用的有全局守卫、路由独享守卫和组件内的路由守卫。
6.2.1 全局守卫:beforeEach 和 afterEach
全局守卫在所有路由导航之前或之后触发。适合用来做全局性的检查或重定向。
beforeEach 守卫
beforeEach 守卫在每次导航开始前触发,可以用于检查用户权限或验证登录状态。
示例:全局 beforeEach 守卫
在 router/index.js 文件中添加 beforeEach 守卫,模拟一个简单的权限控制逻辑,例如未登录用户不能访问某些页面。
// router/index.js
import { createRouter, createWebHistory } from 'vue-router';
import Home from '@/views/Home.vue';
import About from '@/views/About.vue';
import User from '@/views/User.vue';
const routes = [
{ path: '/', name: 'Home', component: Home },
{ path: '/about', name: 'About', component: About },
{ path: '/user/:id', name: 'User', component: User, meta: { requiresAuth: true } } // 需要认证的路由
];
const router = createRouter({
history: createWebHistory(),
routes
});
// 全局前置守卫
router.beforeEach((to, from, next) => {
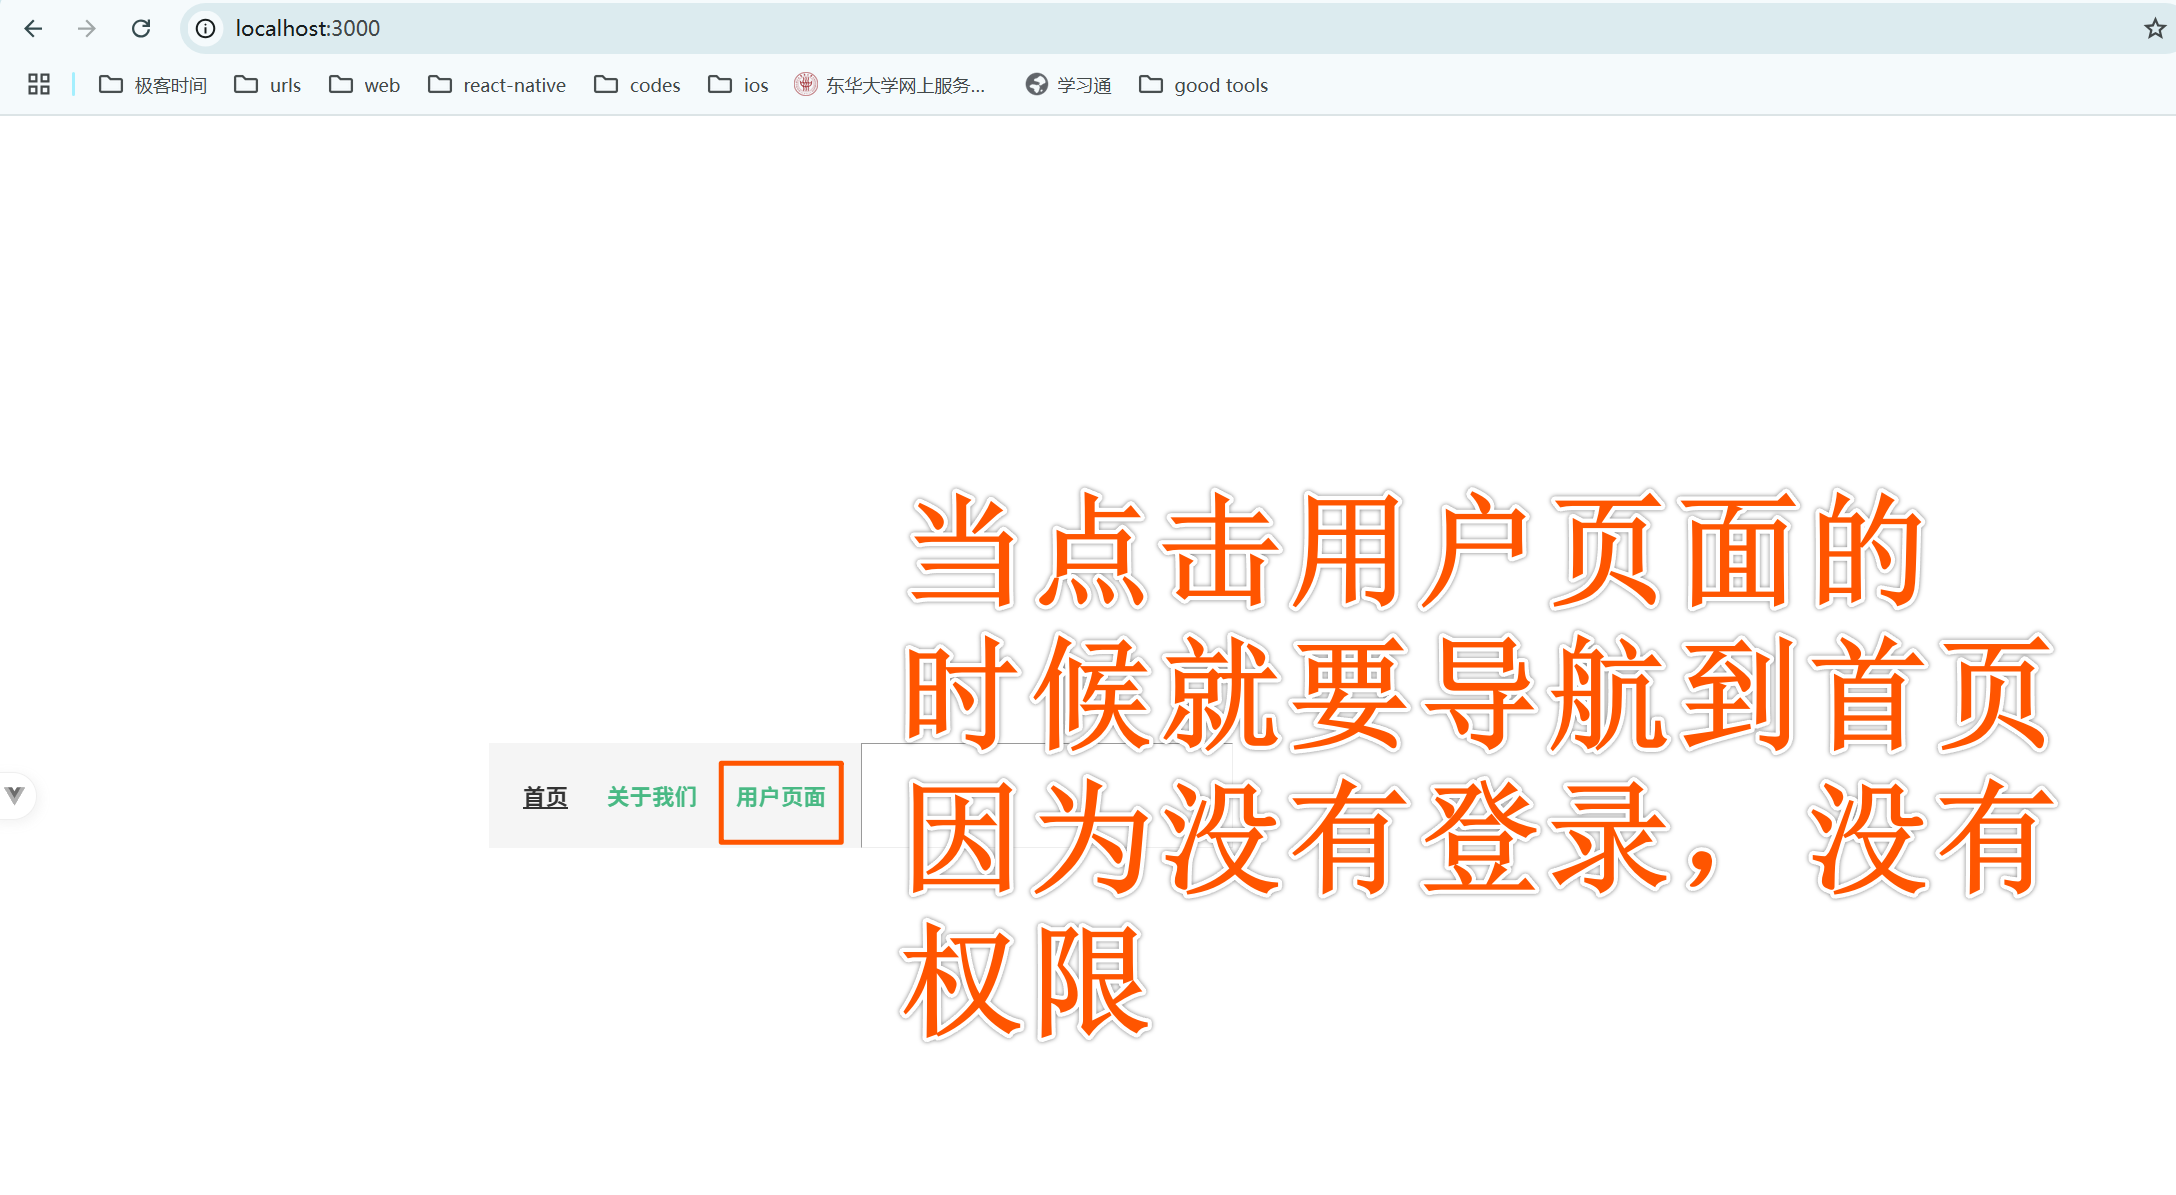
const isAuthenticated = false; // 模拟未登录状态,实际项目中应从状态管理工具(如 Vuex、Pinia)中获取
if (to.meta.requiresAuth && !isAuthenticated) {
console.log('需要登录才能访问此页面');
next({ name: 'Home' }); // 重定向到首页
} else {
next(); // 允许导航
}
});
export default router;解释:
to是目标路由对象,from是来源路由对象,next是一个函数,用于放行或拦截导航。to.meta.requiresAuth检查目标路由是否需要认证,如果未登录 (isAuthenticated为false),则重定向到Home页面。
afterEach 守卫
afterEach 守卫在导航完成后触发,可以用于页面统计或记录访问路径。
示例:全局 afterEach 守卫
router.afterEach((to, from) => {
console.log(`成功导航到:${to.fullPath}`);
});解释:
afterEach不接收next参数,因为它是在导航完成后触发的。- 可以在其中记录路径或触发其他操作。
6.2.2 路由独享守卫
路由独享守卫是在特定路由配置中定义的守卫,仅对该路由生效。它适合用来控制单个页面的访问逻辑。
在路由配置中添加 beforeEnter 守卫:
示例:路由独享守卫
// router/index.js
const routes = [
{
path: '/user/:id',
name: 'User',
component: User,
beforeEnter: (to, from, next) => {
const isAuthenticated = true; // 假设用户已登录
if (isAuthenticated) {
next(); // 允许访问
} else {
console.log('请登录以访问用户页面');
next({ name: 'Home' }); // 重定向到首页
}
}
}
];解释:
beforeEnter只在进入该路由时触发,不会在参数或查询变化时重新触发。- 在导航到
/user/:id时,会先执行beforeEnter守卫的逻辑。
6.2.3 组件内的路由守卫
在组件内可以使用 beforeRouteEnter、beforeRouteUpdate 和 beforeRouteLeave 守卫,这些守卫仅在组件实例上生效,适合需要依赖组件实例的逻辑。
1. beforeRouteEnter
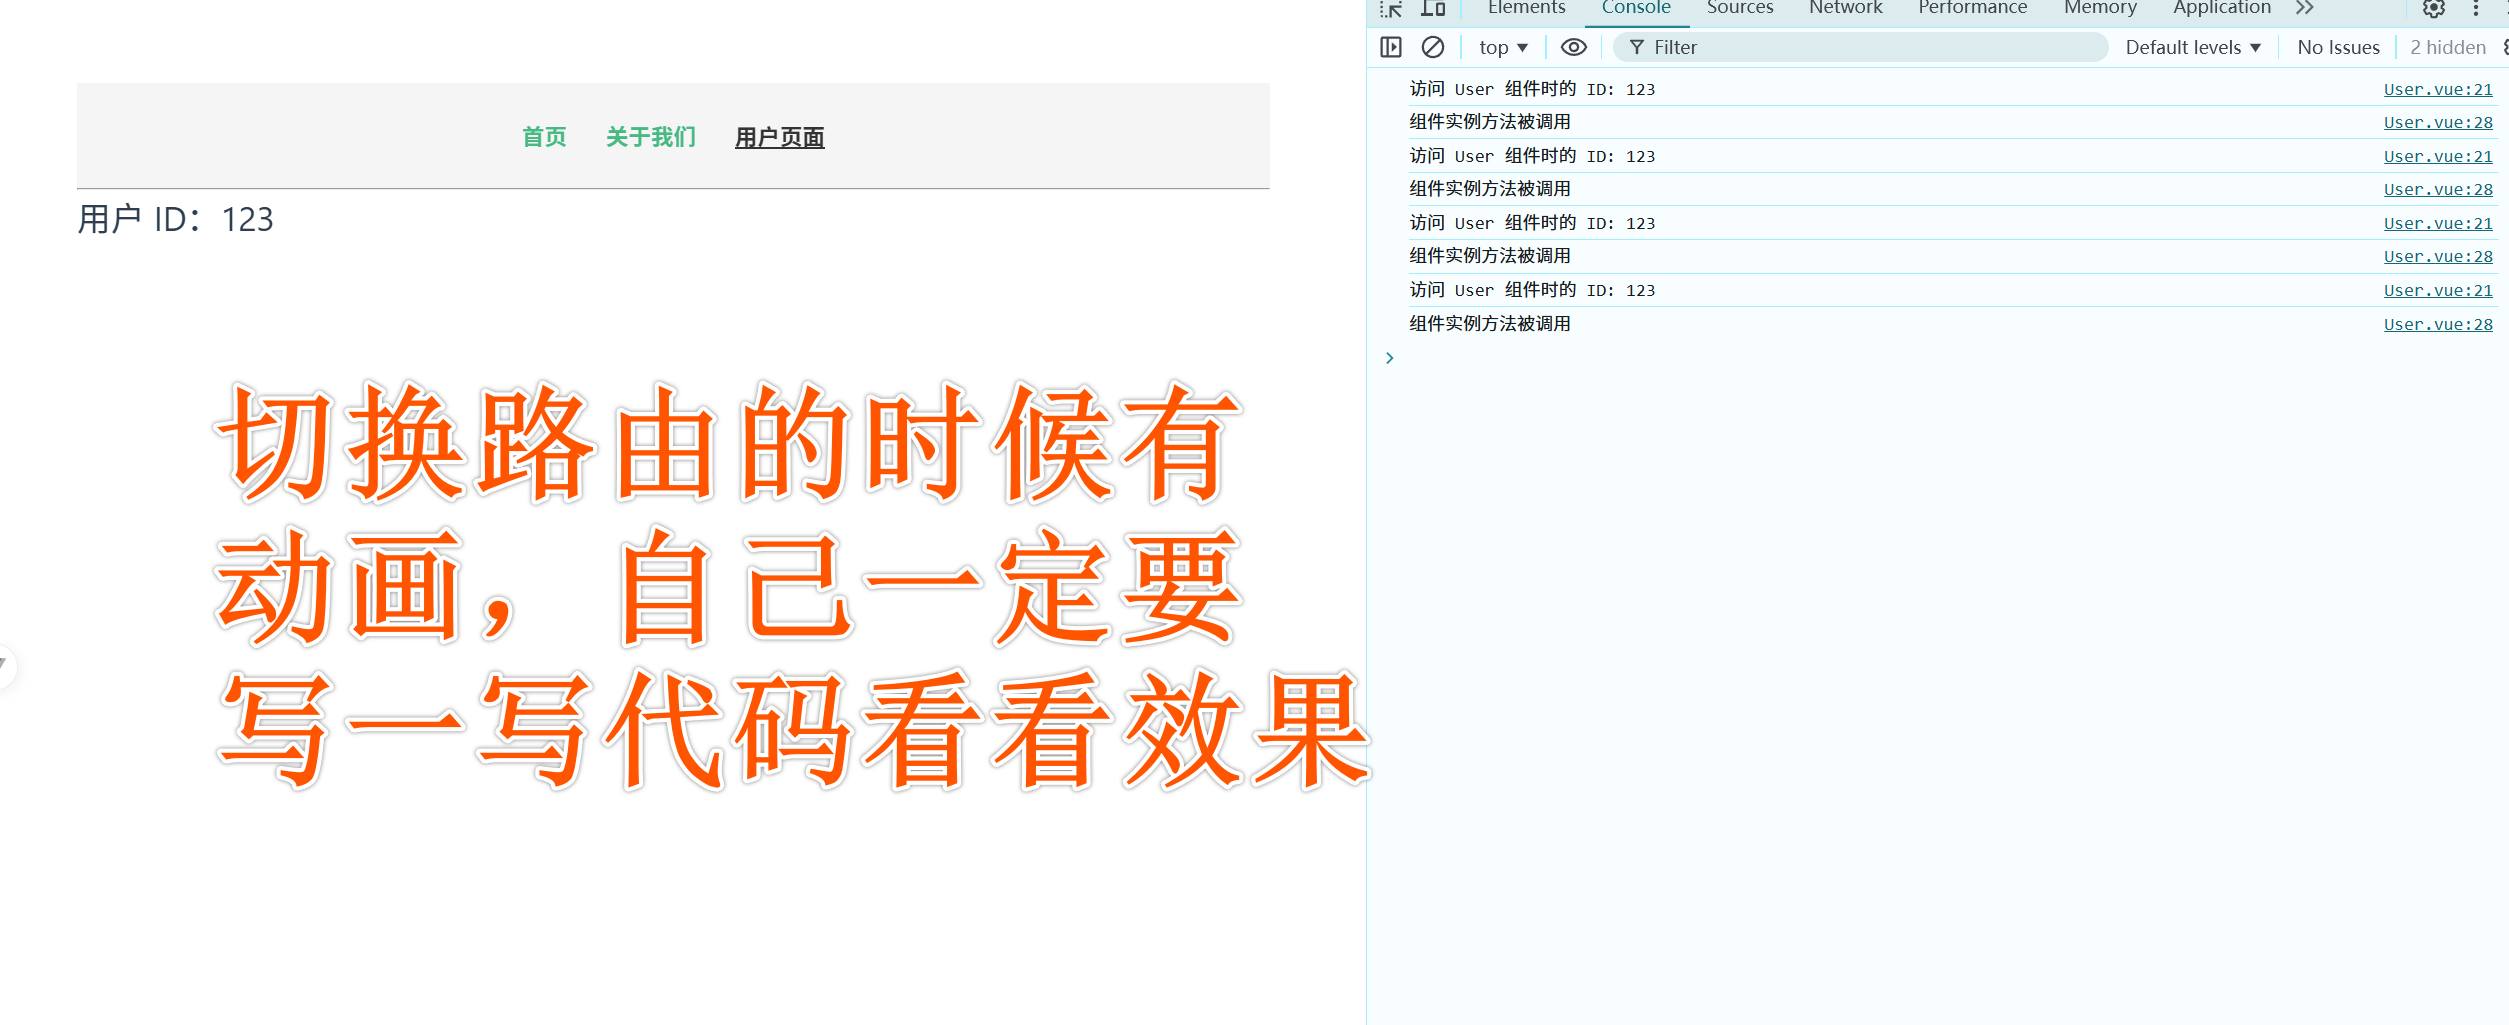
beforeRouteEnter 在路由进入前调用,但此时组件实例尚未创建,所以无法直接访问 this。可以通过 next 回调来访问组件实例。
示例:组件内 beforeRouteEnter 守卫
<!-- User.vue -->
<template>
<div>
<h2>用户 ID:{{ userId }}</h2>
</div>
</template>
<script>
import { useRoute } from 'vue-router';
export default {
setup() {
const route = useRoute();
const userId = route.params.id;
return { userId };
},
beforeRouteEnter(to, from, next) {
// 组件实例还未创建,无法使用 this
next(vm => {
console.log('访问 User 组件时的 ID:', to.params.id);
// vm 代表组件实例
vm.someMethod();
});
},
methods: {
someMethod() {
console.log('组件实例方法被调用');
}
}
};
</script>解释:
next(vm => {...})的vm参数指向组件实例,可以在此时调用实例上的方法。
2. beforeRouteUpdate
beforeRouteUpdate 在当前路由变化且组件复用时调用,适用于监听参数或查询变化。
示例:组件内 beforeRouteUpdate 守卫
<script>
export default {
beforeRouteUpdate(to, from, next) {
console.log('路由更新,新的用户 ID:', to.params.id);
this.userId = to.params.id; // 更新用户 ID
next();
}
};
</script>解释:
- 当路径从
/user/123变为/user/456时,beforeRouteUpdate会触发,用于更新用户 ID。
3. beforeRouteLeave
beforeRouteLeave 在导航离开组件之前调用,适用于提示用户是否确认离开页面。
示例:组件内 beforeRouteLeave 守卫
<script>
export default {
beforeRouteLeave(to, from, next) {
const answer = window.confirm('确定要离开此页面吗?');
if (answer) {
next(); // 允许导航
} else {
next(false); // 阻止导航
}
}
};
</script>解释:
window.confirm弹出一个确认框,用户选择确定则允许导航,否则取消导航。
总结
- 全局守卫:
beforeEach和afterEach用于所有路由的导航控制。适合权限检查、日志记录等全局逻辑。 - 路由独享守卫:
beforeEnter仅作用于特定路由,适合单独页面的访问控制。 - 组件内守卫:
beforeRouteEnter、beforeRouteUpdate和beforeRouteLeave用于组件实例,适合组件内部依赖实例的方法或属性的逻辑。
6.3 路由元信息与过渡动画
6.3.1 meta 路由元信息
meta 是 Vue Router 路由配置中的一个自定义属性,可以为每个路由添加附加信息,例如页面标题、权限要求等。meta 信息不会影响路由本身的功能,但可以在路由守卫或组件中使用。
示例:为路由添加元信息
假设我们要为不同页面设置标题,通过 meta 为每个路由添加 title 元信息。
router/index.js
import { createRouter, createWebHistory } from 'vue-router';
import Home from '@/views/Home.vue';
import About from '@/views/About.vue';
import User from '@/views/User.vue';
const routes = [
{ path: '/', name: 'Home', component: Home, meta: { title: '首页' } },
{ path: '/about', name: 'About', component: About, meta: { title: '关于我们' } },
{ path: '/user/:id', name: 'User', component: User, meta: { title: '用户信息', requiresAuth: true } }
];
const router = createRouter({
history: createWebHistory(),
routes
});
// 全局前置守卫,用于设置页面标题
router.beforeEach((to, from, next) => {
// 如果 `to.meta.title` 存在,则设置为页面标题
if (to.meta.title) {
document.title = to.meta.title;
}
// 简单的权限验证
const isAuthenticated = false;
if (to.meta.requiresAuth && !isAuthenticated) {
next({ name: 'Home' });
} else {
next();
}
});
export default router;解释:
meta中的title用于为每个路由设置页面标题。- 在
beforeEach守卫中,检查to.meta.title,如果存在则设置为document.title,动态更新页面标题。
6.3.2 路由动画的实现
Vue 提供了 <transition> 和 <transition-group> 标签,可以轻松实现路由动画。通过包裹 <router-view> 使用 <transition>,在路由切换时自动应用动画效果。
示例:简单的路由过渡动画
@/router/index.js
import { createRouter, createWebHistory } from 'vue-router'
import User from '@/views/User.vue'
import UserProfile from '@/views/UserProfile.vue'
import UserPosts from '@/views/UserPosts.vue'
import Home from '@/views/Home.vue'
import About from '@/views/About.vue'

const routes = [
  {
    path: '/',
    name: 'Home',
    component: Home
  },
  {
    path: '/about',
    name: 'About',
    component: About
  },
  {
    path: '/user/:id',
    name: 'User',
    component: User,
    children: [
      {
        path: 'profile',
        name: 'UserProfile',
        component: UserProfile
      },
      {
        path: 'posts',
        name: 'UserPosts',
        component: UserPosts
      }
    ]
  }
]

const router = createRouter({
  history: createWebHistory(),
  routes
})

export default router
在 App.vue 中使用 <transition> 包裹 <router-view>,并添加一些 CSS 动画。
App.vue
<template>
  <div id="app">
    <nav>
      <router-link to="/">首页</router-link>
      <router-link to="/about">关于我们</router-link>
      <router-link :to="{ name: 'User', params: { id: 123 } }"
        >用户页面</router-link
      >
    </nav>
    <hr />
    <!-- 使用 transition 包裹 component 实现动画效果 -->
    <router-view v-slot="{ Component }">
      <transition name="fade" mode="out-in">
        <component :is="Component" />
      </transition>
    </router-view>
  </div>
</template>

<script>
export default {
  name: 'App'
}
</script>

<style scoped>
/* 导航样式 */
nav {
  display: flex;
  gap: 20px;
  justify-content: center;
  padding: 20px;
  background-color: #f5f5f5;
}

nav a {
  text-decoration: none;
  color: #42b983;
  font-weight: bold;
}

nav a.router-link-active {
  color: #333;
  text-decoration: underline;
}

/* 路由过渡动画样式 */
.fade-enter-active,
.fade-leave-active {
  transition: opacity 0.5s;
}
.fade-enter,
.fade-leave-to {
  opacity: 0;
}
</style>解释:
<transition name="fade" mode="out-in">:为<router-view>包裹的内容添加过渡动画。mode="out-in"确保旧内容淡出后新内容才淡入。.fade-enter-active和.fade-leave-active定义过渡效果,opacity从0到1实现淡入淡出。
其他动画效果
你可以根据需求调整过渡效果。例如,可以使用 transform: translateX() 来实现页面左右滑动的效果:
/* 左右滑动过渡 */
.slide-enter-active, .slide-leave-active {
  transition: transform 0.5s;
}
.slide-enter {
  transform: translateX(100%);
}
.slide-leave-to {
  transform: translateX(-100%);
}
将 <transition name="fade" mode="out-in"> 改为 <transition name="slide" mode="out-in">,这样页面切换时就会有左右滑动的效果。
总结
- 路由元信息:通过
meta定义自定义信息,比如title和requiresAuth,可以在路由守卫中使用,动态设置页面标题或控制权限。 - 路由动画:使用
<transition>包裹<router-view>实现过渡动画,CSS 可以自定义过渡效果,实现淡入淡出或左右滑动的视觉效果。
通过路由元信息和动画,可以让 Vue 应用的页面切换更加灵活且具有吸引力的用户体验。
7. 状态管理(Vuex 和 Pinia)
7.1 Vuex 状态管理
7.1.1 Vuex 文件结构
为了便于组织,我们可以将 Vuex 相关代码放在 src/store 文件夹中,并创建一个 index.js 文件作为入口。
文件结构如下:
src/
|-- store/
|   |-- index.js         # Vuex 主配置文件
|-- views/
|   |-- UserList.vue     # 示例组件,用于展示 Vuex 功能
7.1.2 代码实现:用户信息管理系统
我们将实现以下功能:
- state:保存用户列表和过滤条件。
- getters:获取用户列表,并基于角色进行过滤。
- mutations:添加用户和删除用户。
- actions:执行异步操作,例如从服务器加载用户数据。
7.1.3 store/index.js
1. state:定义全局状态
state 用于存储共享数据。在这里,我们定义一个用户列表和一个过滤条件。
// store/index.js
import { createStore } from 'vuex';

export default createStore({
  state: {
    users: [
      { id: 1, name: '张三', role: 'admin' },
      { id: 2, name: '李四', role: 'editor' },
      { id: 3, name: '王五', role: 'viewer' }
    ],
    filterRole: 'all' // 用于筛选用户角色
  },
  // Getters 用于获取和处理 state 中的数据
  getters: {
    filteredUsers: (state) => {
      if (state.filterRole === 'all') {
        return state.users;
      }
      return state.users.filter(user => user.role === state.filterRole);
    },
    userCount: (state) => state.users.length
  },
  // Mutations 用于同步修改 state
  mutations: {
    addUser(state, user) {
      state.users.push(user);
    },
    removeUser(state, userId) {
      state.users = state.users.filter(user => user.id !== userId);
    },
    setFilterRole(state, role) {
      state.filterRole = role;
    }
  },
  // Actions 用于异步操作,可以触发 Mutations
  actions: {
    async fetchUsers({ commit }) {
      // 假设我们通过 API 获取用户数据
      const data = await fetch('/api/users').then(res => res.json());
      data.forEach(user => {
        commit('addUser', user);
      });
    },
    async deleteUser({ commit }, userId) {
      // 假设调用 API 删除用户
      await fetch(`/api/users/${userId}`, { method: 'DELETE' });
      commit('removeUser', userId);
    }
  }
});
详解
state:定义全局状态数据,包括用户列表users和过滤条件filterRole。getters:计算状态的派生数据。filteredUsers:根据filterRole过滤用户列表。userCount:返回用户总数。
mutations:定义同步操作,用于直接修改状态。addUser:向用户列表中添加新用户。removeUser:通过用户 ID 删除用户。setFilterRole:设置当前的过滤角色。
actions:定义异步操作,可以调用mutations修改状态。fetchUsers:异步获取用户列表并添加到状态中。deleteUser:异步删除用户数据,然后更新状态。
7.1.4 在组件中使用 Vuex
接下来,我们在 UserList.vue 中演示如何使用 state、getters、mutations 和 actions。
UserList.vue
我把这个页面当组件放在了@/components
<template>
  <div>
    <h1>用户管理系统</h1>
    <div>
      <label>筛选角色:</label>
      <select v-model="filterRole" @change="changeFilterRole">
        <option value="all">全部</option>
        <option value="admin">管理员</option>
        <option value="editor">编辑</option>
        <option value="viewer">浏览者</option>
      </select>
    </div>
    <ul>
      <li v-for="user in filteredUsers" :key="user.id">
        {{ user.name }} - {{ user.role }}
        <button @click="deleteUser(user.id)">删除</button>
      </li>
    </ul>
    <p>总用户数:{{ userCount }}</p>
    <button @click="addNewUser">添加用户</button>
  </div>
</template>

<script>
import { mapState, mapGetters, mapMutations, mapActions } from 'vuex';

export default {
  computed: {
    ...mapState(['filterRole']),
    ...mapGetters(['filteredUsers', 'userCount'])
  },
  methods: {
    ...mapMutations(['setFilterRole', 'addUser']),
    ...mapActions(['fetchUsers', 'deleteUser']),

    changeFilterRole(event) {
      this.setFilterRole(event.target.value);
    },
    addNewUser() {
      // 示例:添加一个新用户
      const newUser = { id: Date.now(), name: '新用户', role: 'viewer' };
      this.addUser(newUser);
    }
  },
  mounted() {
    this.fetchUsers(); // 加载用户数据
  }
};
</script>

<style scoped>
h1 {
  color: #42b983;
}
</style>
详解
computed:
- 使用
mapState将filterRole直接映射为计算属性。 - 使用
mapGetters将filteredUsers和userCount映射为计算属性。
- 使用
methods:
- 使用
mapMutations映射setFilterRole和addUser,用于更改过滤条件和添加用户。 - 使用
mapActions映射fetchUsers和deleteUser,用于异步获取用户数据和删除用户。
- 使用
方法实现:
changeFilterRole:触发setFilterRolemutation 以更新filterRole。addNewUser:触发addUsermutation 以添加一个新用户。deleteUser:触发deleteUseraction 以删除用户(异步操作)。
mounted:
- 在组件挂载时调用
fetchUsersaction,从服务器加载用户数据。
- 在组件挂载时调用
7.1.5 App.vue里面的代码
<template>
  <div id="app">
    <h1>Vuex 用户管理系统演示</h1>
    <!-- 引入 UserList 组件 -->
    <UserList />
  </div>
</template>

<script>
import UserList from '@/components/UserList.vue' // 导入 UserList 组件
import { mapActions } from 'vuex'

export default {
  name: 'App',
  components: {
    UserList
  },
  methods: {
    ...mapActions(['fetchUsers']) // 映射 fetchUsers action,用于初始化数据
  },
  mounted() {
    this.fetchUsers() // 在应用启动时加载用户数据
  }
}
</script>

<style scoped>
#app {
  font-family: Avenir, Helvetica, Arial, sans-serif;
  text-align: center;
  color: #2c3e50;
  margin-top: 20px;
}
</style>
7.1.6 总结
- state:存储共享的全局状态,例如用户列表
users和筛选条件filterRole。 - getters:计算派生状态,例如基于角色过滤的
filteredUsers和用户总数userCount。 - mutations:定义同步操作来更改状态,例如
addUser添加用户、removeUser删除用户、setFilterRole设置过滤条件。 - actions:定义异步操作,例如
fetchUsers从服务器加载数据和deleteUser删除用户数据。
Pinia 是 Vue 3 官方推荐的状态管理库,具有简单的 API 和更好的类型支持。Pinia 的核心概念包括 state、getters、actions,它们类似于 Vuex 中的功能,但语法更加简洁。下面我将详细讲解 Pinia 的使用,包括如何定义 store、使用 state、actions 和 getters,并展示 Pinia 的模块化和组合式 store。
我们将使用一个稍微复杂的案例:一个购物车系统,包含商品列表、购物车管理、商品筛选和异步加载商品信息。
7.2 Pinia 状态管理
7.2.1 安装 Pinia
在 Vue 3 项目中可以通过以下命令安装 Pinia:
npm install pinia然后,在 main.js 中注册 Pinia:
// main.js
import { createApp } from 'vue';
import App from './App.vue';
import { createPinia } from 'pinia';

const app = createApp(App);
app.use(createPinia()); // 使用 Pinia
app.mount('#app');
7.2.2 定义 store 和使用 state、actions、getters
创建 Pinia store
在 src/stores 文件夹中创建 cartStore.js 和 productStore.js 两个 store,分别用于购物车和商品信息管理。
1. 商品管理 store(productStore.js)
定义一个商品管理 store,包括商品列表、商品筛选和异步加载商品信息的功能。
// src/stores/productStore.js
import { defineStore } from 'pinia';

export const useProductStore = defineStore('productStore', {
  state: () => ({
    products: [
      { id: 1, name: 'Apple', price: 10, category: 'fruits' },
      { id: 2, name: 'Banana', price: 5, category: 'fruits' },
      { id: 3, name: 'Bread', price: 3, category: 'bakery' }
    ],
    filterCategory: 'all'
  }),
  getters: {
    filteredProducts(state) {
      if (state.filterCategory === 'all') return state.products;
      return state.products.filter(product => product.category === state.filterCategory);
    },
    totalProductCount(state) {
      return state.products.length;
    }
  },
  actions: {
    async fetchProducts() {
      // 假设这是一个异步请求来加载商品信息
      const fetchedProducts = await fetch('/api/products').then(res => res.json());
      this.products = fetchedProducts;
    },
    setFilterCategory(category) {
      this.filterCategory = category;
    }
  }
});说明:
state:用于存储产品列表products和过滤条件filterCategory。getters:filteredProducts:基于filterCategory筛选商品。totalProductCount:计算商品总数。
actions:fetchProducts:异步加载商品列表。setFilterCategory:更新过滤条件。
2. 购物车管理 store(cartStore.js)
定义一个购物车管理 store,用于添加商品到购物车、更新商品数量、移除商品、计算总价格等。
// src/stores/cartStore.js
import { defineStore } from 'pinia';
import { useProductStore } from './productStore';

export const useCartStore = defineStore('cartStore', {
  state: () => ({
    cartItems: []
  }),
  getters: {
    totalCartQuantity(state) {
      return state.cartItems.reduce((total, item) => total + item.quantity, 0);
    },
    totalCartPrice(state) {
      return state.cartItems.reduce((total, item) => total + item.price * item.quantity, 0);
    }
  },
  actions: {
    addProductToCart(productId) {
      const productStore = useProductStore();
      const product = productStore.products.find(p => p.id === productId);

      if (product) {
        const cartItem = this.cartItems.find(item => item.id === product.id);
        if (cartItem) {
          cartItem.quantity++;
        } else {
          this.cartItems.push({ ...product, quantity: 1 });
        }
      }
    },
    removeProductFromCart(productId) {
      this.cartItems = this.cartItems.filter(item => item.id !== productId);
    },
    updateProductQuantity(productId, quantity) {
      const cartItem = this.cartItems.find(item => item.id === productId);
      if (cartItem) {
        cartItem.quantity = quantity;
      }
    }
  }
});说明:
state:存储购物车中的商品列表cartItems。getters:totalCartQuantity:计算购物车中商品总数。totalCartPrice:计算购物车中商品的总价格。
actions:addProductToCart:将商品添加到购物车,若已存在则增加数量。removeProductFromCart:从购物车中移除商品。updateProductQuantity:更新购物车中某个商品的数量。
7.2.3 Pinia 的模块化与组合式 store
上面的案例已经展示了 Pinia 的模块化结构。每个 store 是独立的模块,并且可以在其他 store 中相互引用。例如,cartStore 中通过 useProductStore 获取产品信息,这展示了 Pinia 的模块化和组合式设计。
7.2.4 在组件中使用 Pinia
在组件中,我们可以使用 useProductStore 和 useCartStore 来访问和操作 state、getters 和 actions。
ProductList.vue - 展示商品列表,并允许将商品添加到购物车
这个我以组件的形式放在了@/components/
<!-- ProductList.vue -->
<template>
  <div>
    <h2>商品列表</h2>
    <select v-model="filterCategory" @change="setFilterCategory">
      <option value="all">所有类别</option>
      <option value="fruits">水果</option>
      <option value="bakery">烘焙</option>
    </select>
    <ul>
      <li v-for="product in filteredProducts" :key="product.id">
        {{ product.name }} - ${{ product.price }}
        <button @click="addProductToCart(product.id)">加入购物车</button>
      </li>
    </ul>
  </div>
</template>

<script>
import { useProductStore } from '@/stores/productStore';
import { useCartStore } from '@/stores/cartStore';

export default {
  setup() {
    const productStore = useProductStore();
    const cartStore = useCartStore();

    return {
      filterCategory: productStore.filterCategory,
      filteredProducts: productStore.filteredProducts,
      setFilterCategory: productStore.setFilterCategory,
      addProductToCart: cartStore.addProductToCart
    };
  }
};
</script>
Cart.vue - 展示购物车内容,并允许修改或移除商品
这个我以组件的形式放在了@/components/
<!-- Cart.vue -->
<template>
  <div>
    <h2>购物车</h2>
    <ul>
      <li v-for="item in cartItems" :key="item.id">
        {{ item.name }} - ${{ item.price }} x {{ item.quantity }}
        <button @click="removeProductFromCart(item.id)">移除</button>
        <input type="number" v-model.number="item.quantity" @input="updateProductQuantity(item.id, item.quantity)" min="1" />
      </li>
    </ul>
    <p>总商品数量:{{ totalCartQuantity }}</p>
    <p>总价格:${{ totalCartPrice }}</p>
  </div>
</template>

<script>
import { useCartStore } from '@/stores/cartStore';

export default {
  setup() {
    const cartStore = useCartStore();

    return {
      cartItems: cartStore.cartItems,
      totalCartQuantity: cartStore.totalCartQuantity,
      totalCartPrice: cartStore.totalCartPrice,
      removeProductFromCart: cartStore.removeProductFromCart,
      updateProductQuantity: cartStore.updateProductQuantity
    };
  }
};
</script>
App.vue 导入组件
<template>
  <div id="app">
    <h1>Pinia 购物车系统示例</h1>
    <div class="content">
      <!-- 商品列表组件 -->
      <ProductList />
      <!-- 购物车组件 -->
      <Cart />
    </div>
  </div>
</template>

<script>
import ProductList from '@/components/ProductList.vue' // 导入商品列表组件
import Cart from '@/components/Cart.vue' // 导入购物车组件
import { useProductStore } from '@/stores/productStore'

export default {
  name: 'App',
  components: {
    ProductList,
    Cart
  },
  setup() {
    const productStore = useProductStore()

    // 组件挂载时加载商品数据
    productStore.fetchProducts()

    return {}
  }
}
</script>

<style scoped>
#app {
  font-family: Avenir, Helvetica, Arial, sans-serif;
  text-align: center;
  color: #2c3e50;
  margin-top: 20px;
}

.content {
  display: flex;
  justify-content: space-around;
  margin-top: 20px;
}
</style>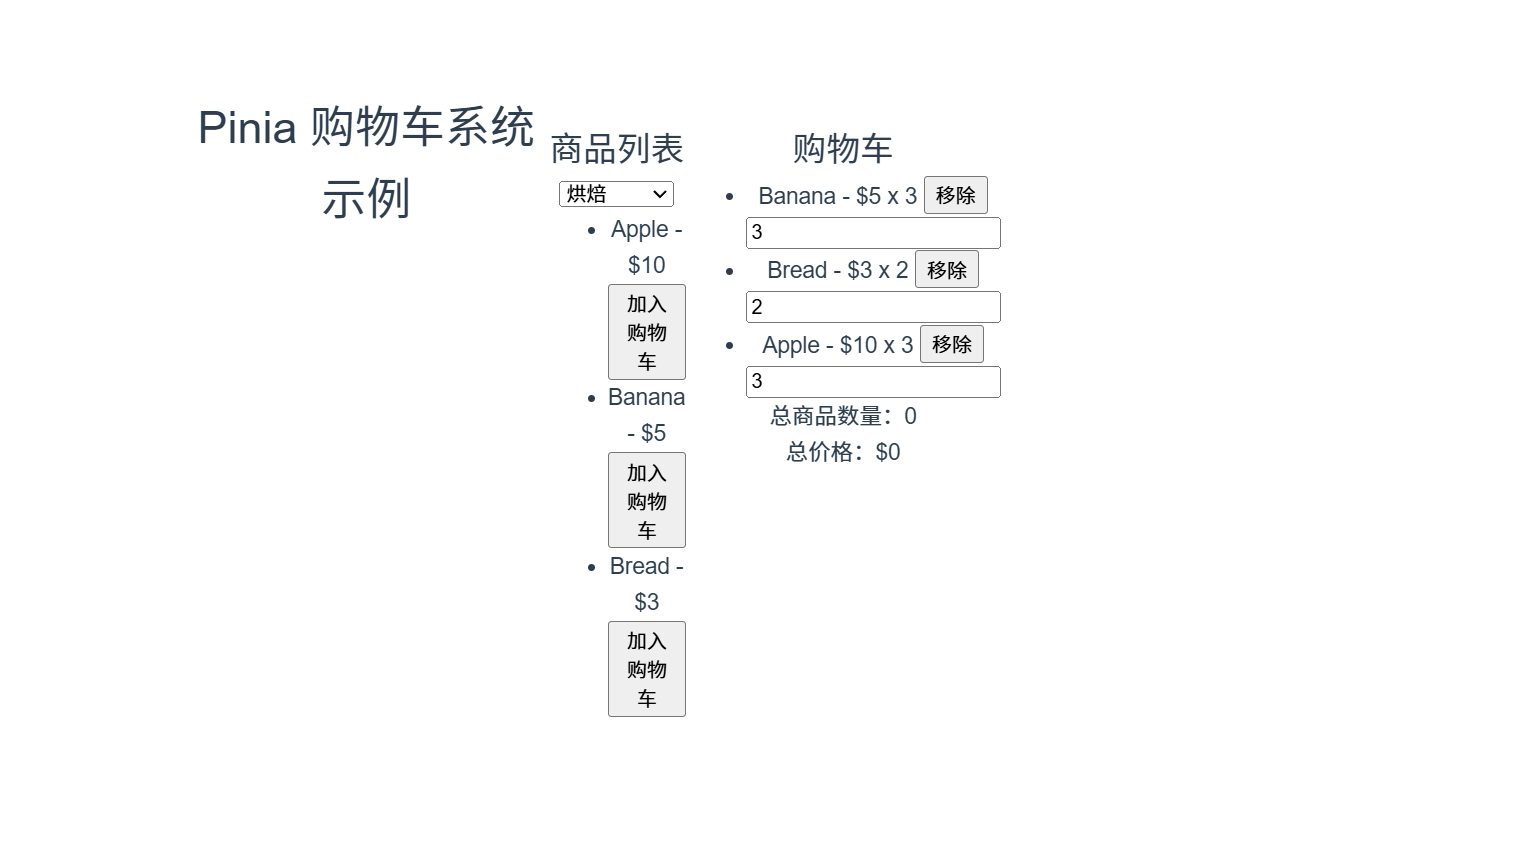
7.3 总结
- Pinia 的模块化:每个
store独立管理自己的状态和操作逻辑,便于维护。 - 使用
state、getters、actions:分别用于管理状态、计算派生数据和执行异步操作。 - 组件中使用 Pinia:通过
setup使用useStore访问state、getters和actions,实现模块化和组合式的状态管理。
8. API 请求与数据处理
在 Vue 项目中,我们可以使用 axios 来轻松发起 HTTP 请求,并将获取的数据存储到状态管理工具中(例如 Pinia 或 Vuex)。下面会使用 Pinia 结合 axios 来实现请求和数据管理。
8.1 使用 axios 发起 HTTP 请求
8.1.1 安装与配置 axios
首先,通过 npm 安装 axios:

npm install axios接下来,可以在 src 目录下新建一个 axios.js 文件,用于配置全局的 axios 实例,方便管理请求基础路径和拦截器。
配置 axios 实例
创建 src/axios.js:
// src/axios.js
import axios from 'axios';

// 创建一个 axios 实例
const apiClient = axios.create({
  baseURL: 'https://jsonplaceholder.typicode.com', // 基础路径
  timeout: 5000 // 超时时间
});

// 请求拦截器
apiClient.interceptors.request.use(
  (config) => {
    console.log('Request sent:', config);
    return config;
  },
  (error) => {
    return Promise.reject(error);
  }
);

// 响应拦截器
apiClient.interceptors.response.use(
  (response) => {
    console.log('Response received:', response);
    return response;
  },
  (error) => {
    return Promise.reject(error);
  }
);

export default apiClient;- 请求拦截器:每次发送请求前会调用,可以在这里添加授权 token 等信息。
- 响应拦截器:每次接收到响应后会调用,可以用于统一处理错误。
8.1.2 发起 GET、POST 请求
在 Pinia 中使用 axios 发起请求并管理数据。
在 stores 文件夹下创建 commentStore.js,用于管理评论数据
我们将定义一个 commentStore,包括获取评论的 GET 请求和添加评论的 POST 请求。
// src/stores/commentStore.js
import { defineStore } from 'pinia'
import apiClient from '@/axios'

export const useCommentStore = defineStore('commentStore', {
  state: () => ({
    comments: [], // 存储所有评论
    loading: false, // 请求加载状态
    error: null // 请求错误信息
  }),
  actions: {
    async fetchComments() {
      // 获取评论数据
      this.loading = true
      this.error = null
      try {
        const response = await apiClient.get('/comments')
        this.comments = response.data // 获取到的数据直接存储在 comments 中
        console.log('Fetched comments:', response.data) // 调试用
      } catch (error) {
        this.error = 'Failed to load comments' // 错误信息
        console.error('Fetch Comments Error:', error)
      } finally {
        this.loading = false
      }
    },
    async addComment(commentData) {
      // 添加新评论
      try {
        const response = await apiClient.post('/posts', commentData)
        this.comments.unshift(response.data) // 将新评论添加到评论列表顶部
        console.log('Added comment:', response.data) // 调试用
      } catch (error) {
        this.error = 'Failed to add comment'
        console.error('Add Comment Error:', error)
      }
    }
  }
})解释:
fetchComments:使用axios.get发起 GET 请求,获取评论数据,并将其存储到comments状态中。addComment:使用axios.post发起 POST 请求,将新的评论数据发送到服务器,并将返回的评论对象添加到comments列表中。
8.1.3 axios 请求和响应拦截器
在上面的 axios 配置中,我们定义了请求和响应拦截器:
- 请求拦截器:在请求发送前触发,适合添加公共请求头或打印日志。
- 响应拦截器:在接收到响应后触发,适合统一处理响应数据或错误。
例如,在请求拦截器中,可以添加一个授权 token:
apiClient.interceptors.request.use((config) => {
  config.headers.Authorization = `Bearer your_token_here`;
  return config;
});
8.1.4 在组件中使用 Pinia 和 axios 管理请求数据
我们将创建一个 CommentList.vue 组件,用于显示评论数据,并提供一个表单来添加新评论。
CommentList.vue
<!-- CommentList.vue -->
<template>
  <div>
    <h2>评论列表</h2>
    <button @click="fetchComments" :disabled="loading">加载评论</button>
    <p v-if="loading">加载中...</p>
    <p v-if="error">{{ error }}</p>

    <!-- 评论列表 -->
    <ul v-if="comments.length > 0">
      <li v-for="comment in comments" :key="comment.id">
        <strong>{{ comment.name }} ({{ comment.email }})</strong>
        <p>{{ comment.body }}</p>
      </li>
    </ul>

    <h3>添加新评论</h3>
    <form @submit.prevent="submitComment">
      <label>
        姓名:
        <input type="text" v-model="newComment.name" required />
      </label>
      <label>
        邮箱:
        <input type="email" v-model="newComment.email" required />
      </label>
      <label>
        评论:
        <textarea v-model="newComment.body" required></textarea>
      </label>
      <button type="submit">提交评论</button>
    </form>
  </div>
</template>

<script>
import { useCommentStore } from '@/stores/commentStore'
import { ref } from 'vue'

export default {
  setup() {
    const commentStore = useCommentStore()
    const newComment = ref({
      name: '',
      email: '',
      body: ''
    })

    const fetchComments = () => {
      commentStore.fetchComments()
    }

    const submitComment = () => {
      commentStore.addComment(newComment.value)
      // 清空表单
      newComment.value = {
        name: '',
        email: '',
        body: ''
      }
    }

    return {
      comments: commentStore.comments,
      loading: commentStore.loading,
      error: commentStore.error,
      fetchComments,
      newComment,
      submitComment
    }
  }
}
</script>

<style scoped>
h2,
h3 {
  color: #42b983;
}

form {
  margin-top: 20px;
}

form label {
  display: block;
  margin-bottom: 10px;
}

form input,
form textarea {
  width: 100%;
  padding: 8px;
  margin-top: 5px;
  margin-bottom: 15px;
}

button {
  background-color: #42b983;
  color: white;
  border: none;
  padding: 10px 15px;
  cursor: pointer;
}
</style>解释:
- 加载评论:点击 加载评论 按钮会调用
fetchComments方法,从服务器获取评论数据并展示。 - 添加评论:用户可以填写表单并提交新评论,提交后会调用
submitComment,该方法会调用addCommentaction 并将新评论推送到comments列表中。
8.1.5 在 App.vue 中引入 CommentList.vue
将 CommentList.vue 组件引入 App.vue,并渲染它。
App.vue
<template>
  <div id="app">
    <h1>评论管理系统</h1>
    <CommentList />
  </div>
</template>

<script>
import CommentList from '@/components/CommentList.vue'

export default {
  name: 'App',
  components: {
    CommentList
  }
}
</script>

<style>
#app {
  font-family: Avenir, Helvetica, Arial, sans-serif;
  text-align: center;
  color: #2c3e50;
  margin-top: 20px;
}
</style>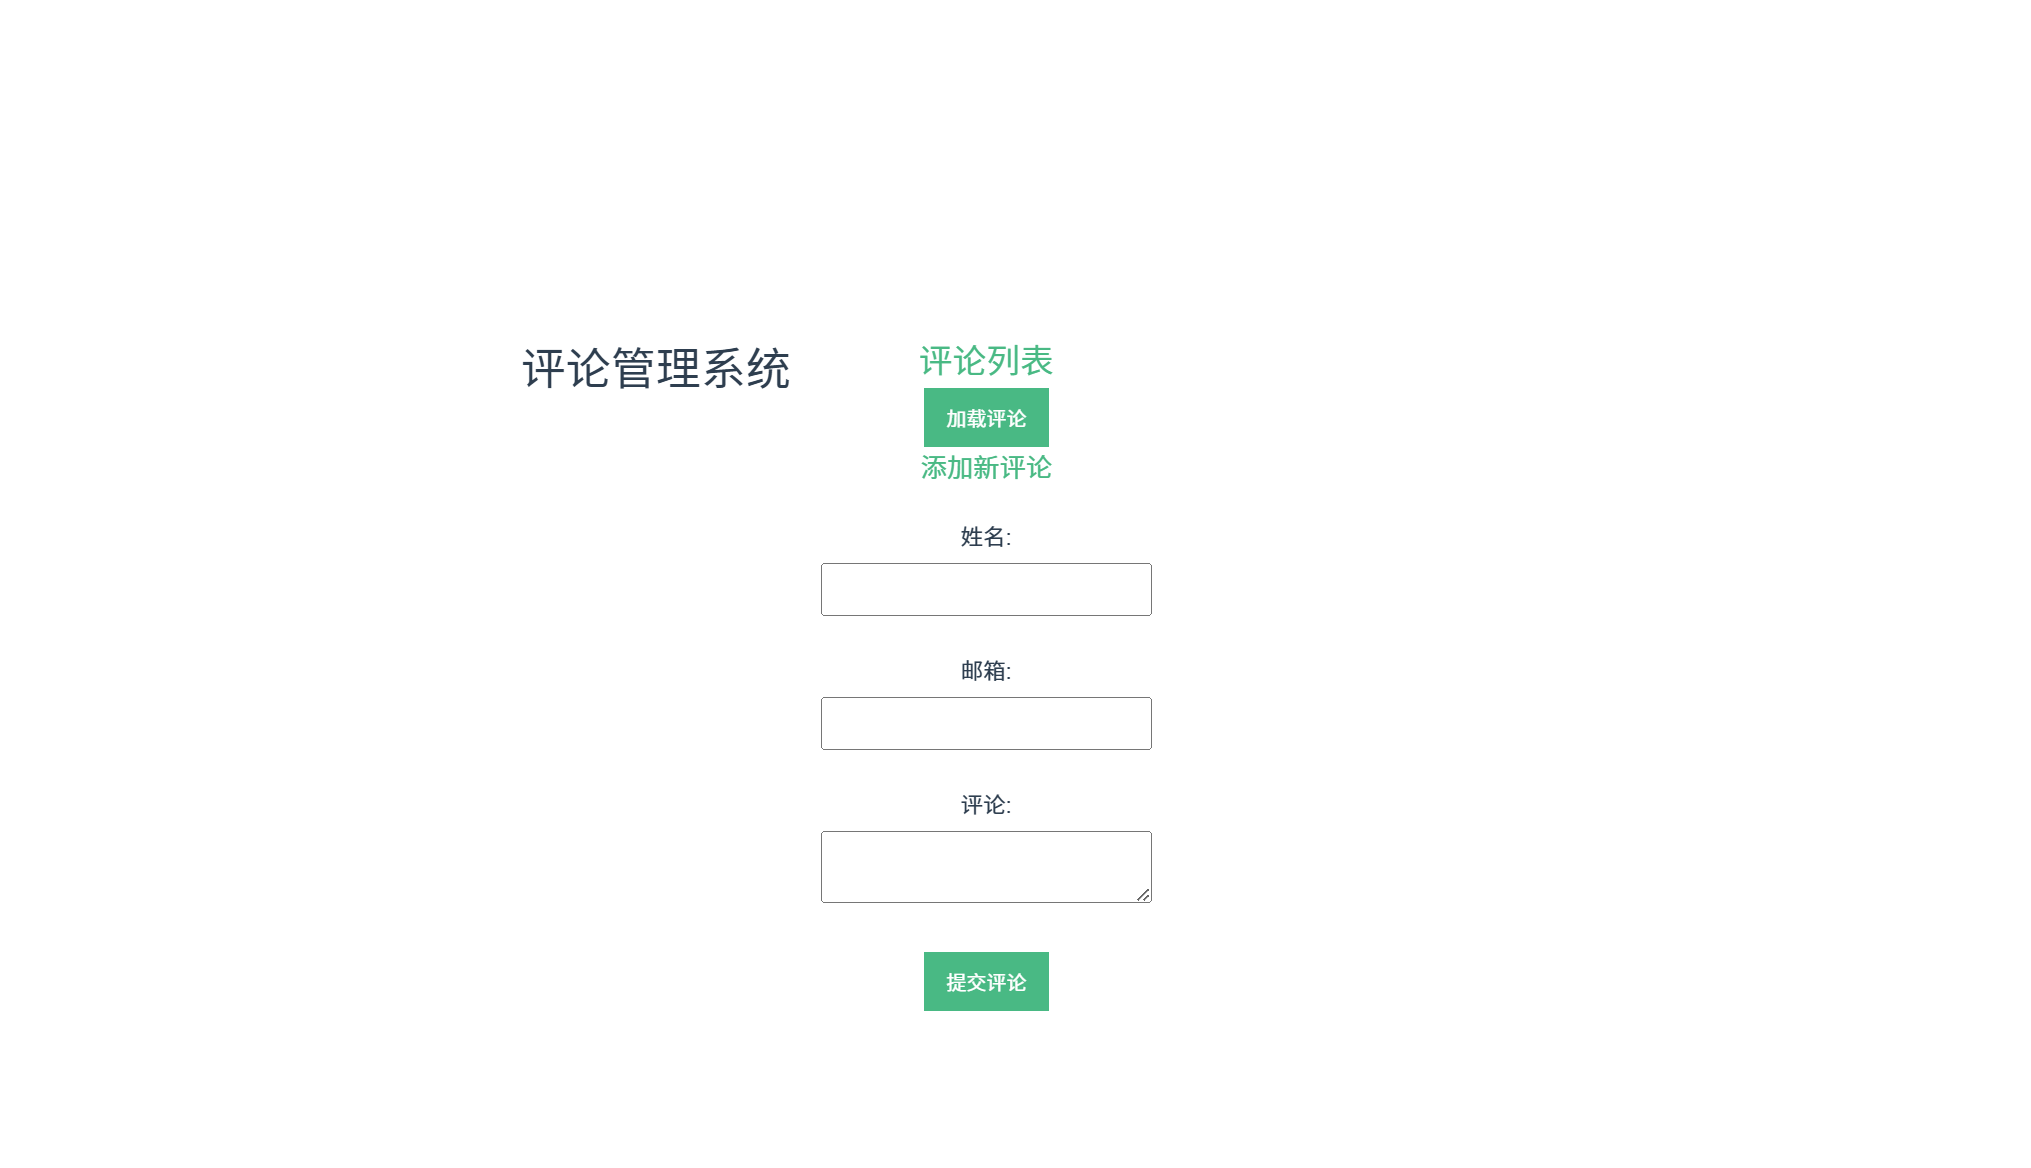
8.1.6 总结
axios安装与配置:创建自定义axios实例,配置请求和响应拦截器。- GET 请求:使用
fetchComments通过GET请求获取评论列表。 - POST 请求:使用
addComment通过POST请求添加新评论。 - 状态管理:在 Pinia 中使用
state存储评论数据,actions管理异步请求,getters处理数据展示。
8.2 使用 fetch 发起 HTTP 请求(原生支持)
8.2.1 fetch 的基础用法
fetch 是 JavaScript 原生提供的 API,可以用于发送 HTTP 请求。它返回一个 Promise,在请求成功时解析为 Response 对象。
基本用法
// GET 请求示例
fetch('https://jsonplaceholder.typicode.com/comments')
  .then(response => {
    if (!response.ok) {
      throw new Error(`HTTP error! Status: ${response.status}`);
    }
    return response.json();
  })
  .then(data => {
    console.log('Fetched Data:', data);
  })
  .catch(error => {
    console.error('Fetch Error:', error);
});- 请求成功:返回的
Response对象可以通过response.json()解析为 JSON 数据。 - 请求失败:通过
response.ok检查响应状态,如果响应状态不为 2xx,将抛出错误。
8.2.2 fetch 和 async/await 的结合
使用 async/await 可以使代码更加简洁,同时便于在异步操作中处理错误。以下是一个使用 async/await 发起请求的示例。
使用 async/await 发送 GET 请求
async function fetchComments() {
  try {
    const response = await fetch('https://jsonplaceholder.typicode.com/comments');
    if (!response.ok) {
      throw new Error(`HTTP error! Status: ${response.status}`);
    }
    const data = await response.json();
    console.log('Fetched Data:', data);
    return data;
  } catch (error) {
    console.error('Fetch Error:', error);
    throw error; // 抛出错误以便进一步处理
  }
}

fetchComments();- try-catch:
try-catch用于捕获请求中的任何错误。 - 错误处理:如果请求失败,会抛出错误并进入
catch块。
8.2.3 请求错误处理与重试机制
在实际项目中,网络请求可能会因为网络中断或服务器错误而失败。我们可以在请求失败时实现重试机制,以增加请求成功的几率。
错误处理与重试机制的实现
下面是一个带有重试机制的 fetch 函数,在请求失败时自动重试指定次数。
async function fetchWithRetry(url, options = {}, retries = 3, delay = 1000) {
  for (let i = 0; i < retries; i++) {
    try {
      const response = await fetch(url, options);
      if (!response.ok) {
        throw new Error(`HTTP error! Status: ${response.status}`);
      }
      const data = await response.json();
      return data;
    } catch (error) {
      console.error(`Fetch attempt ${i + 1} failed: ${error.message}`);
      if (i < retries - 1) {
        console.log(`Retrying in ${delay}ms...`);
        await new Promise(resolve => setTimeout(resolve, delay));
      } else {
        console.error('All fetch attempts failed');
        throw error;
      }
    }
  }
}

// 使用示例
fetchWithRetry('https://jsonplaceholder.typicode.com/comments')
  .then(data => {
    console.log('Data fetched with retry:', data);
  })
  .catch(error => {
    console.error('Final fetch error after retries:', error);
});参数说明:
url:请求的 URL。options:请求的配置选项,例如请求方法和请求头。retries:最大重试次数。delay:每次重试前的延迟时间(毫秒)。
逻辑说明:
- 使用
for循环控制重试次数。 - 在每次请求失败后,通过
setTimeout延迟指定时间后再进行重试。 - 如果达到最大重试次数,抛出错误并结束请求。
- 使用
8.2.4 综合示例:在 Vue 组件中使用 fetch 和重试机制
以下是一个 Vue 组件示例,演示如何在组件中使用 fetchWithRetry 函数获取数据。
CommentList.vue
<template>
  <div>
    <h2>评论列表</h2>
    <button @click="loadComments" :disabled="loading">加载评论</button>
    <p v-if="loading">加载中...</p>
    <p v-if="error">{{ error }}</p>
    <ul v-if="comments.length > 0">
      <li v-for="comment in comments" :key="comment.id">
        <strong>{{ comment.name }} ({{ comment.email }})</strong>
        <p>{{ comment.body }}</p>
      </li>
    </ul>
  </div>
</template>

<script>
import { ref } from 'vue';

export default {
  setup() {
    const comments = ref([]);
    const loading = ref(false);
    const error = ref(null);

    async function loadComments() {
      loading.value = true;
      error.value = null;
      try {
        comments.value = await fetchWithRetry('https://jsonplaceholder.typicode.com/comments');
      } catch (err) {
        error.value = 'Failed to load comments after multiple attempts.';
      } finally {
        loading.value = false;
      }
    }

    // 带重试机制的 fetch 函数
    async function fetchWithRetry(url, options = {}, retries = 3, delay = 1000) {
      for (let i = 0; i < retries; i++) {
        try {
          const response = await fetch(url, options);
          if (!response.ok) {
            throw new Error(`HTTP error! Status: ${response.status}`);
          }
          const data = await response.json();
          return data;
        } catch (error) {
          console.error(`Fetch attempt ${i + 1} failed: ${error.message}`);
          if (i < retries - 1) {
            console.log(`Retrying in ${delay}ms...`);
            await new Promise(resolve => setTimeout(resolve, delay));
          } else {
            console.error('All fetch attempts failed');
            throw error;
          }
        }
      }
    }

    return {
      comments,
      loading,
      error,
      loadComments
    };
  }
};
</script>

<style scoped>
h2 {
  color: #42b983;
}

button {
  background-color: #42b983;
  color: white;
  border: none;
  padding: 10px 15px;
  cursor: pointer;
}

button:disabled {
  background-color: #d3d3d3;
  cursor: not-allowed;
}

ul {
  list-style-type: none;
  padding: 0;
}
</style>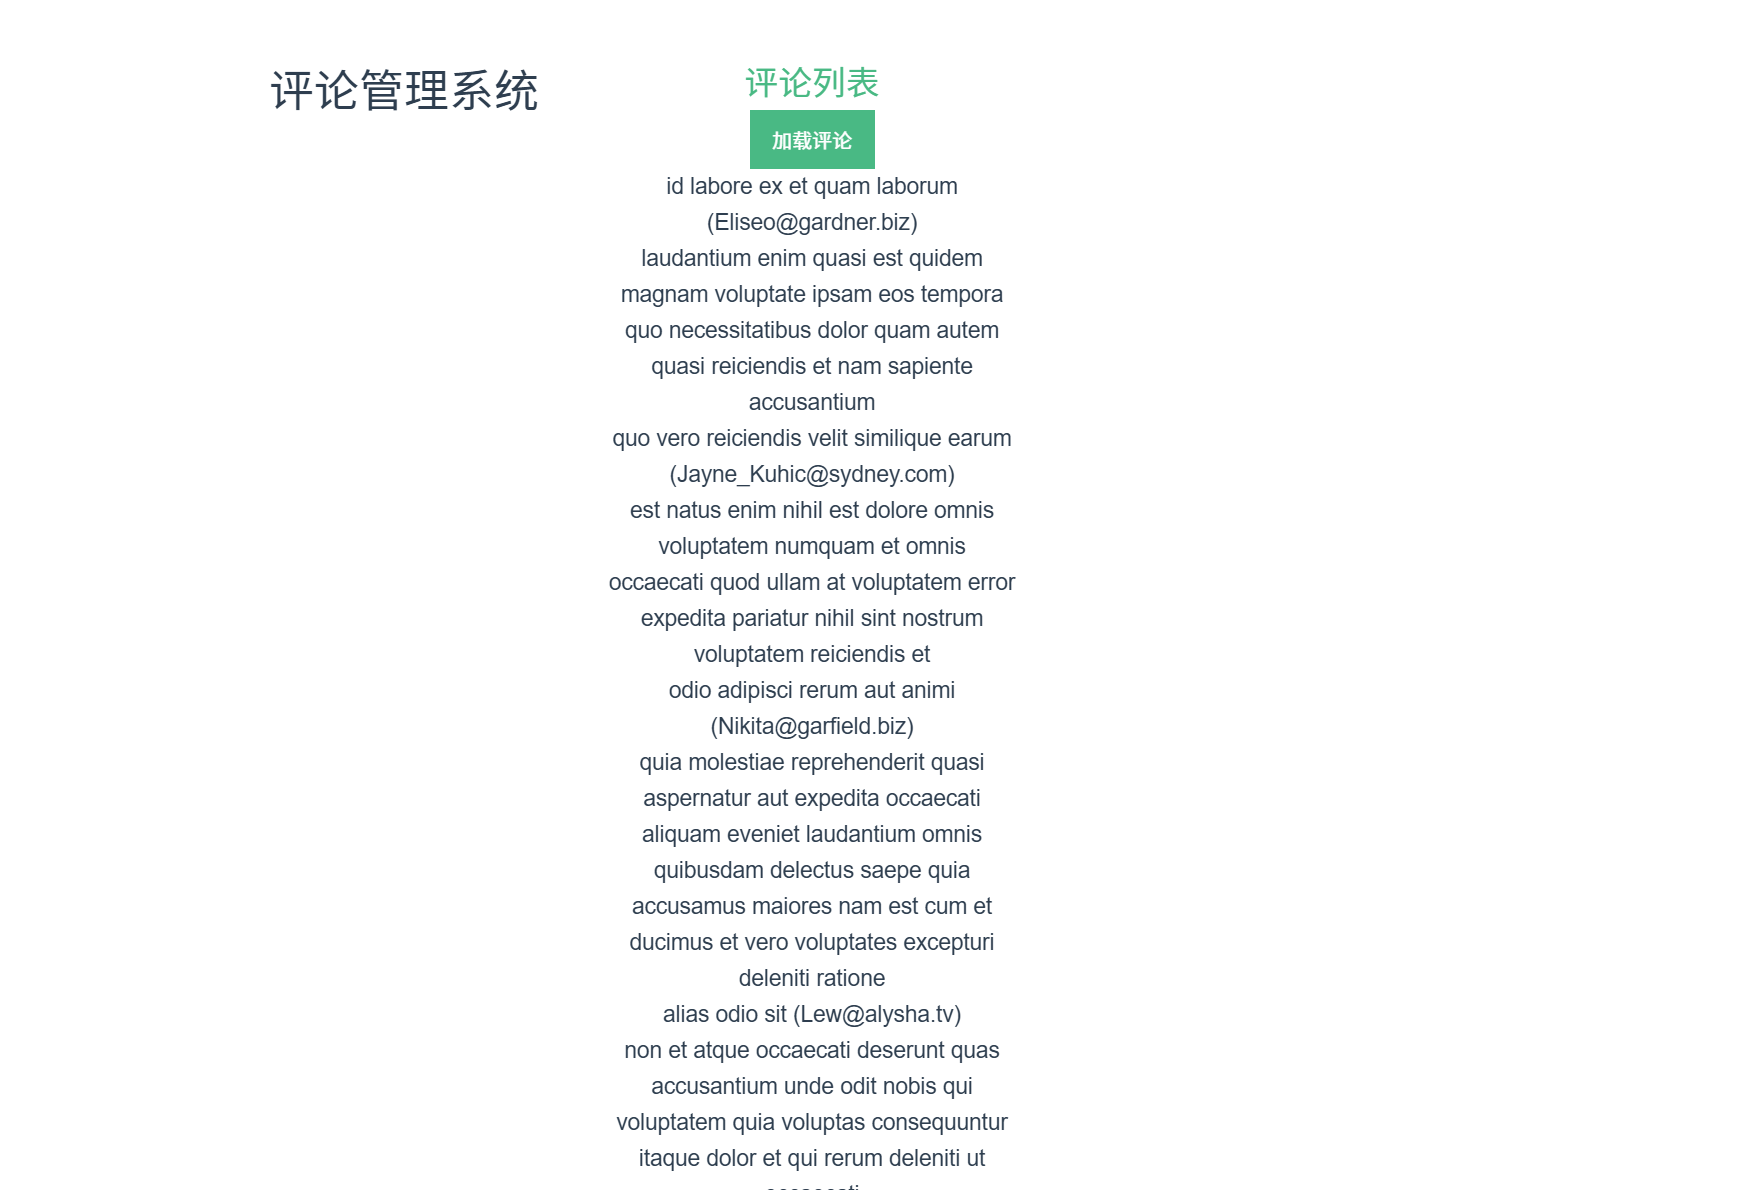
说明:
- 数据加载按钮:点击 加载评论 按钮时调用
loadComments,触发fetchWithRetry进行请求。 - 请求重试机制:如果请求失败,会自动重试指定次数(默认 3 次),每次重试前延迟 1 秒。
- 状态显示:加载过程中显示
loading状态,错误时显示error信息。
8.2.5 总结
- 基础用法:
fetch是 JavaScript 原生的 HTTP 请求方法,简单且轻量。 - 结合
async/await:可以让代码更加清晰和简洁。 - 重试机制:通过循环控制请求的最大重试次数和延迟,提高请求的可靠性。
9. 组件库与 UI 框架集成
Element Plus 是 Vue 3 生态中非常流行的 UI 组件库,提供了丰富的基础组件和功能组件,帮助开发者快速构建优雅的界面。下面详细介绍如何在 Vue 3 项目中集成 Element Plus,以及如何使用常用组件和自定义主题。
https://element-plus.org/en-US/component/overview.html
9.1 使用 Element Plus
9.1.1 安装与配置 Element Plus
首先,通过 npm 安装 Element Plus:

npm install element-plus然后,在 main.js 文件中引入 Element Plus 和默认样式。
配置 main.js
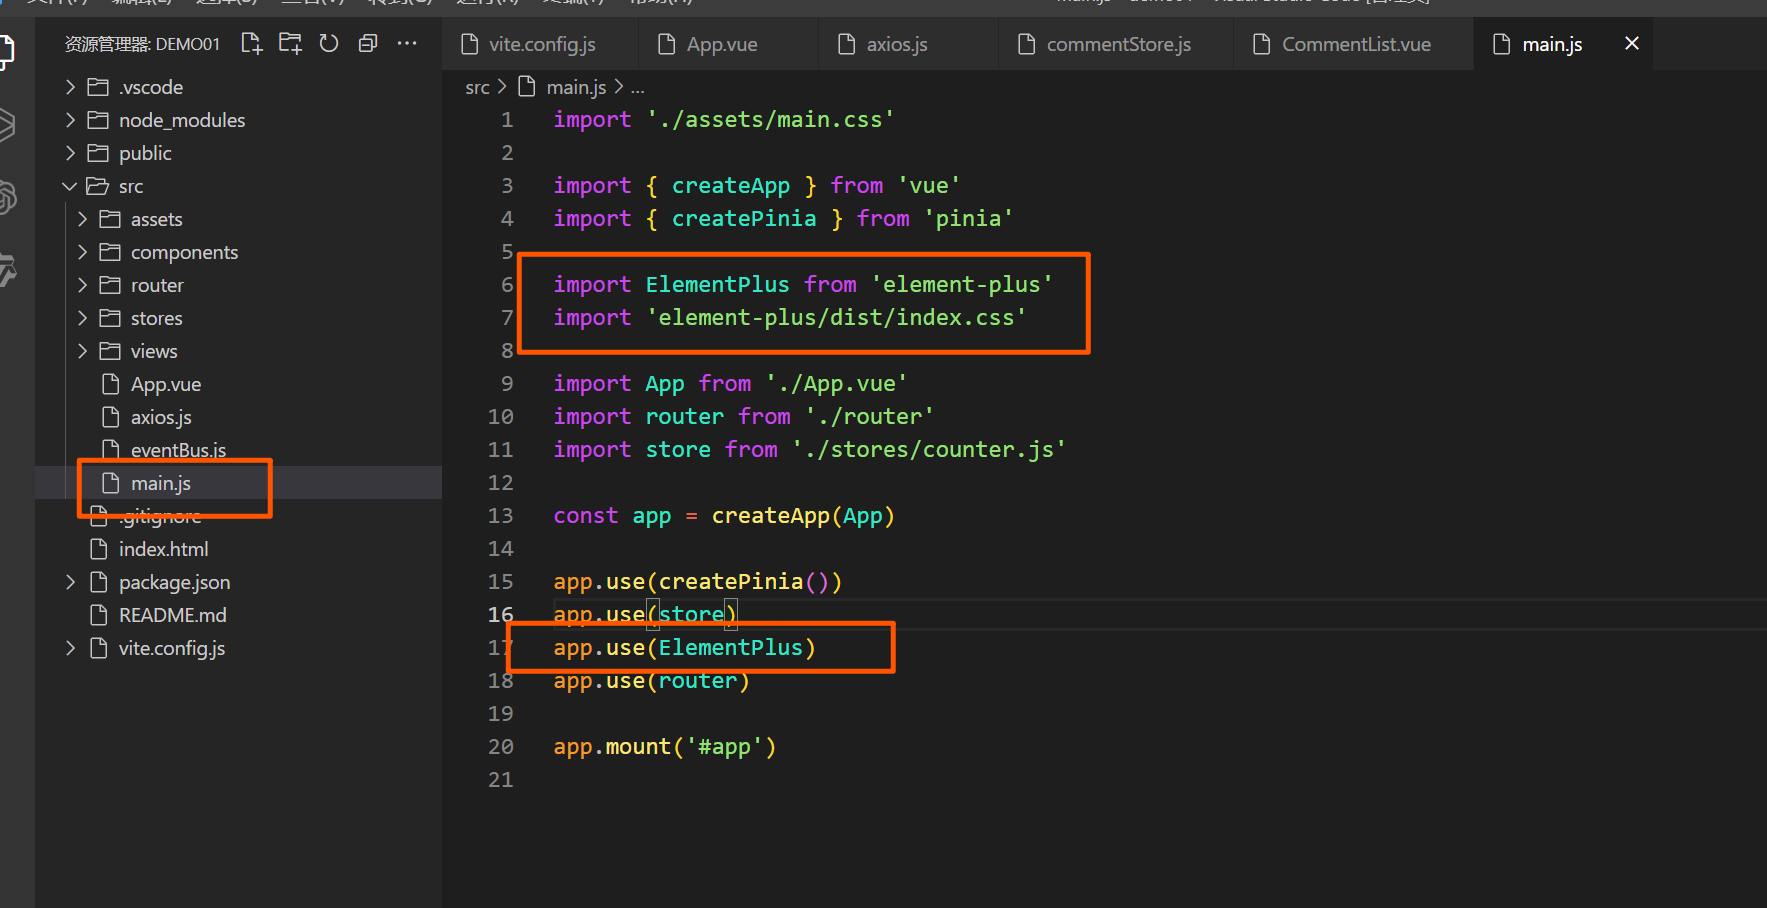
// main.js
import { createApp } from 'vue';
import App from './App.vue';
import ElementPlus from 'element-plus'
import 'element-plus/dist/index.css'

const app = createApp(App);
app.use(ElementPlus);
app.mount('#app');
import ElementPlus from 'element-plus':引入 Element Plus 组件库。import 'element-plus/dist/index.css':引入 Element Plus 的默认样式。

9.1.2 使用常用组件(按钮、输入框、表格等)
Element Plus 提供了丰富的组件,如按钮、输入框、表格等,下面展示如何使用这些常用组件。
示例:按钮、输入框和表格组件
在 App.vue 中,展示一个简单的用户信息表格,包含添加用户的输入框和按钮。
<template>
  <el-container id="app">
    <el-header>
      <h1>用户信息管理</h1>
    </el-header>

    <el-main>
      <div class="form-section">
        <el-input
          v-model="newUserName"
          placeholder="请输入用户名"
          style="width: 300px; margin-right: 10px"
        ></el-input>
        <el-button type="primary" @click="addUser">添加用户</el-button>
      </div>

      <el-table :data="users" style="width: 100%; margin-top: 20px">
        <el-table-column prop="id" label="ID" width="100" />
        <el-table-column prop="name" label="用户名" />
        <el-table-column label="操作" width="150">
          <template #default="scope">
            <el-button
              type="danger"
              size="mini"
              @click="deleteUser(scope.row.id)"
            >
              删除
            </el-button>
          </template>
        </el-table-column>
      </el-table>
    </el-main>
  </el-container>
</template>

<script>
import { ref } from 'vue'

export default {
  setup() {
    const users = ref([
      { id: 1, name: '张三' },
      { id: 2, name: '李四' },
      { id: 3, name: '王五' }
    ])
    const newUserName = ref('')

    const addUser = () => {
      if (newUserName.value.trim()) {
        users.value.push({ id: Date.now(), name: newUserName.value })
        newUserName.value = ''
      }
    }

    const deleteUser = (id) => {
      users.value = users.value.filter((user) => user.id !== id)
    }

    return {
      users,
      newUserName,
      addUser,
      deleteUser
    }
  }
}
</script>

<style scoped>
#app {
  font-family: Avenir, Helvetica, Arial, sans-serif;
  text-align: center;
  color: #2c3e50;
  margin-top: 20px;
}

.form-section {
  display: flex;
  justify-content: center;
  align-items: center;
  margin-bottom: 20px;
}
</style>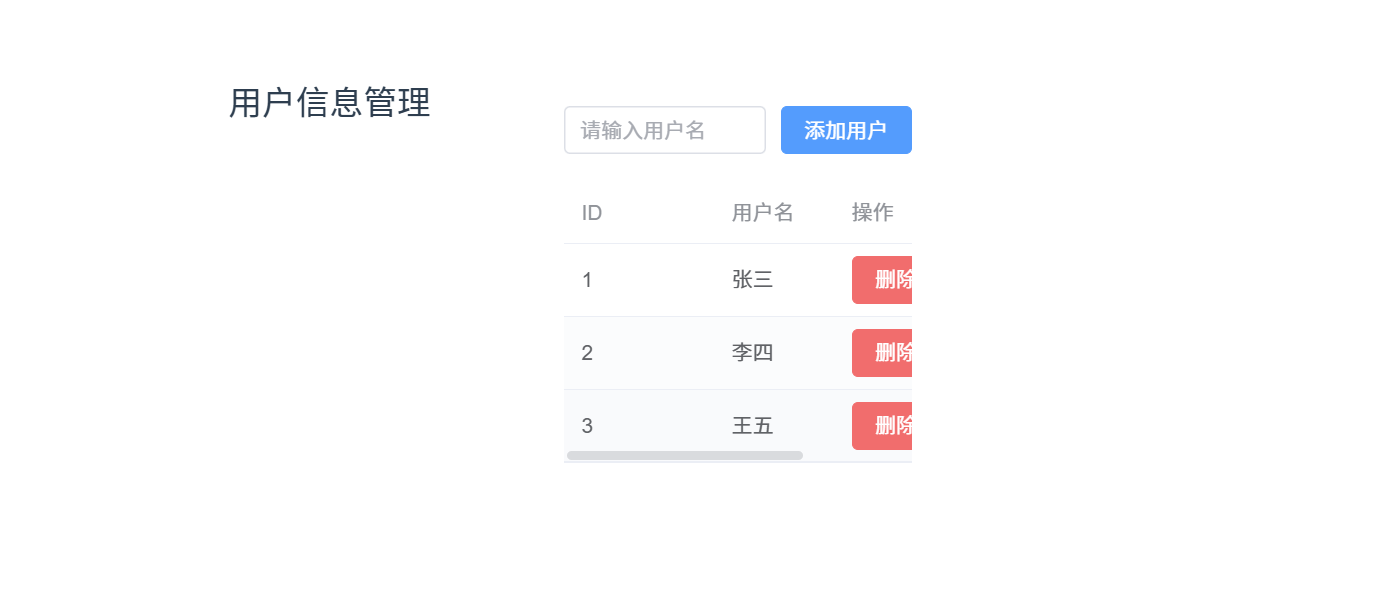
解释:
- 按钮和输入框:使用
el-input和el-button组件实现添加用户的功能。输入框绑定newUserName,点击按钮会触发addUser方法,将新用户添加到users列表中。 - 表格组件:使用
el-table和el-table-column展示用户列表。每行包含一个 "删除" 按钮,通过deleteUser方法删除用户。
9.1.3 自定义主题与按需加载
如果需要自定义 Element Plus 的主题或按需加载组件,可以按照以下步骤进行配置。
自定义主题
Element Plus 使用 CSS 变量来自定义主题。我们可以覆盖这些变量来更改主题。
- 在
src目录下创建theme/index.scss文件。 - 在
theme/index.scss中覆盖默认变量:
// src/theme/index.scss
@use "element-plus/theme-chalk/src/common/var.scss" as *;

$--color-primary: #409eff;
$--color-success: #67c23a;
$--color-warning: #e6a23c;
$--color-danger: #f56c6c;
$--color-info: #909399;- 在
main.js中引入该自定义主题:
// main.js
import { createApp } from 'vue';
import App from './App.vue';
import ElementPlus from 'element-plus';
import './theme/index.scss'; // 引入自定义主题

const app = createApp(App);
app.use(ElementPlus);
app.mount('#app');
这样,就可以将 Element Plus 的主色和其他配色修改为自定义颜色。
按需加载
按需加载可以减少打包体积,仅加载使用到的组件。使用按需加载需要借助插件 unplugin-vue-components 和 unplugin-auto-import。
安装插件:
npm install -D unplugin-vue-components unplugin-auto-import sass-embedded sass配置
vite.config.js文件以实现按需加载:// vite.config.js import { defineConfig } from 'vite'; import vue from '@vitejs/plugin-vue'; import Components from 'unplugin-vue-components/vite'; import { ElementPlusResolver } from 'unplugin-vue-components/resolvers'; export default defineConfig({ plugins: [ vue(), Components({ resolvers: [ElementPlusResolver()] }) ] });配置完成后,无需手动导入 Element Plus 组件,插件会自动按需加载你在模板中使用的组件。
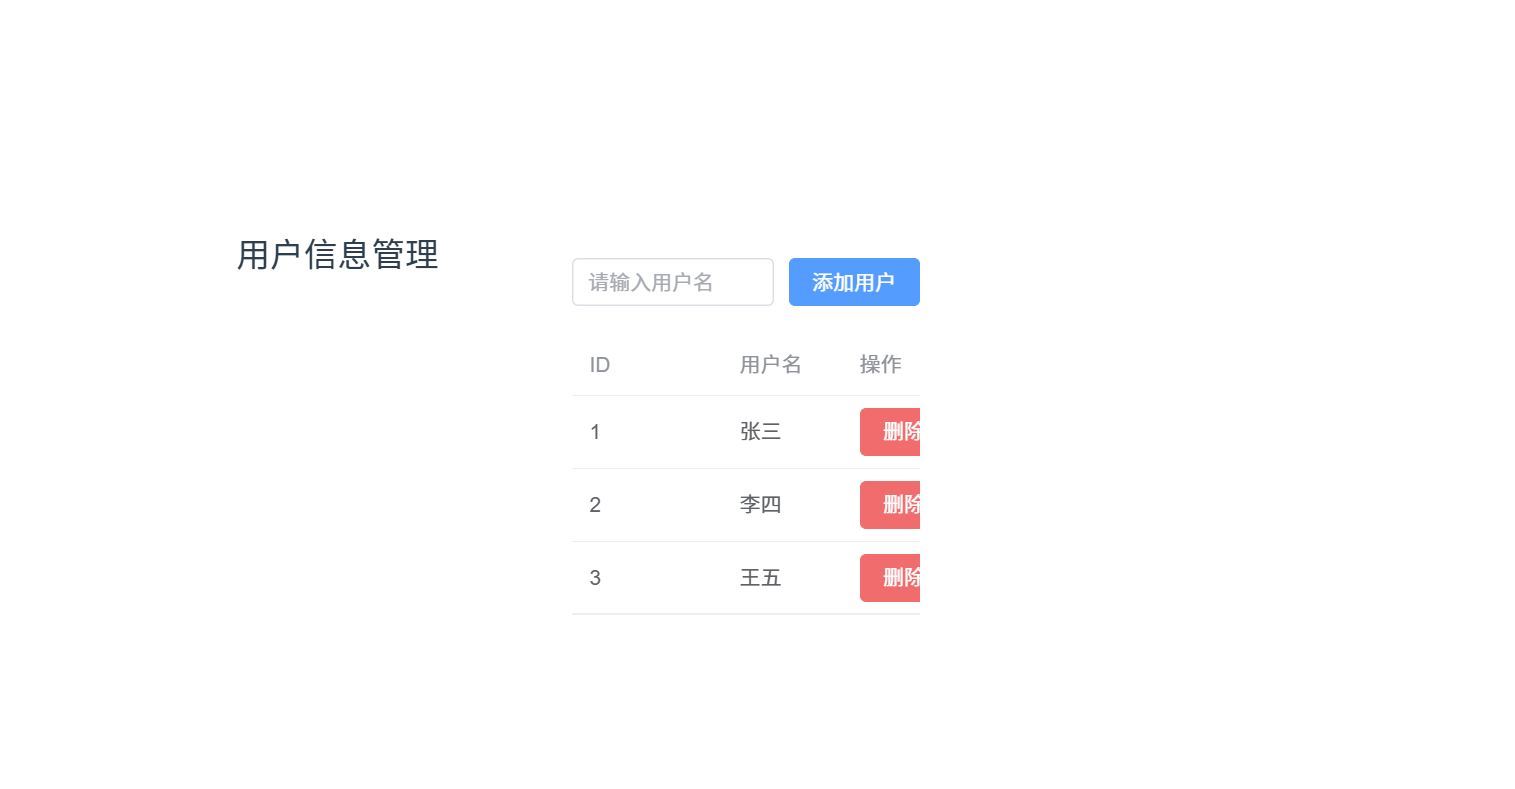
9.1.4 总结
- 安装与配置:使用 npm 安装 Element Plus,并在
main.js中配置全局引入。 - 常用组件:展示了
el-input、el-button和el-table组件,构建一个用户管理表格。 - 自定义主题:通过覆盖 CSS 变量实现自定义主题。
- 按需加载:使用
unplugin-vue-components插件实现按需加载,减少打包体积。
9.2 使用 Ant Design Vue
https://antdv.com/components/overview
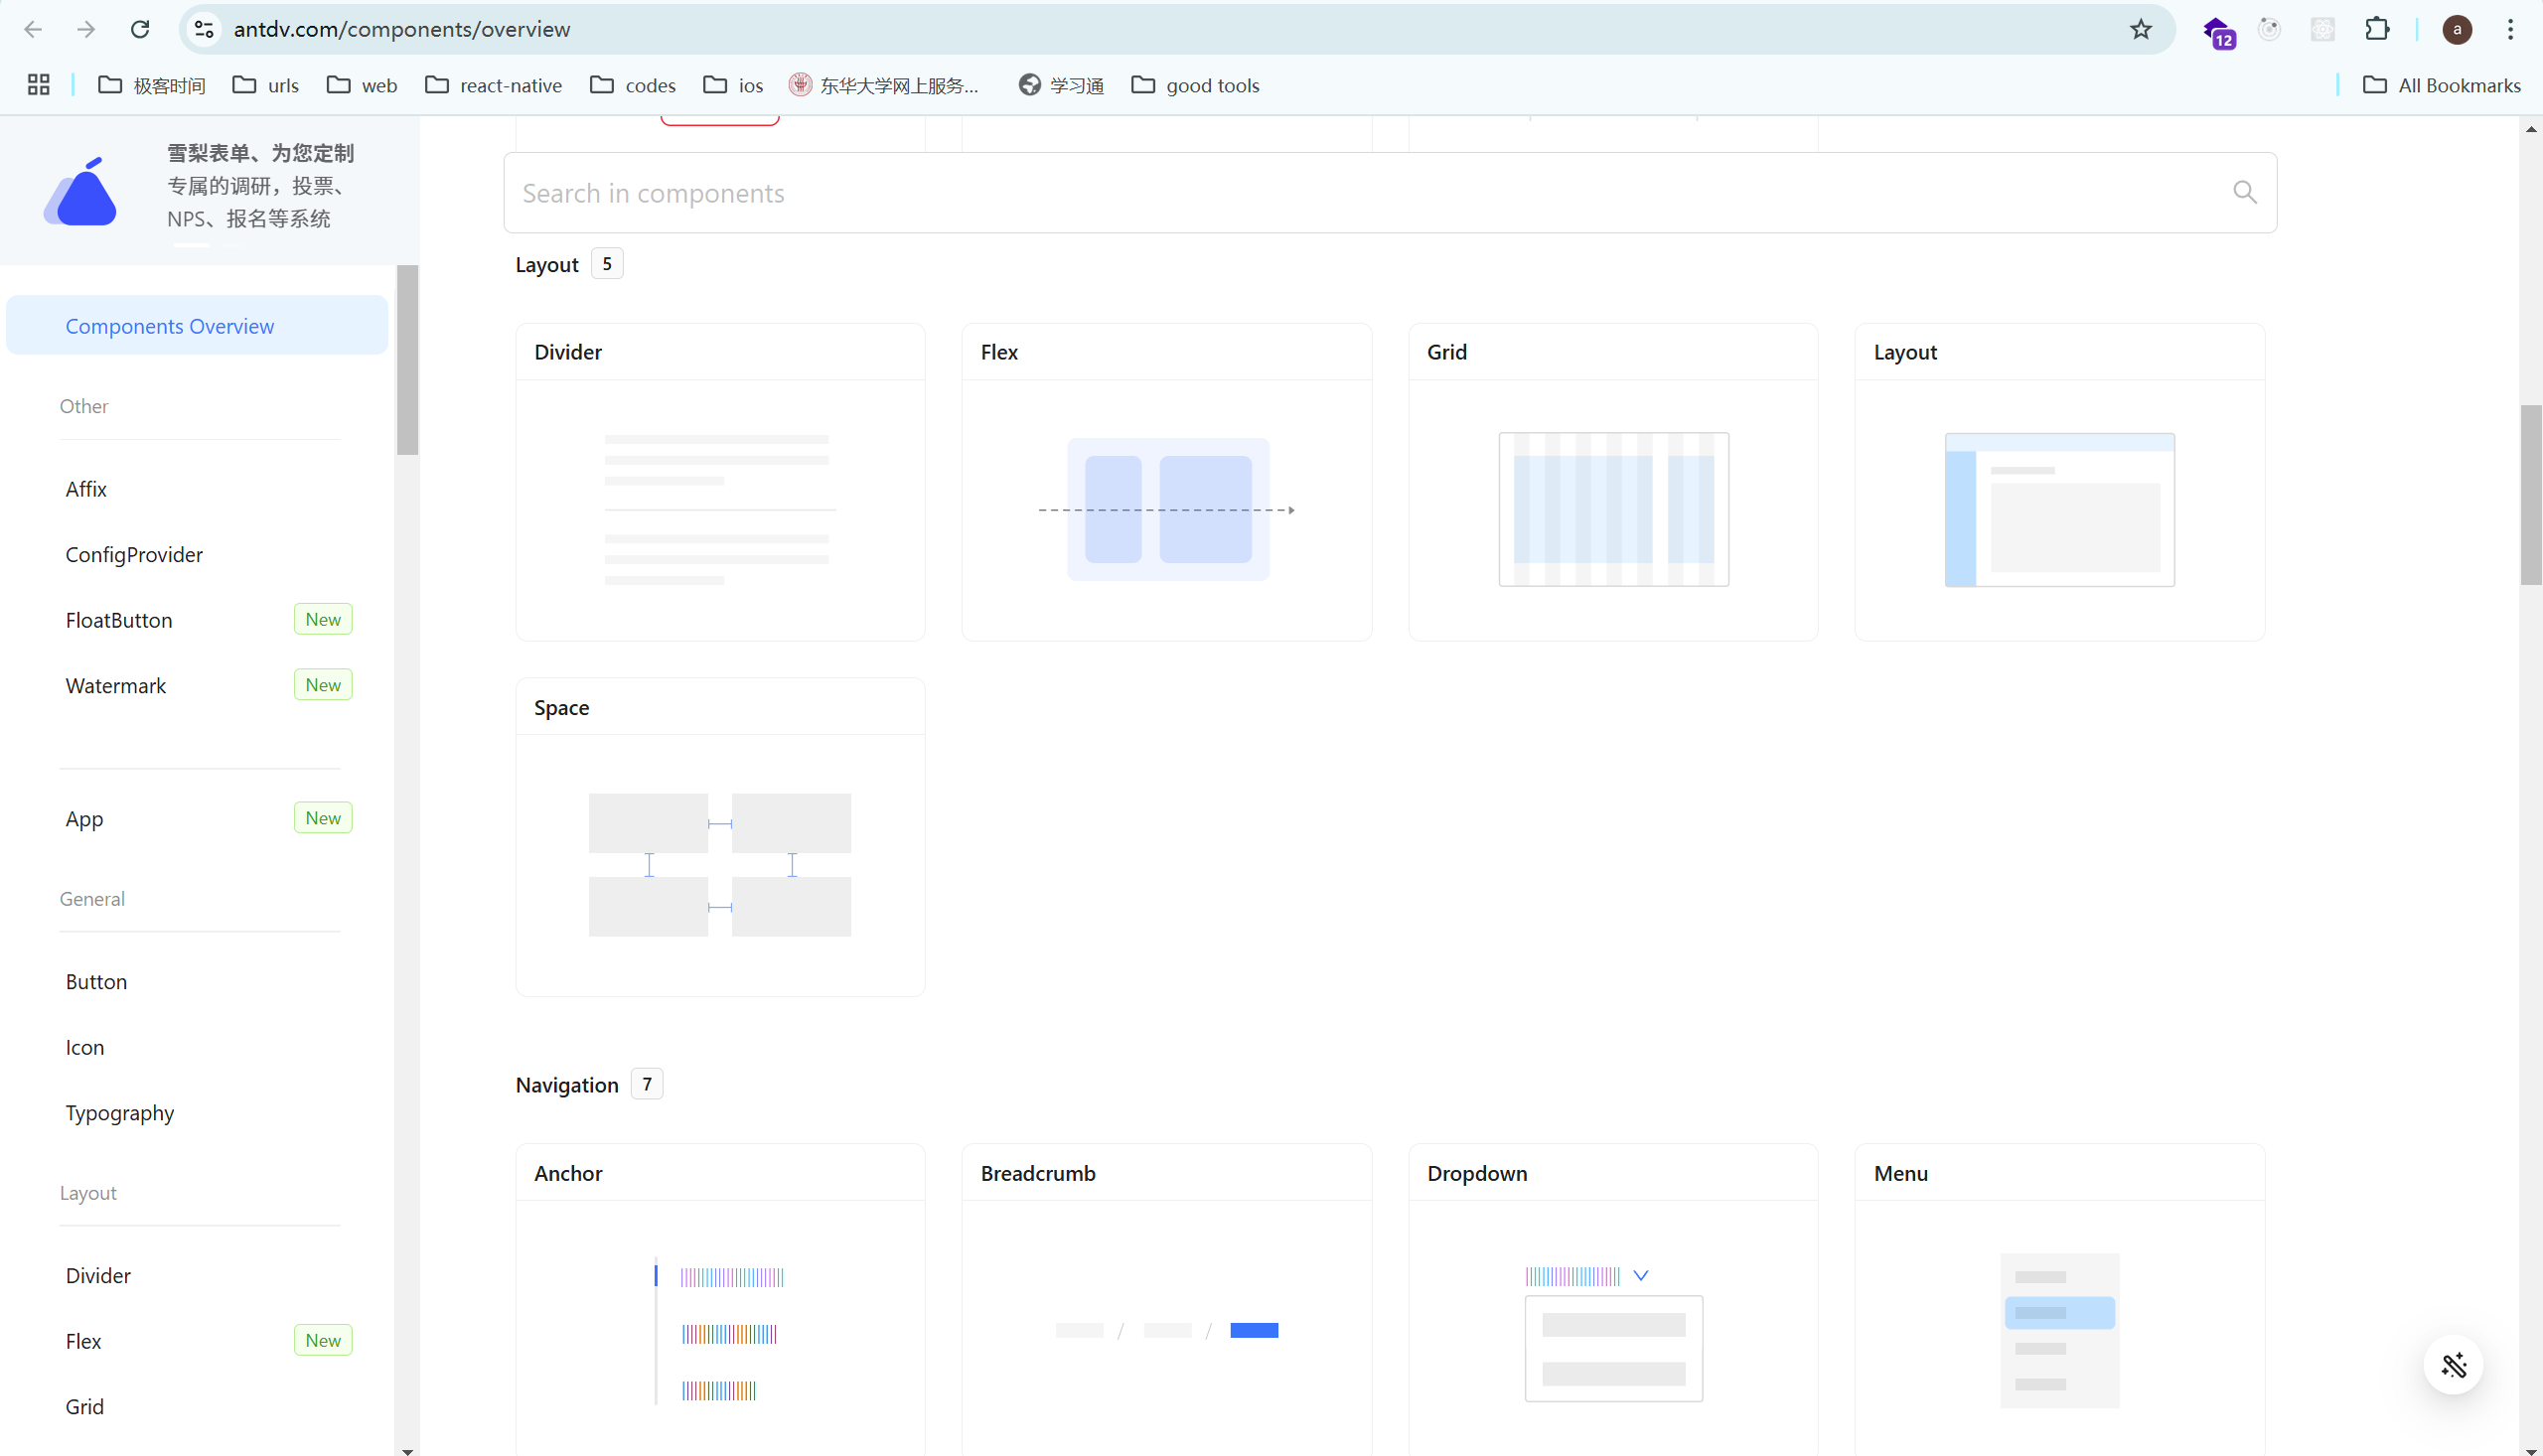
Ant Design Vue 是基于 Ant Design 设计体系开发的一款 Vue UI 组件库,旨在提供高质量、丰富的组件,帮助开发者快速构建优雅的用户界面。在这一部分,我们将深入探讨如何安装、配置并使用 Ant Design Vue,特别是在 Vue 项目中使用常用组件,如何进行主题定制以及实现按需加载。
9.2.1 安装与配置 Ant Design Vue
https://antdv.com/docs/vue/getting-started 可以参考官方文档去配置
要在 Vue 项目中使用 Ant Design Vue,首先需要安装相关依赖,并进行配置。
安装步骤
安装 Ant Design Vue: 你可以使用 npm 或 yarn 来安装 Ant Design Vue。
使用 npm 安装:

npm install ant-design-vue --save使用 yarn 安装:
yarn add ant-design-vue
安装样式: Ant Design Vue 需要引入样式文件。你可以在
main.js或main.ts中引入:import 'ant-design-vue/dist/reset.css'在 Vue 中全局注册组件: 你需要将 Ant Design Vue 的组件库注册到 Vue 中。在
main.js文件中进行全局配置:import Vue from 'vue'; import Antd from 'ant-design-vue'; import 'ant-design-vue/dist/reset.css' Vue.use(Antd); // 全局注册 Ant Design Vue 组件
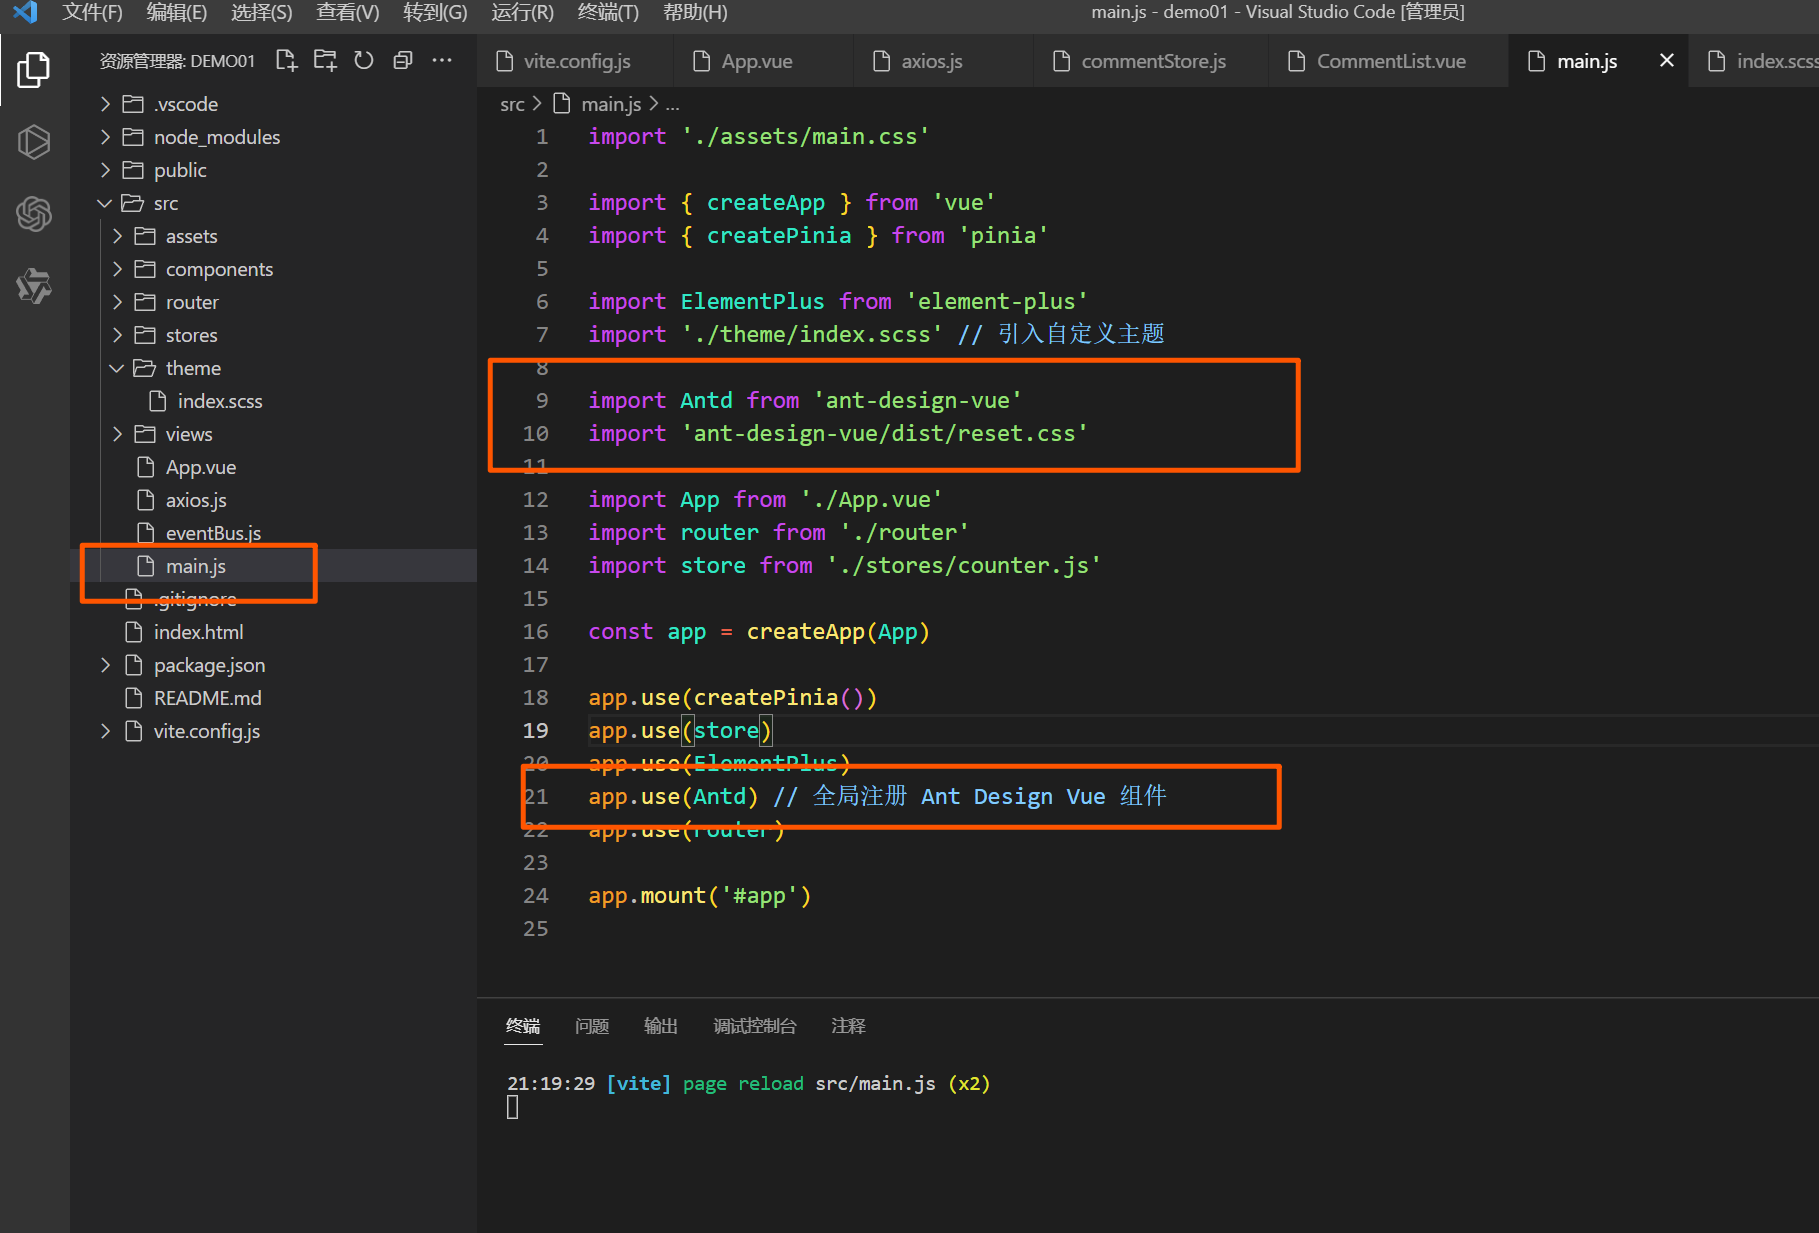
配置主题(可选)
你可以通过修改 vue.config.js 配置文件来定制 Ant Design Vue 的主题。例如,修改主题色:
安装 less-loader 和 less: Ant Design Vue 支持通过
less进行主题定制,因此你需要安装less和less-loader:npm install less less-loader --save-dev配置 less 主题变量: 在
vue.config.js文件中配置 Ant Design Vue 的主题,覆盖默认的样式变量:
module.exports = {
  css: {
    loaderOptions: {
      less: {
        modifyVars: {
          'primary-color': '#1DA57A', // 修改主题色
          'link-color': '#1DA57A',    // 修改链接色
        },
        javascriptEnabled: true, // 开启 less 支持 JavaScript
      },
    },
  },
};
9.2.2 使用常用组件(按钮、布局、表单等)
Ant Design Vue 提供了大量常用的 UI 组件,以下是几个常用组件的使用方法。
1. 按钮(Button)
Ant Design Vue 提供了丰富的按钮组件,可以进行各种自定义和样式设置。
<template>
  <a-button type="primary" icon="search">搜索</a-button>
  <a-button type="dashed">虚线按钮</a-button>
  <a-button type="link">链接按钮</a-button>
</template>

<script>
export default {
  name: 'ButtonExample',
};
</script>常见按钮类型:
primary: 主按钮,通常用于主要操作。dashed: 虚线按钮,通常用于次要操作。link: 链接按钮,用于无边框的链接样式。
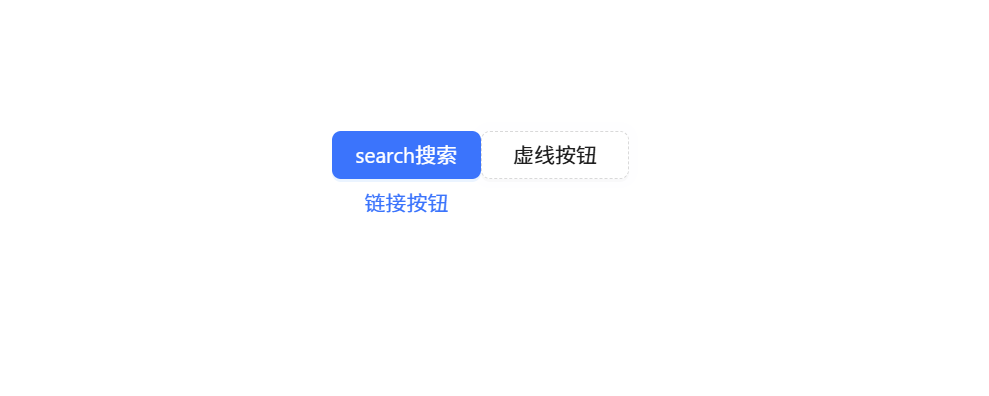
2. 布局(Layout)
Ant Design Vue 提供了类似于 Grid 和 Flex 布局的组件来组织页面。
<template>
  <a-layout>
    <a-layout-header>Header</a-layout-header>
    <a-layout-content>
      <a-row>
        <a-col :span="12">内容</a-col>
        <a-col :span="12">内容</a-col>
      </a-row>
    </a-layout-content>
    <a-layout-footer>Footer</a-layout-footer>
  </a-layout>
</template>布局组件:
a-layout: 用于容器布局。a-layout-header: 页头部分。a-layout-footer: 页脚部分。a-layout-content: 页面主体内容。a-row和a-col: 用于栅格系统布局。
3. 表单(Form)
Ant Design Vue 提供了强大的表单组件,包括输入框、选择器、单选框等。
<template>
  <a-form :model="form" @submit="onSubmit">
    <a-form-item label="用户名">
      <a-input v-model="form.username" placeholder="请输入用户名" />
    </a-form-item>
    <a-form-item label="密码">
      <a-input-password v-model="form.password" placeholder="请输入密码" />
    </a-form-item>
    <a-form-item>
      <a-button type="primary" html-type="submit">提交</a-button>
    </a-form-item>
  </a-form>
</template>

<script>
export default {
  data() {
    return {
      form: {
        username: '',
        password: '',
      },
    };
  },
  methods: {
    onSubmit() {
      console.log(this.form);
    },
  },
};
</script>表单组件:
a-form: 表单容器。a-form-item: 表单项。a-input: 输入框。a-input-password: 密码输入框。

9.2.3 自定义主题与按需加载
自定义主题
如前所述,Ant Design Vue 支持通过 less 自定义主题,你可以通过修改默认变量来实现不同的风格定制。常见的主题变量包括:
primary-color: 主色调。link-color: 链接的颜色。font-size-base: 字体大小。border-radius-base: 边框圆角。
按需加载
Ant Design Vue 默认是按需加载的,这意味着你只需要使用的组件会被打包到最终的项目中。如果你想确保按需加载生效,需要进行如下配置。
安装
babel-plugin-import: 通过babel-plugin-import插件,确保每个组件按需加载:npm install babel-plugin-import --save-dev配置
babel.config.js: 在babel.config.js中添加配置,开启按需加载:module.exports = { plugins: [ [ 'import', { libraryName: 'ant-design-vue', libraryDirectory: 'es', style: 'css', // 支持less主题定制 }, 'ant-design-vue', ], ], };
按需加载示例:
<template>
  <a-button type="primary">按钮</a-button>
</template>

<script>
// 按需加载 Ant Design Vue 的 Button 组件
import { Button } from 'ant-design-vue';

export default {
  components: {
    AButton: Button,
  },
};
</script>
通过上述配置和代码示例,Ant Design Vue 的组件会根据你实际使用的内容来进行打包,避免不必要的代码冗余。
9.3 使用 Tailwind CSS
https://tailwindcss.com/docs/installation 这是我非常喜欢用的一个库,非常好用
Tailwind CSS 是一款功能强大的实用工具类 CSS 框架,它通过提供大量的低级别的工具类,帮助开发者构建自定义设计。与传统的 CSS 框架不同,Tailwind CSS 并不预定义样式组件,而是通过一组基础的类来让开发者灵活组合,从而构建出个性化的界面。
在本节中,我们将详细介绍如何在 Vue 项目中安装、配置并使用 Tailwind CSS。
9.3.1 安装与配置 Tailwind CSS
要在 Vue 项目中使用 Tailwind CSS,首先需要安装相关依赖,并进行相应的配置。
安装步骤
安装 Tailwind CSS 依赖: 使用 npm 或 yarn 安装 Tailwind CSS、PostCSS 和 Autoprefixer。
使用 npm 安装:

npm install -D tailwindcss postcss autoprefixer使用 yarn 安装:
yarn add tailwindcss postcss autoprefixer --dev
初始化 Tailwind 配置文件: 安装完成后,可以使用
tailwindcssCLI 工具生成默认的配置文件: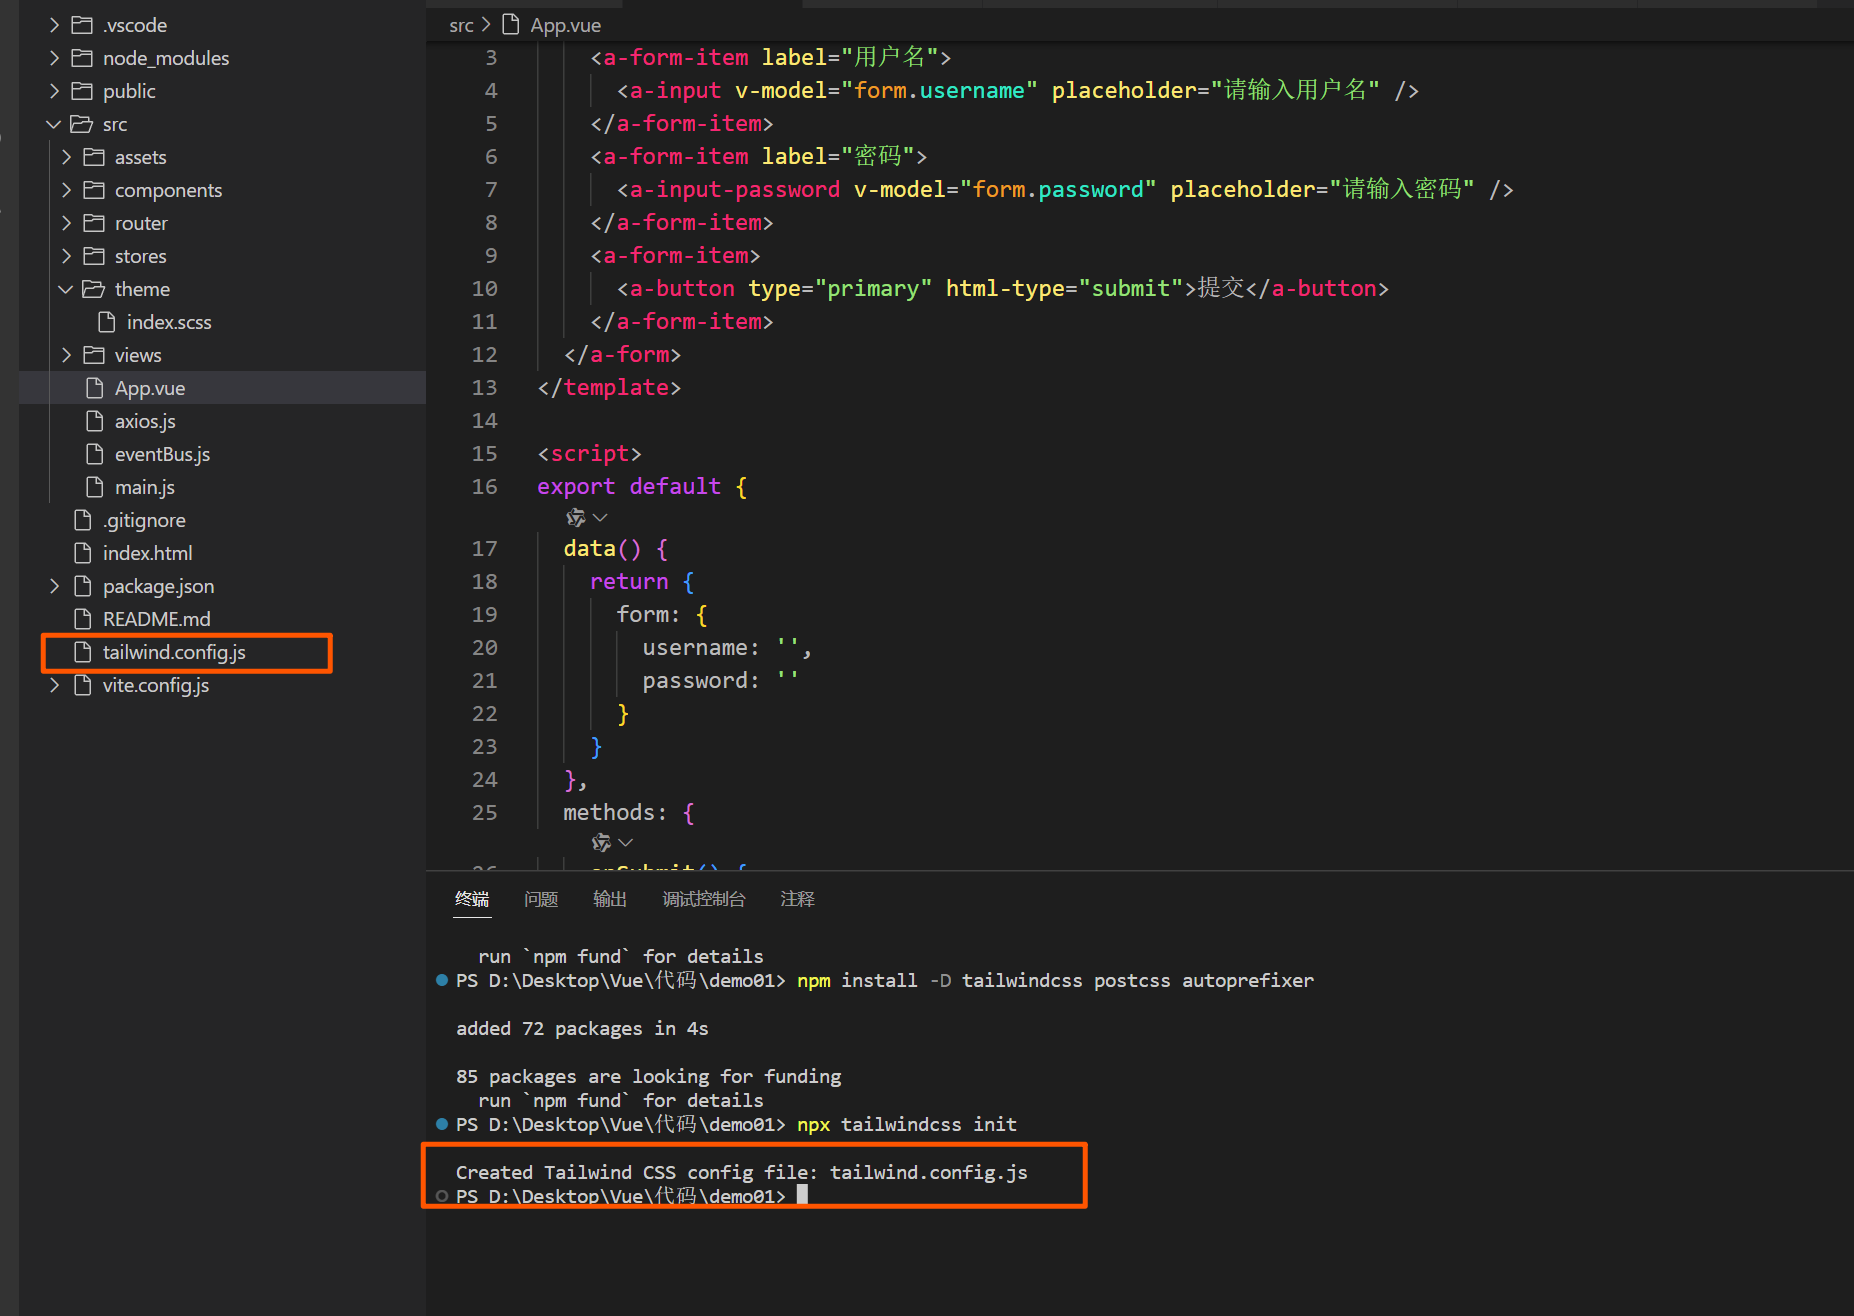
npx tailwindcss init这将会在项目根目录下创建一个
tailwind.config.js文件。创建 PostCSS 配置文件: 如果项目中没有 PostCSS 配置文件,需要手动创建一个
postcss.config.js文件,内容如下:module.exports = { plugins: { tailwindcss: {}, autoprefixer: {}, }, };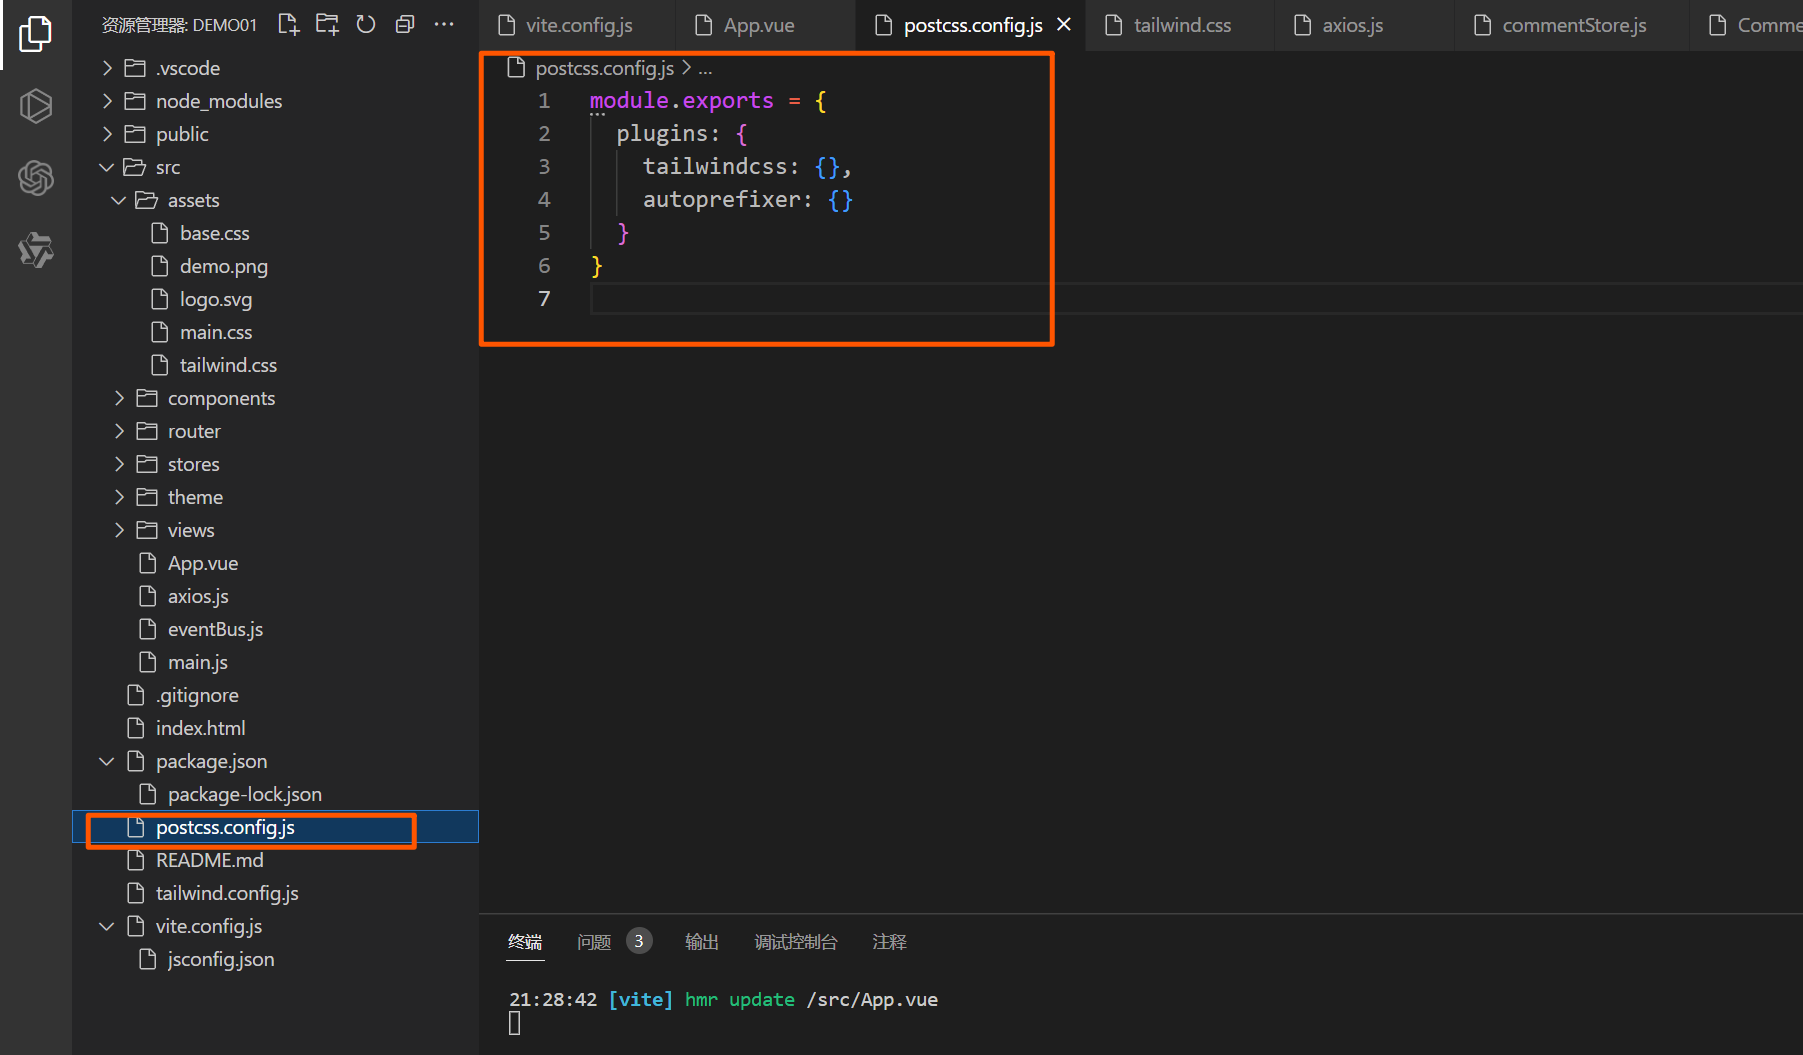
创建 Tailwind 的 CSS 文件: 在项目的
src/assets文件夹下创建一个新的 CSS 文件,例如tailwind.css。并在文件中导入 Tailwind 的默认样式:/* src/assets/tailwind.css */ @tailwind base; @tailwind components; @tailwind utilities;@tailwind base:引入 Tailwind 的基础样式。@tailwind components:引入 Tailwind 的组件样式(如按钮、表单等)。@tailwind utilities:引入 Tailwind 的实用工具类。
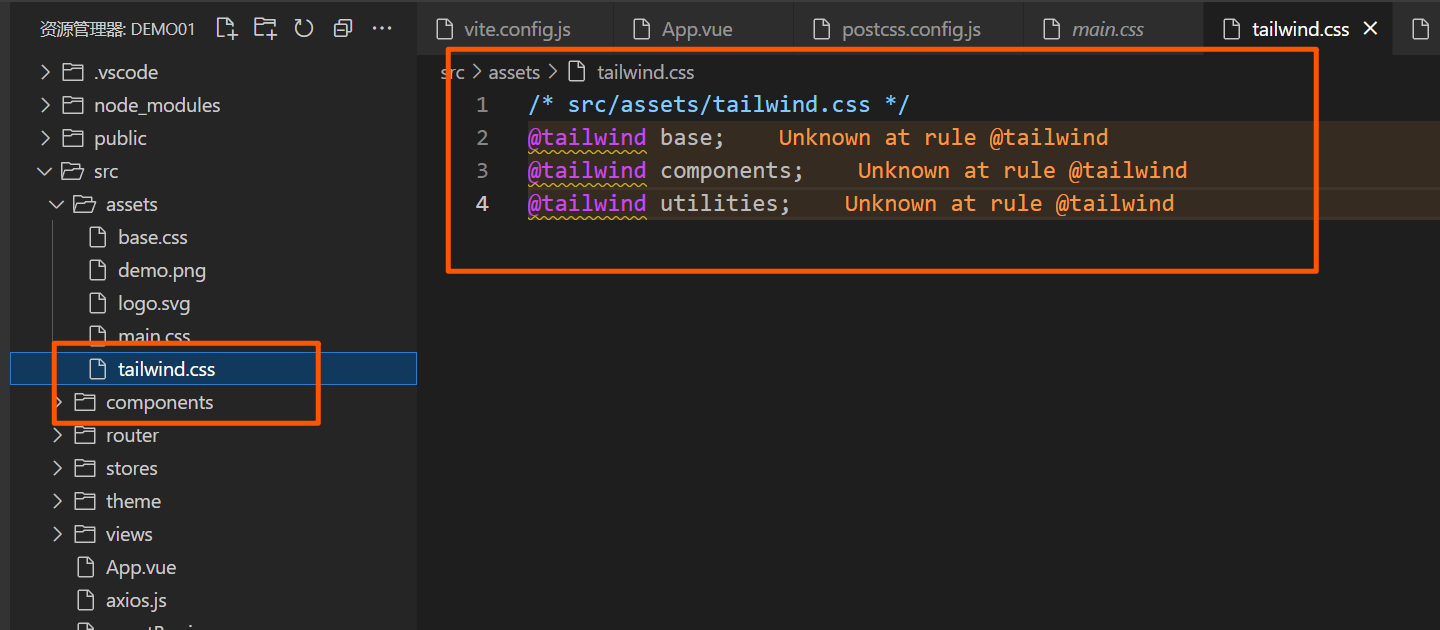
9.3.2 在 Vue 项目中使用 Tailwind CSS
配置完 Tailwind CSS 后,接下来我们可以将其应用到 Vue 项目中。
1. 在 main.js 或 main.ts 中引入 CSS 文件
为了使 Tailwind 样式生效,你需要在项目的入口文件中引入刚才创建的 tailwind.css 文件。例如:
// main.js 或 main.ts
import Vue from 'vue';
import App from './App.vue';
import './assets/tailwind.css'; // 引入 Tailwind CSS

new Vue({
  render: h => h(App),
}).$mount('#app');
2. 使用 Tailwind CSS 类
现在,你可以在 Vue 组件中开始使用 Tailwind 的类。以下是一个简单的示例:
<template>
  <div
    class="
      min-h-screen
      bg-gradient-to-r
      from-indigo-500
      via-purple-500
      to-pink-500
      flex
      items-center
      justify-center
    "
  >
    <!-- Main Card -->
    <div
      class="
        max-w-4xl
        w-full
        bg-white
        rounded-2xl
        shadow-xl
        overflow-hidden
        transform
        transition-all
        hover:scale-105 hover:shadow-2xl
      "
    >
      <!-- Header Section -->
      <div
        class="
          relative
          bg-gradient-to-r
          from-blue-400
          via-blue-500
          to-blue-600
          text-white
          py-10
          px-8
        "
      >
        <h1 class="text-5xl font-extrabold leading-tight">
          Welcome to My Advanced Vue App
        </h1>
        <p class="mt-4 text-xl text-gray-100">
          Discover modern design elements and components using Vue.js and
          Tailwind CSS.
        </p>
        <a
          href="#"
          class="
            absolute
            bottom-4
            right-8
            text-lg
            font-semibold
            text-gray-200
            hover:text-white
            transition-colors
            duration-300
          "
        >
          Learn More →</a
        >
      </div>

      <!-- Content Section -->
      <div class="p-8">
        <div class="grid grid-cols-1 md:grid-cols-2 gap-8">
          <!-- Card Content 1 -->
          <div
            class="
              bg-white
              rounded-lg
              shadow-md
              p-6
              transform
              transition-all
              hover:scale-105 hover:shadow-xl
            "
          >
            <div class="flex items-center space-x-4 mb-6">
              <div
                class="
                  w-12
                  h-12
                  rounded-full
                  bg-indigo-500
                  text-white
                  flex
                  items-center
                  justify-center
                  text-2xl
                "
              >
                <i class="fas fa-cogs"></i>
              </div>
              <h2 class="text-2xl font-bold text-gray-800">
                Customizable Components
              </h2>
            </div>
            <p class="text-gray-600 text-lg leading-relaxed">
              Tailwind CSS lets you easily customize components and tailor them
              to your design needs.
            </p>
          </div>

          <!-- Card Content 2 -->
          <div
            class="
              bg-white
              rounded-lg
              shadow-md
              p-6
              transform
              transition-all
              hover:scale-105 hover:shadow-xl
            "
          >
            <div class="flex items-center space-x-4 mb-6">
              <div
                class="
                  w-12
                  h-12
                  rounded-full
                  bg-purple-500
                  text-white
                  flex
                  items-center
                  justify-center
                  text-2xl
                "
              >
                <i class="fas fa-user-friends"></i>
              </div>
              <h2 class="text-2xl font-bold text-gray-800">
                Community and Support
              </h2>
            </div>
            <p class="text-gray-600 text-lg leading-relaxed">
              Join an active community of developers and get support for your
              projects quickly.
            </p>
          </div>
        </div>

        <!-- Action Section -->
        <div class="mt-10 flex justify-center space-x-8">
          <button
            class="
              px-8
              py-3
              bg-blue-600
              text-white
              rounded-full
              shadow-lg
              hover:bg-blue-700
              focus:outline-none
              transition-all
              duration-300
              transform
              hover:scale-105
            "
          >
            Get Started
          </button>
          <button
            class="
              px-8
              py-3
              bg-gray-300
              text-gray-800
              rounded-full
              shadow-lg
              hover:bg-gray-400
              focus:outline-none
              transition-all
              duration-300
              transform
              hover:scale-105
            "
          >
            Learn More
          </button>
        </div>
      </div>

      <!-- Footer Section -->
      <div class="bg-gray-800 text-center text-white py-4">
        <p>© 2024 My Vue App | All Rights Reserved</p>
      </div>
    </div>
  </div>
</template>

<script>
export default {
  name: 'App'
}
</script>

<style scoped>
/* Optional custom styles */
</style>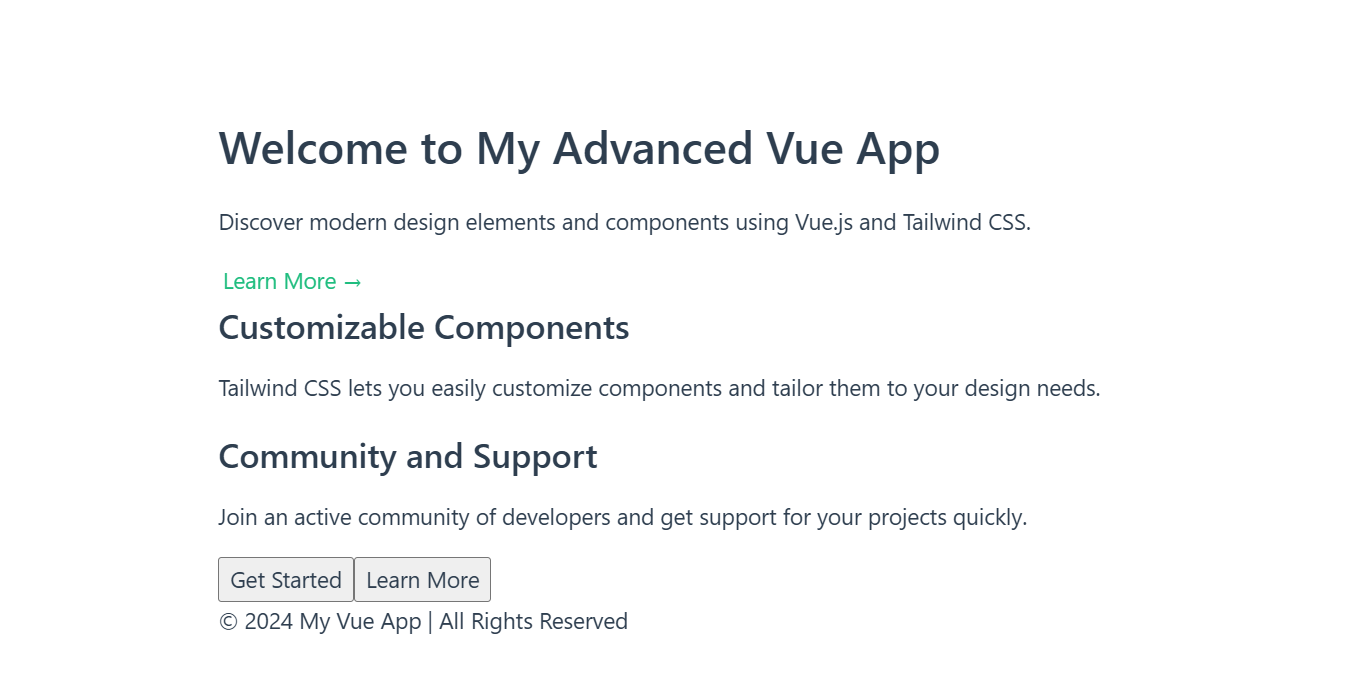
Tailwind CSS 类解释:
container: 设置最大宽度并居中内容。mx-auto: 自动设置左右外边距以居中元素。p-4: 设置内边距为1rem(16px)。text-3xl: 设置字体大小为1.875rem(30px)。font-bold: 设置字体为加粗。text-center: 设置文本居中。text-blue-500: 设置文本颜色为 Tailwind 的蓝色调(500)。mt-4: 设置顶部外边距为1rem(16px)。px-6 py-2: 设置左右内边距为1.5rem(24px),上下内边距为0.5rem(8px)。bg-blue-500: 设置背景颜色为蓝色调(500)。text-white: 设置文字颜色为白色。rounded: 设置圆角。hover:bg-blue-700: 设置鼠标悬停时的背景颜色为蓝色调(700)。
3. 开启 PurgeCSS(去除未使用的 CSS)
在开发过程中,Tailwind CSS 可能会生成大量的 CSS 类,而你可能只会用到其中的一小部分。为了优化生产环境中的 CSS 文件大小,Tailwind 提供了 PurgeCSS 功能。通过 PurgeCSS,Tailwind 可以去除项目中未使用的 CSS 类。
在 tailwind.config.js 文件中,启用 purge 配置,指定哪些文件包含 Tailwind CSS 类:
// tailwind.config.js
module.exports = {
  content: [
    './index.html',
    './src/**/*.{vue,js,ts,jsx,tsx}',
  ],
  theme: {
    extend: {},
  },
  plugins: [],
};
上述配置中的 content 数组告诉 Tailwind 在哪些文件中查找类名并移除未使用的类。你可以根据自己的项目文件结构调整路径。
10. 动画与过渡效果
在 Vue 中,动画和过渡效果可以大大增强用户界面的互动性和美观性。Vue 提供了内置的过渡系统,帮助开发者在元素的进入、离开以及列表更新时应用动画效果。此外,Vue 还可以与第三方动画库如 Anime.js 和 GSAP 配合使用,实现更复杂和丰富的动画效果。
10.1 使用 Vue 内置的过渡效果
Vue 提供了简单且灵活的过渡系统,可以在元素添加、更新或移除时应用过渡效果。
10.1.1 transition 的基础用法
transition 是 Vue 中提供的一个特殊元素,允许我们为单个元素添加过渡动画。它适用于元素进入和离开的动画效果。
基本使用示例:
<template>
  <div>
    <button @click="show = !show">Toggle</button>
    <transition name="fade">
      <p v-if="show">这是一个带过渡动画的文本!</p>
    </transition>
  </div>
</template>

<script>
export default {
  data() {
    return {
      show: false,
    };
  },
};
</script>

<style>
.fade-enter-active, .fade-leave-active {
  transition: opacity 1s;
}
.fade-enter, .fade-leave-to {
  opacity: 0;
}
</style>
解释:
transition:Vue 的过渡组件,包裹需要应用动画的元素。name="fade":给过渡指定一个名称,这会影响到 CSS 类名的自动生成。.fade-enter-active和.fade-leave-active:分别对应元素进入和离开时的过渡效果,定义了动画的持续时间和过渡方式。.fade-enter和.fade-leave-to:这两个类分别用于元素进入和离开时的初始和结束状态,通常设置透明度为 0,实现淡入淡出效果。

10.1.2 transition-group 列表过渡效果
transition-group 用于为列表元素提供过渡效果,适用于动态增减的列表项。它可以同时处理多个元素的动画,常用于动态渲染和移除列表项时的动画效果。
示例:列表过渡效果
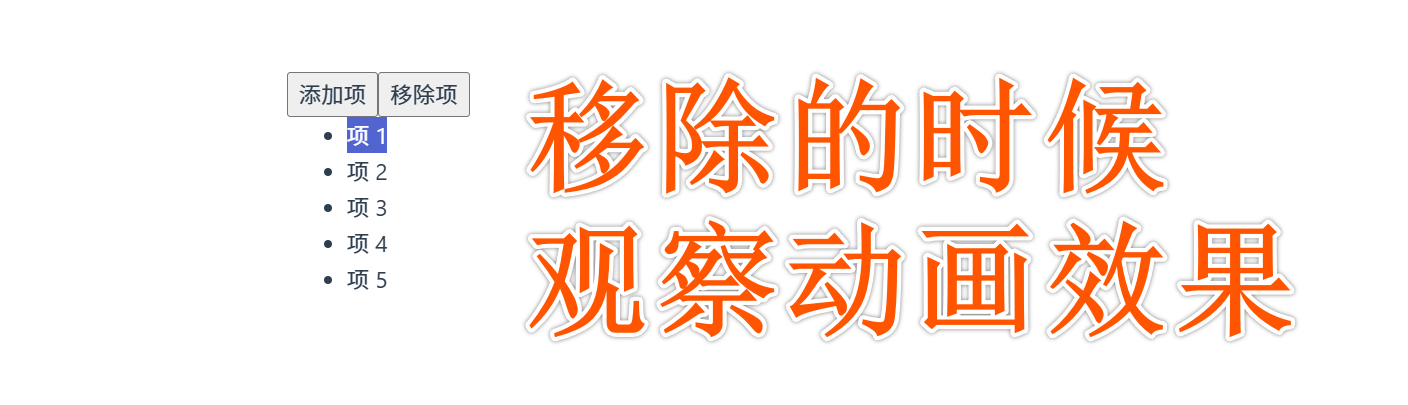
<template>
  <div>
    <button @click="addItem">添加项</button>
    <button @click="removeItem">移除项</button>
    <transition-group name="fade" tag="ul">
      <li v-for="item in items" :key="item.id" class="fade-item">{{ item.text }}</li>
    </transition-group>
  </div>
</template>

<script>
export default {
  data() {
    return {
      items: [
        { id: 1, text: '项 1' },
        { id: 2, text: '项 2' },
      ],
    };
  },
  methods: {
    addItem() {
      this.items.push({ id: Date.now(), text: `项 ${this.items.length + 1}` });
    },
    removeItem() {
      this.items.pop();
    },
  },
};
</script>

<style>
.fade-enter-active, .fade-leave-active {
  transition: opacity 0.5s;
}
.fade-enter, .fade-leave-to {
  opacity: 0;
}
</style>
解释:
transition-group:用于处理动态列表项的过渡效果。与普通的transition不同,它适用于多个元素。tag="ul":设置过渡的容器标签为<ul>,默认情况下是一个<span>。key:在v-for中为每个元素指定一个唯一的key,以便 Vue 能够识别和正确地应用过渡效果。.fade-enter-active和.fade-leave-active:控制元素进入和离开时的过渡效果。.fade-enter和.fade-leave-to:控制进入和离开的初始和结束状态。
10.2 使用第三方动画库
对于更复杂的动画需求,Vue 可以与第三方动画库结合使用,如 Anime.js 和 GSAP,以实现更丰富的动态效果。
10.2.1 使用 Anime.js 实现动画效果
https://animejs.com/documentation/#cssProperties
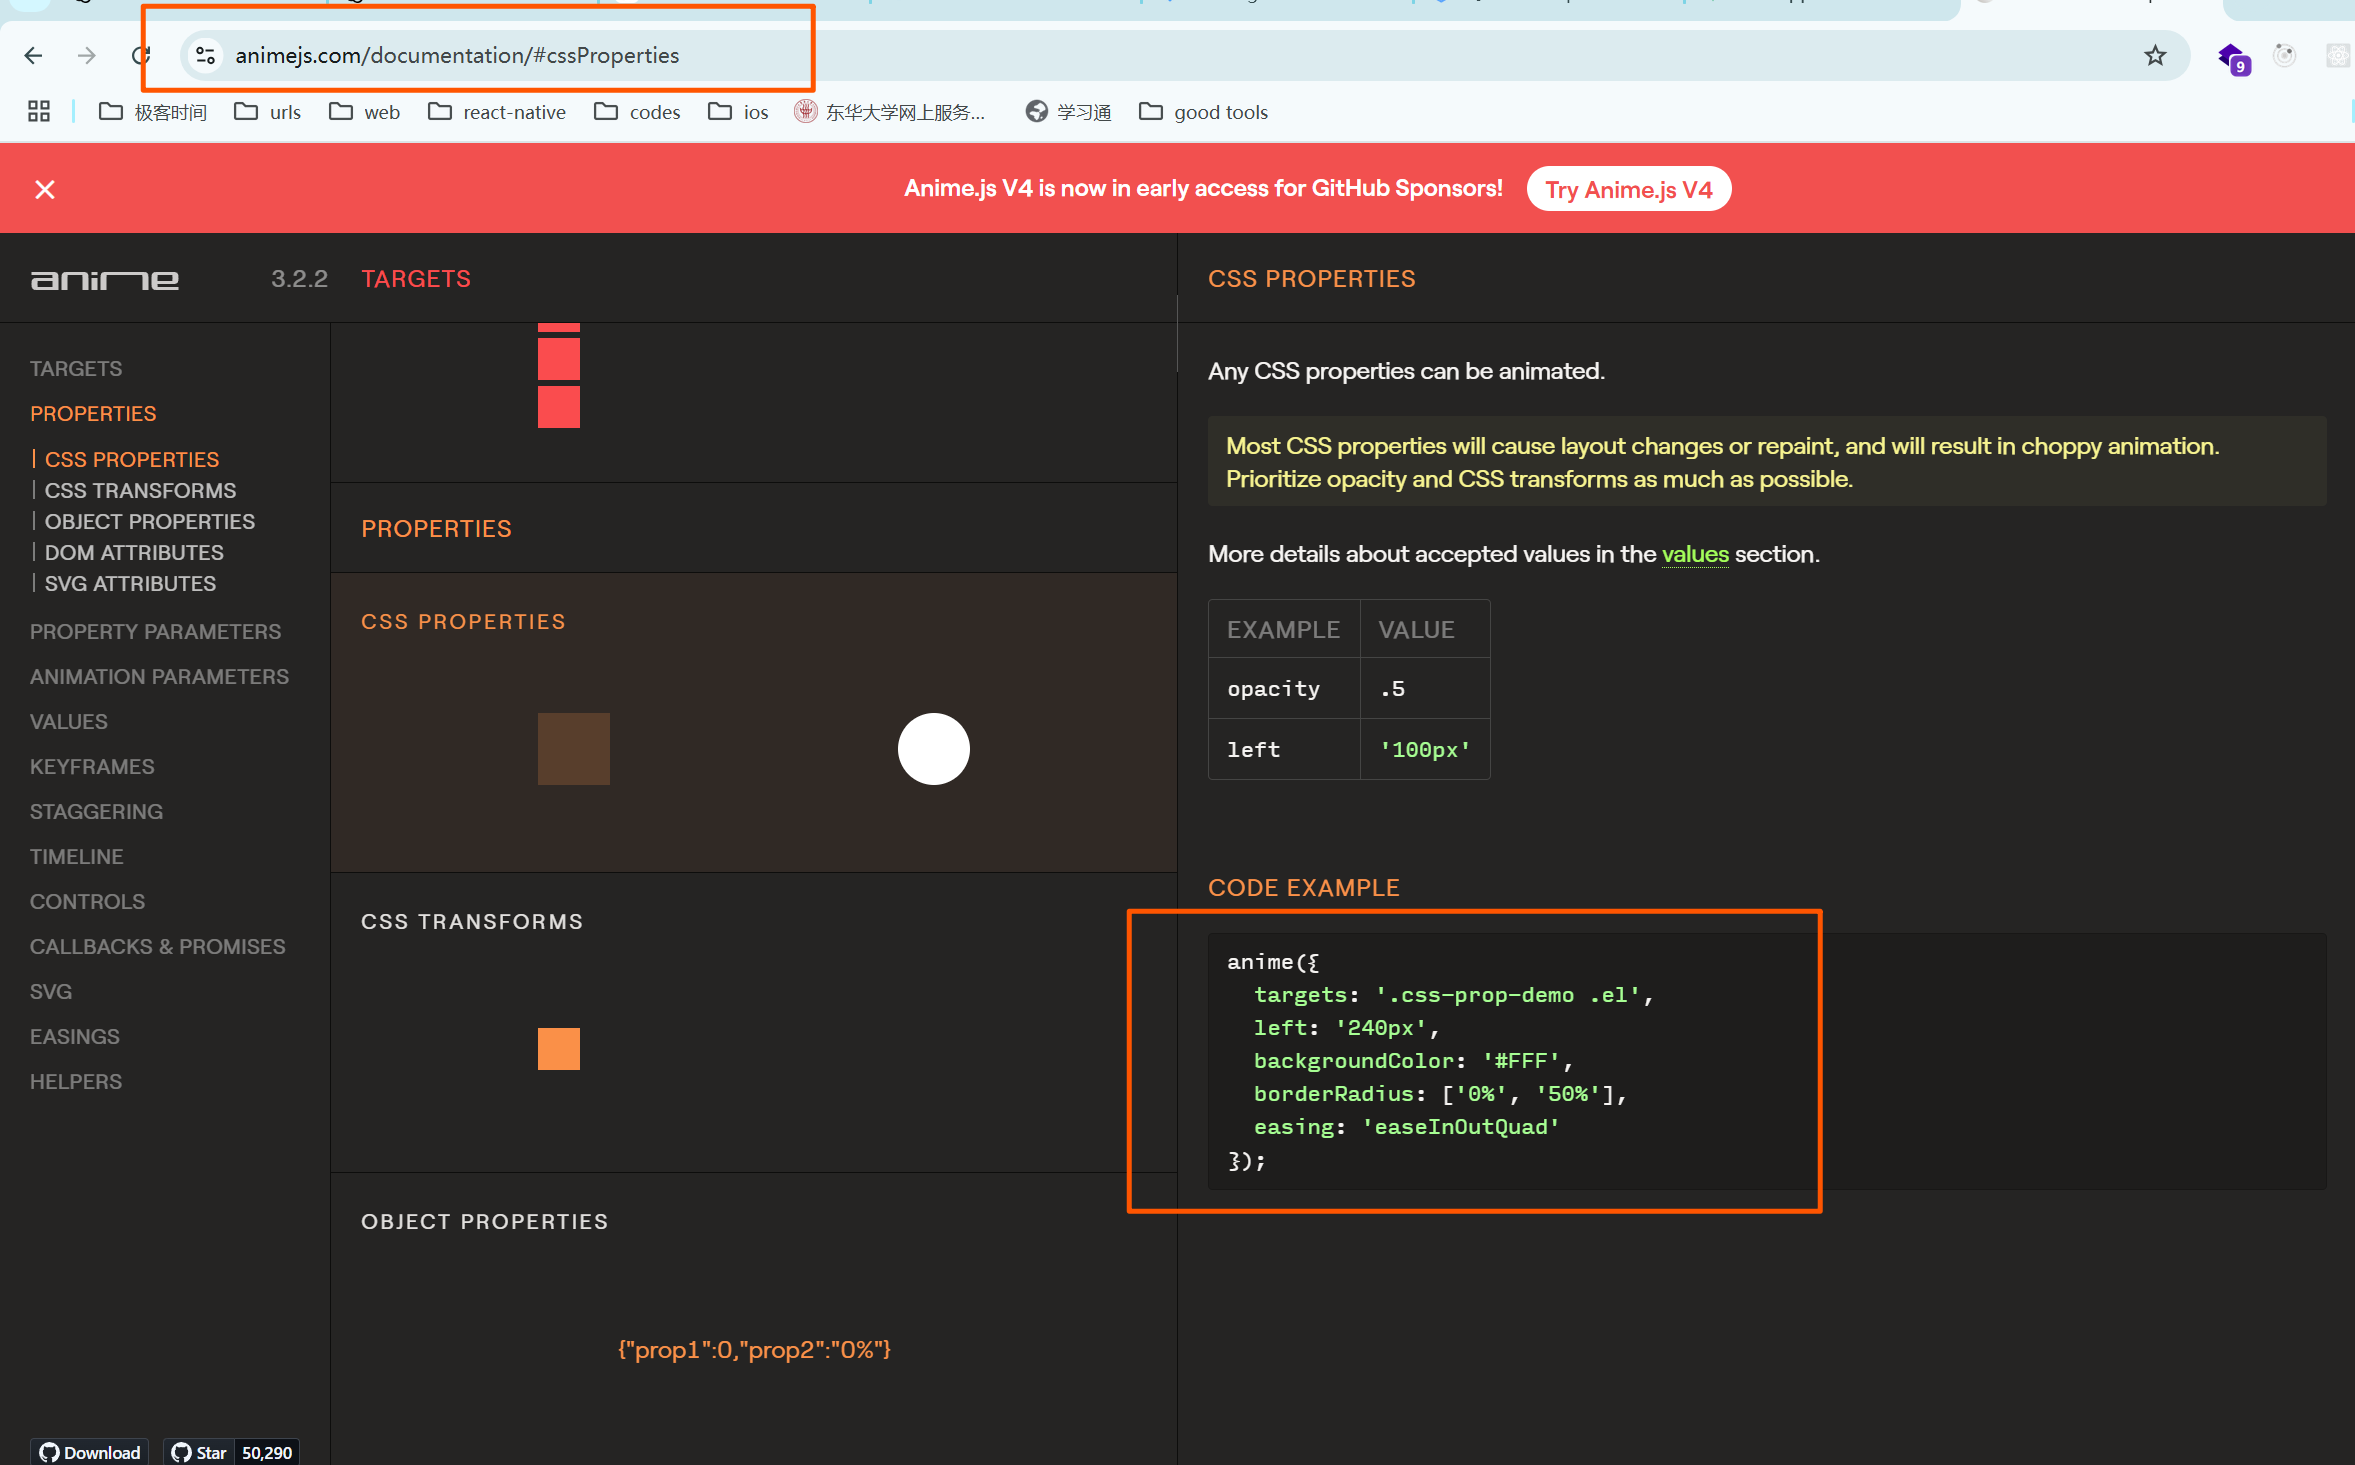
Anime.js 是一个强大的 JavaScript 动画库,它可以非常容易地创建复杂的动画效果,支持 CSS、SVG、DOM 属性等。
安装 Anime.js
npm install animejs --save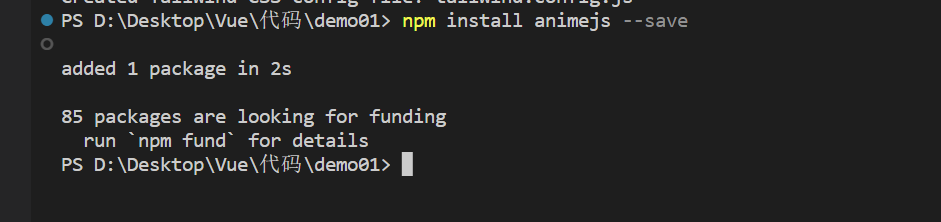
在 Vue 中使用 Anime.js
<template>
  <div>
    <button @click="animate">点击动画</button>
    <div ref="box" class="box"></div>
  </div>
</template>

<script>
import anime from 'animejs/lib/anime.es.js';

export default {
  methods: {
    animate() {
      anime({
        targets: this.$refs.box,
        translateX: 250,
        duration: 1000,
        easing: 'easeInOutQuad',
      });
    },
  },
};
</script>

<style>
.box {
  width: 100px;
  height: 100px;
  background-color: red;
  margin-top: 20px;
}
</style>
解释:
anime():Anime.js 用来定义动画的函数。targets:指定动画的目标,可以是 DOM 元素、数组或选择器。translateX:让元素在水平方向上平移。duration:设置动画的持续时间,单位为毫秒。easing:设置动画的缓动效果,如easeInOutQuad,它是一个平滑的加速和减速动画。
10.2.2 使用 GSAP 实现复杂动画
https://gsap.com/
GSAP 是一个功能强大的动画库,可以轻松处理复杂的动画。它支持时间轴、复杂的缓动函数、物理引擎效果等。
安装 GSAP
npm install gsap --save在 Vue 中使用 GSAP
<template>
  <div>
    <button @click="animate">点击动画</button>
    <div ref="box" class="box"></div>
  </div>
</template>

<script>
import { gsap } from 'gsap';

export default {
  methods: {
    animate() {
      gsap.to(this.$refs.box, {
        x: 250,
        rotation: 360,
        duration: 2,
        ease: "power2.inOut",
      });
    },
  },
};
</script>

<style>
.box {
  width: 100px;
  height: 100px;
  background-color: red;
  margin-top: 20px;
}
</style>
解释:
gsap.to():GSAP 提供的基本动画方法,to表示动画从当前状态变化到指定目标状态。x:水平移动的距离。rotation:设置旋转角度。duration:动画的持续时间。ease:缓动函数,控制动画的加速和减速方式。
10.2.3 在 Vue 组件中使用动画库
在 Vue 组件中使用第三方动画库时,通常需要通过生命周期钩子(如 mounted)来触发动画,并使用 ref 来访问 DOM 元素。
示例:在 mounted 中启动动画
<template>
  <div>
    <button @click="animate">点击动画</button>
    <div ref="box" class="box"></div>
  </div>
</template>

<script>
import { gsap } from 'gsap';

export default {
  mounted() {
    this.animate();
  },
  methods: {
    animate() {
      gsap.fromTo(this.$refs.box,
        { opacity: 0 },
        { opacity: 1, duration: 2 }
      );
    },
  },
};
</script>

<style>
.box {
  width: 100px;
  height: 100px;
  background-color: red;
  margin-top: 20px;
}
</style>
解释:
mounted:组件挂载后自动调用animate()方法,触发动画。gsap.fromTo():定义动画从一个状态(opacity: 0)过渡到另一个状态(opacity: 1)。
11. 项目优化与部署
不细讲,大伙自己多了解了解
在开发 Vue 应用时,项目的优化和部署是至关重要的步骤。通过优化代码、提高应用性能以及合理部署,可以确保用户体验的流畅性和应用的高效运行。本节将详细讲解如何进行项目优化以及在不同环境中部署 Vue 应用。
11.1 代码分割与按需加载
代码分割与按需加载可以有效减少初始加载时的文件大小,提高应用的加载速度。Vue 提供了多种方式来实现代码分割和按需加载。
11.1.1 路由懒加载
路由懒加载可以让 Vue 仅在访问某个路由时才加载对应的组件,从而减少初始加载时的资源开销。
示例:路由懒加载
// router/index.js
import Vue from 'vue';
import Router from 'vue-router';

// 使用动态导入实现懒加载
const Home = () => import('@/components/Home.vue');
const About = () => import('@/components/About.vue');

Vue.use(Router);

export default new Router({
  routes: [
    {
      path: '/',
      name: 'Home',
      component: Home,
    },
    {
      path: '/about',
      name: 'About',
      component: About,
    },
  ],
});
解释:
const Home = () => import('@/components/Home.vue');:使用动态import()语法来实现路由组件的懒加载,只有在访问Home路由时,才会加载Home.vue组件。- 这种懒加载方式会将每个路由组件打包成独立的文件,只有在访问该路由时才会请求加载该文件。
11.1.2 动态导入组件
动态导入组件使得 Vue 在需要时加载某个特定组件,避免一次性加载所有组件,优化性能。
示例:动态导入组件
<template>
  <div>
    <button @click="loadComponent">加载组件</button>
    <component :is="dynamicComponent" />
  </div>
</template>

<script>
export default {
  data() {
    return {
      dynamicComponent: null,
    };
  },
  methods: {
    loadComponent() {
      import('@/components/HeavyComponent.vue').then((module) => {
        this.dynamicComponent = module.default;
      });
    },
  },
};
</script>
解释:
import('@/components/HeavyComponent.vue'):使用动态import()来按需加载HeavyComponent.vue组件。- 只有在用户点击按钮时,才会加载该组件,减少初始加载时的文件大小。
11.2 性能优化
性能优化是提高用户体验的关键。Vue 提供了一些内置的机制和优化方法,帮助开发者提升应用的性能。
11.2.1 使用 keep-alive 缓存组件
keep-alive 是 Vue 提供的内置组件,可以缓存一些不经常更新的组件,避免频繁渲染,提高性能。
示例:使用 keep-alive 缓存组件
<template>
  <div>
    <keep-alive>
      <component :is="currentComponent" />
    </keep-alive>
    <button @click="switchComponent">切换组件</button>
  </div>
</template>

<script>
export default {
  data() {
    return {
      currentComponent: 'ComponentA',
    };
  },
  methods: {
    switchComponent() {
      this.currentComponent = this.currentComponent === 'ComponentA' ? 'ComponentB' : 'ComponentA';
    },
  },
};
</script>
解释:
keep-alive:用于缓存包含的组件,避免在切换时重新渲染。只有当组件不再显示时,才会销毁该组件的状态。- 在组件切换时,
keep-alive会保持组件的状态,提升性能,特别是在频繁切换的场景中。
11.2.2 使用 v-memo 提升性能
v-memo 是 Vue 3.2 新增的指令,用于避免在依赖不变时重新渲染组件,提升性能。
示例:使用 v-memo 优化渲染
<template>
  <div>
    <p v-memo="[user.name]">{{ user.name }}</p>
  </div>
</template>

<script>
export default {
  data() {
    return {
      user: { name: 'Alice' },
    };
  },
};
</script>
解释:
v-memo="[user.name]":只有在user.name变化时,<p>元素才会重新渲染。其他数据变更不会导致重新渲染该元素,从而提升性能。
11.2.3 资源压缩与 CDN 加速
压缩资源和使用 CDN 可以显著提高页面的加载速度,减少服务器压力。
资源压缩
- JavaScript 压缩:使用工具如 Terser 来压缩 JavaScript 文件,去除多余的空格、注释和冗余代码。
- CSS 压缩:使用 cssnano 来压缩 CSS 文件,减少文件大小。
使用 CDN 加速
将静态资源(如图像、字体文件、JavaScript 库等)托管在 CDN 上,能够减少服务器的负担,并且加速文件加载。
<script src="https://cdn.jsdelivr.net/npm/[email protected]/dist/vue.js"></script>- 使用 CDN 提供的 Vue.js 等第三方库可以减少服务器负担,同时利用全球节点加速用户访问。
11.3 打包与部署
打包和部署是 Vue 项目上线的最后一步。通过构建和优化,可以确保项目在生产环境中高效运行。
11.3.1 环境变量与配置
在 Vue 项目中,使用环境变量来管理不同环境下的配置,比如开发环境、生产环境和测试环境。
示例:配置环境变量
- 创建
.env文件:
VUE_APP_API_URL=https://api.example.com
VUE_APP_ENV=production- 在代码中使用:
console.log(process.env.VUE_APP_API_URL); // 输出 https://api.example.com解释:
VUE_APP_*:Vue CLI 允许你使用VUE_APP_前缀来定义环境变量,这些变量会在构建时注入到应用中。
11.3.2 构建项目与生成生产环境代码
使用 npm run build 或 yarn build 命令来构建 Vue 项目,生成生产环境的代码。
构建命令
npm run build解释:
npm run build:该命令会执行 Vue CLI 中配置的构建任务,将项目文件打包成适合生产环境的格式,输出到dist目录。- 生产环境代码会经过压缩、代码分割和其他优化,减少加载时间和提升应用性能。